In today’s digital age, email remains a crucial channel for businesses to communicate with their customers and stakeholders. For Salesforce users, sending mass emails can be an effective way to reach a large audience with targeted messages and updates. However, with great power comes great responsibility, and sending mass emails without a proper strategy can quickly lead to ineffective or even counterproductive results.
Do you want to make the most out of your email campaigns and see your engagement rates soar? With the power to communicate with thousands of accounts in just a few clicks, sending mass emails in Salesforce can be a game-changer for your sales efforts. However, with great power comes great responsibility – and a need to ensure your emails offer the human touch, even when emailing thousands of leads and contacts.
So, how do you retain the consumer-favorite personalization while ensuring efficiency? That’s what we’re here for today! This article will walk you through the basics and the best practices for sending mass emails in Salesforce, so you can email your leads (without making them feel like they’re the target of yet another automated campaign).
Table of Contents
ToggleHow to Efficiently Send Mass Emails in Salesforce
To start, let’s look at how you would go about sending mass emails from the Salesforce platform. Here, it’s important to note that the process differs depending on whether you use Salesforce Classic or the Lightning Experience, so we’ll deal with both separately.
Sending List Emails in Salesforce Lightning
In the Lightning Experience, Salesforce’s mass email functionality has been renamed List Email. Here are the steps you’ll follow to send these emails:
- Before creating your email, ensure you have a lead list, contact list, or campaign with the recipients you want to email. Then, navigate to the list or campaign.
- If you don’t want to email everyone on the list, you can filter the list or choose individual recipients.
- Select the checkbox next to every record you’d like to email.
- If you don’t select any records, all the records on the list will be added as email recipients by default.
- Note: When selecting recipients manually, you can only select up to 200 leads or contacts.
- Once you’ve selected your recipients, click Send List Email.
- You can also add the names of specific views or campaigns in the Recipients field and add contact and lead list views.
- Use the Related To field to add campaigns to your List Email if you’re sending it to at least one campaign. You can add up to 10 list views in the Recipients field.
- Once you’ve chosen who you’ll send the email to, you can add and customize content and attachments to your email. You can also use an email template.
- With your content added, click Review to ensure the preview looks right. Here, you can also click on every recipient’s name to see if the personalization for every email is correct.
- Finally, click Send, Send Later, or Save as Draft. When you save your email as a draft, you can edit it by visiting the List Email’s home page.
- When you choose to send your email later, you’ll get an email when it’s sent. You’ll also see it was sent by looking at the List Emails home page or a recipient’s activity timeline. Also, remember that when sending your emails, they’ll count towards your org’s mass email daily send limit.
Sending Mass Emails in Salesforce Classic
If you’re still using Salesforce Classic, here are the steps you’ll follow to send mass emails to contacts, leads, or even colleagues:
- Depending on whom you’d like to email, choose the appropriate option. You can click on Mass Email Contacts, or Mass Email Leads under the Contacts or Cases tabs. You can also click on Mass Email Users after typing Mass Email Users in the Quick Find box.
- Select a list view of recipients and click on Go. All the recipients in the list will be selected by default.
- If you’d like to remove some of them from the list, you can deselect them.
- With your recipients selected, click Next.
- Choose the template you’d like to use. To see if the email’s content displays correctly, click the Preview links. If you’re satisfied, click Next.
- On the confirmation page, choose the processing option you’d like. Here, the name you give the mass email will appear in the queue, and any status messages you receive from Salesforce.
- If you’d like to send the email immediately, you can choose this option in Delivery Options. You can also specify a date and time zone if you’d like to send the email in the future.
- Once done, click Send and then Finished. Once your emails are sent, they’ll count toward your daily send limit.
Best Practices When Using Mass Email in Salesforce
Now that you know how to send mass emails in Salesforce, the only thing to do is get started, right? Not so fast! Before you start sending mass emails to your contacts and leads, there are some best practices you should be aware of:
Build Your Own List
Every recipient should want to receive your emails. If you don’t already have one, build your own mailing list.
Don’t buy email lists under any circumstances – at best, you’ll end up with outdated information, which leads to tons of bounces and a possibly damaged sender reputation. At worst, your email domains could get blocklisted, affecting your deliverability across the board.
Give your contacts and leads the ability to opt into your emails. Whenever possible, use double opt-in. Yes, you might get fewer recipients, but your email engagement rate won’t suffer, and you’ll reach the most interested leads (avoiding the need to clean up your mailing list later on).
Adhere to the basic email hygiene practices, including:
- Warm up any cold domains before you start sending emails from them.
- Avoid spam-trigger words like “free” and “discount.”
- Measure your deliverability constantly and consistently remove disinterested prospects from the list.
Choose the Right Format for Your Emails
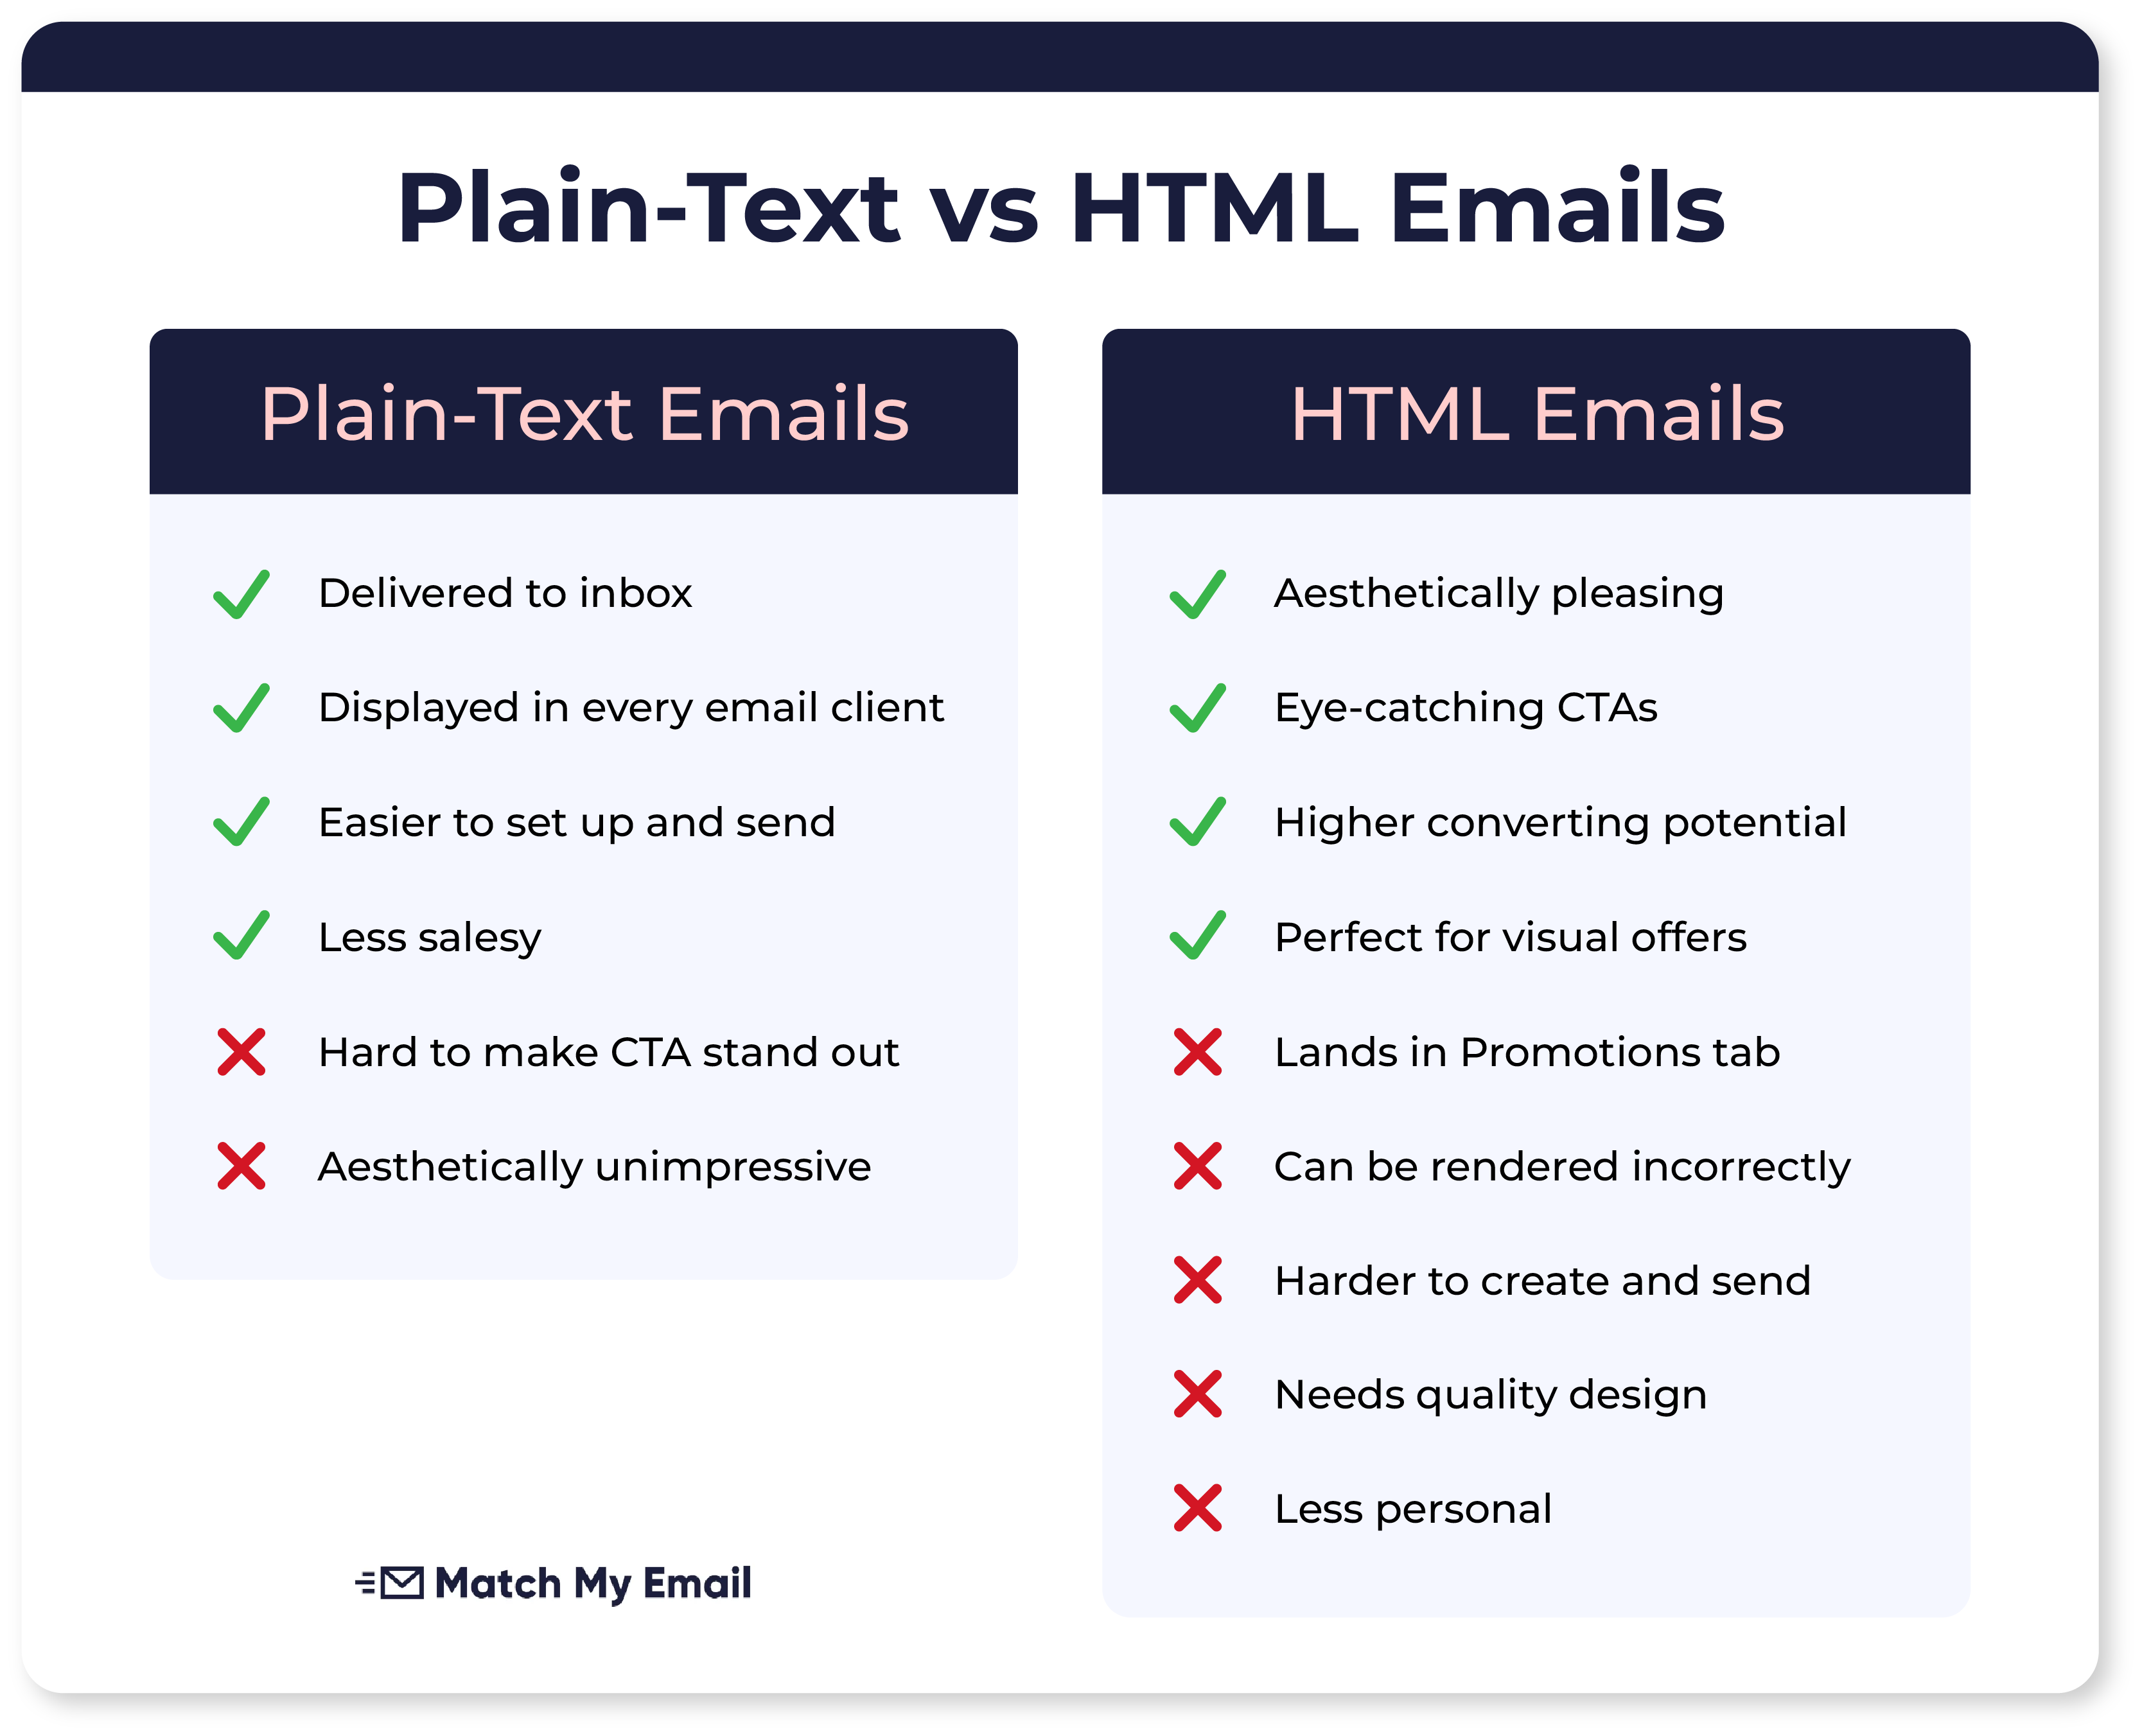
Next, you should ensure that you use the right email format for what you’d like to achieve. For example, email newsletters serve an entirely different purpose and are designed differently compared to sales and marketing emails.
Likewise, marketing and sales emails are often simpler than newsletters but have a clearly defined call to action. Instead of busting out your graphic design chops, you might consider plain-text emails, which typically get 17% higher link-click rates than HTML emails.
And speaking of format, you should also get the designs of your emails right. They should be simple, easy to read, clean, and visually appealing.
Focus on the Email Content
Based on the best practices mentioned above, you’ll send well-designed and formatted emails to recipients who actually want to read them. But what should you send? The simple answer is that you should always send content that provides value to your audience:
- Tap into your audience’s key pain points and offer potential solutions to their problems.
- Reference social proof and case studies.
- Pose a thought-provoking sales question.
- Demonstrate industry expertise and experience.
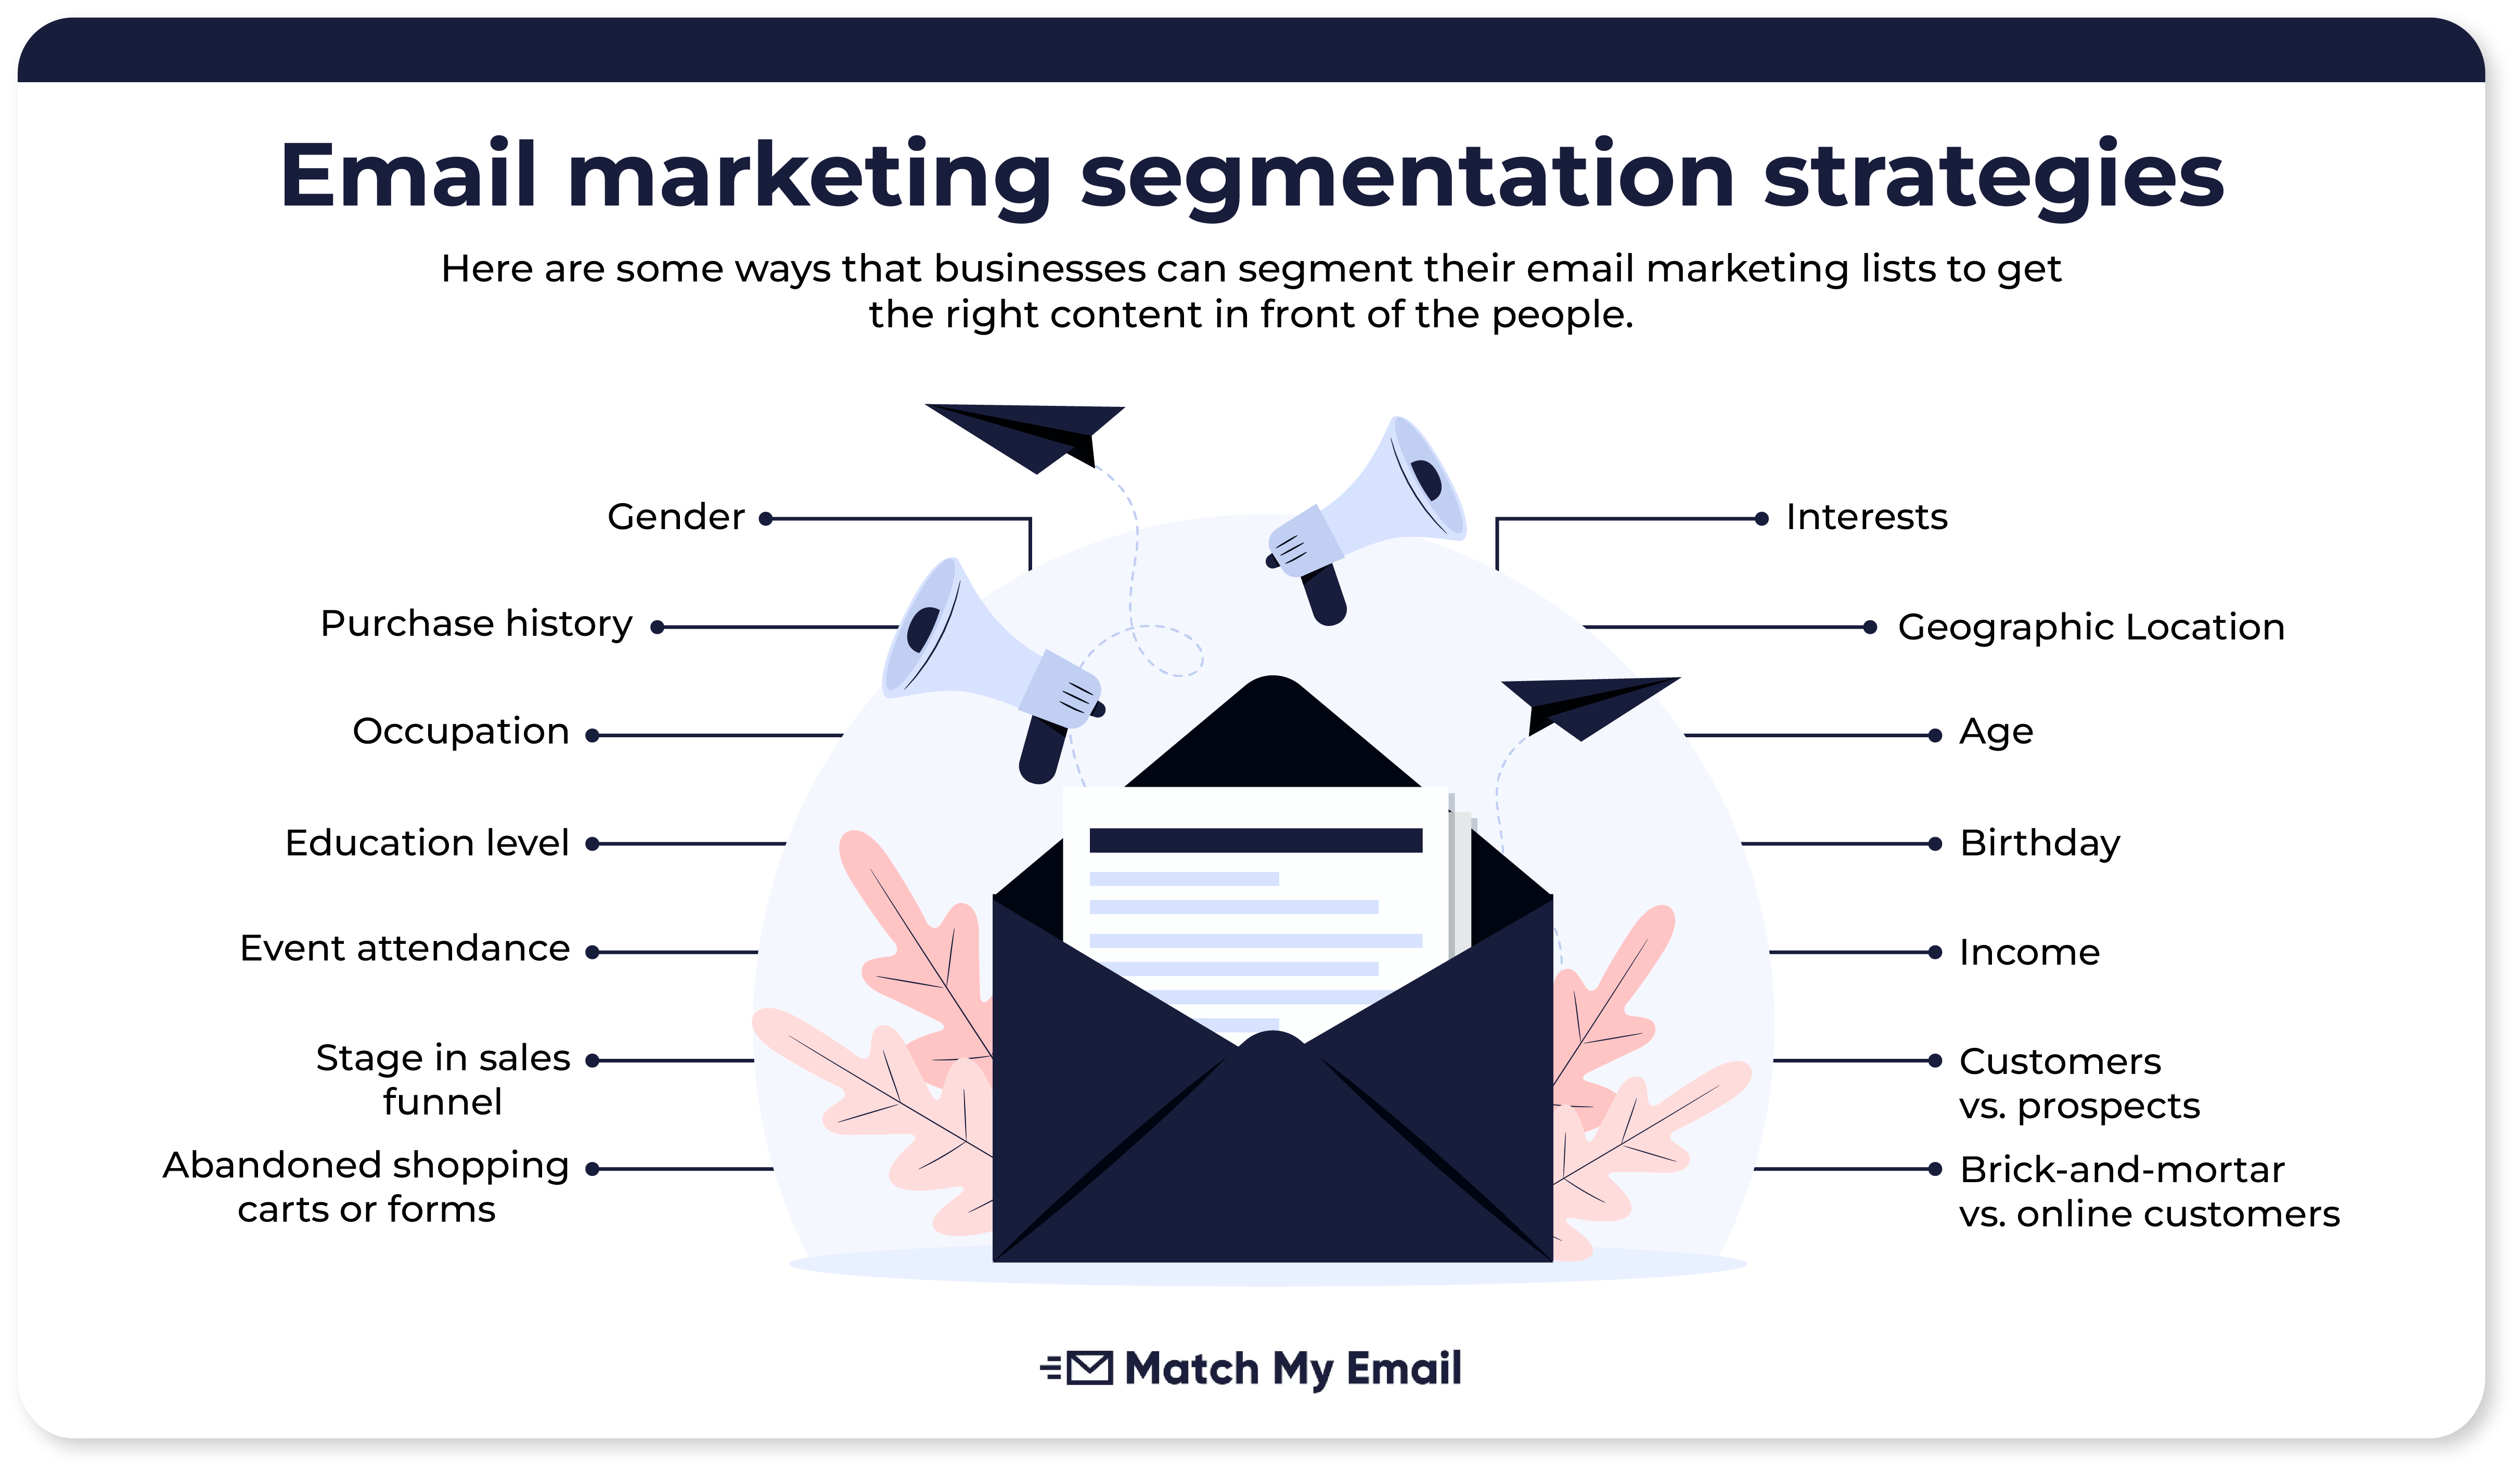
At this point, consider how you want to segment your audience. For example, if you work with manufacturers and eCommerce store owners, they’ll have different needs. To truly convert with your emails, you should create dedicated content for each segment.
Keep Your Salesforce Mass Emails Brief
Let’s face it, while your emails can be relevant, valuable, and helpful, no one has the time or inclination to work through long emails. Your audience might be interested in what you have to say, but if your emails are too long, they may never get around to reading them.
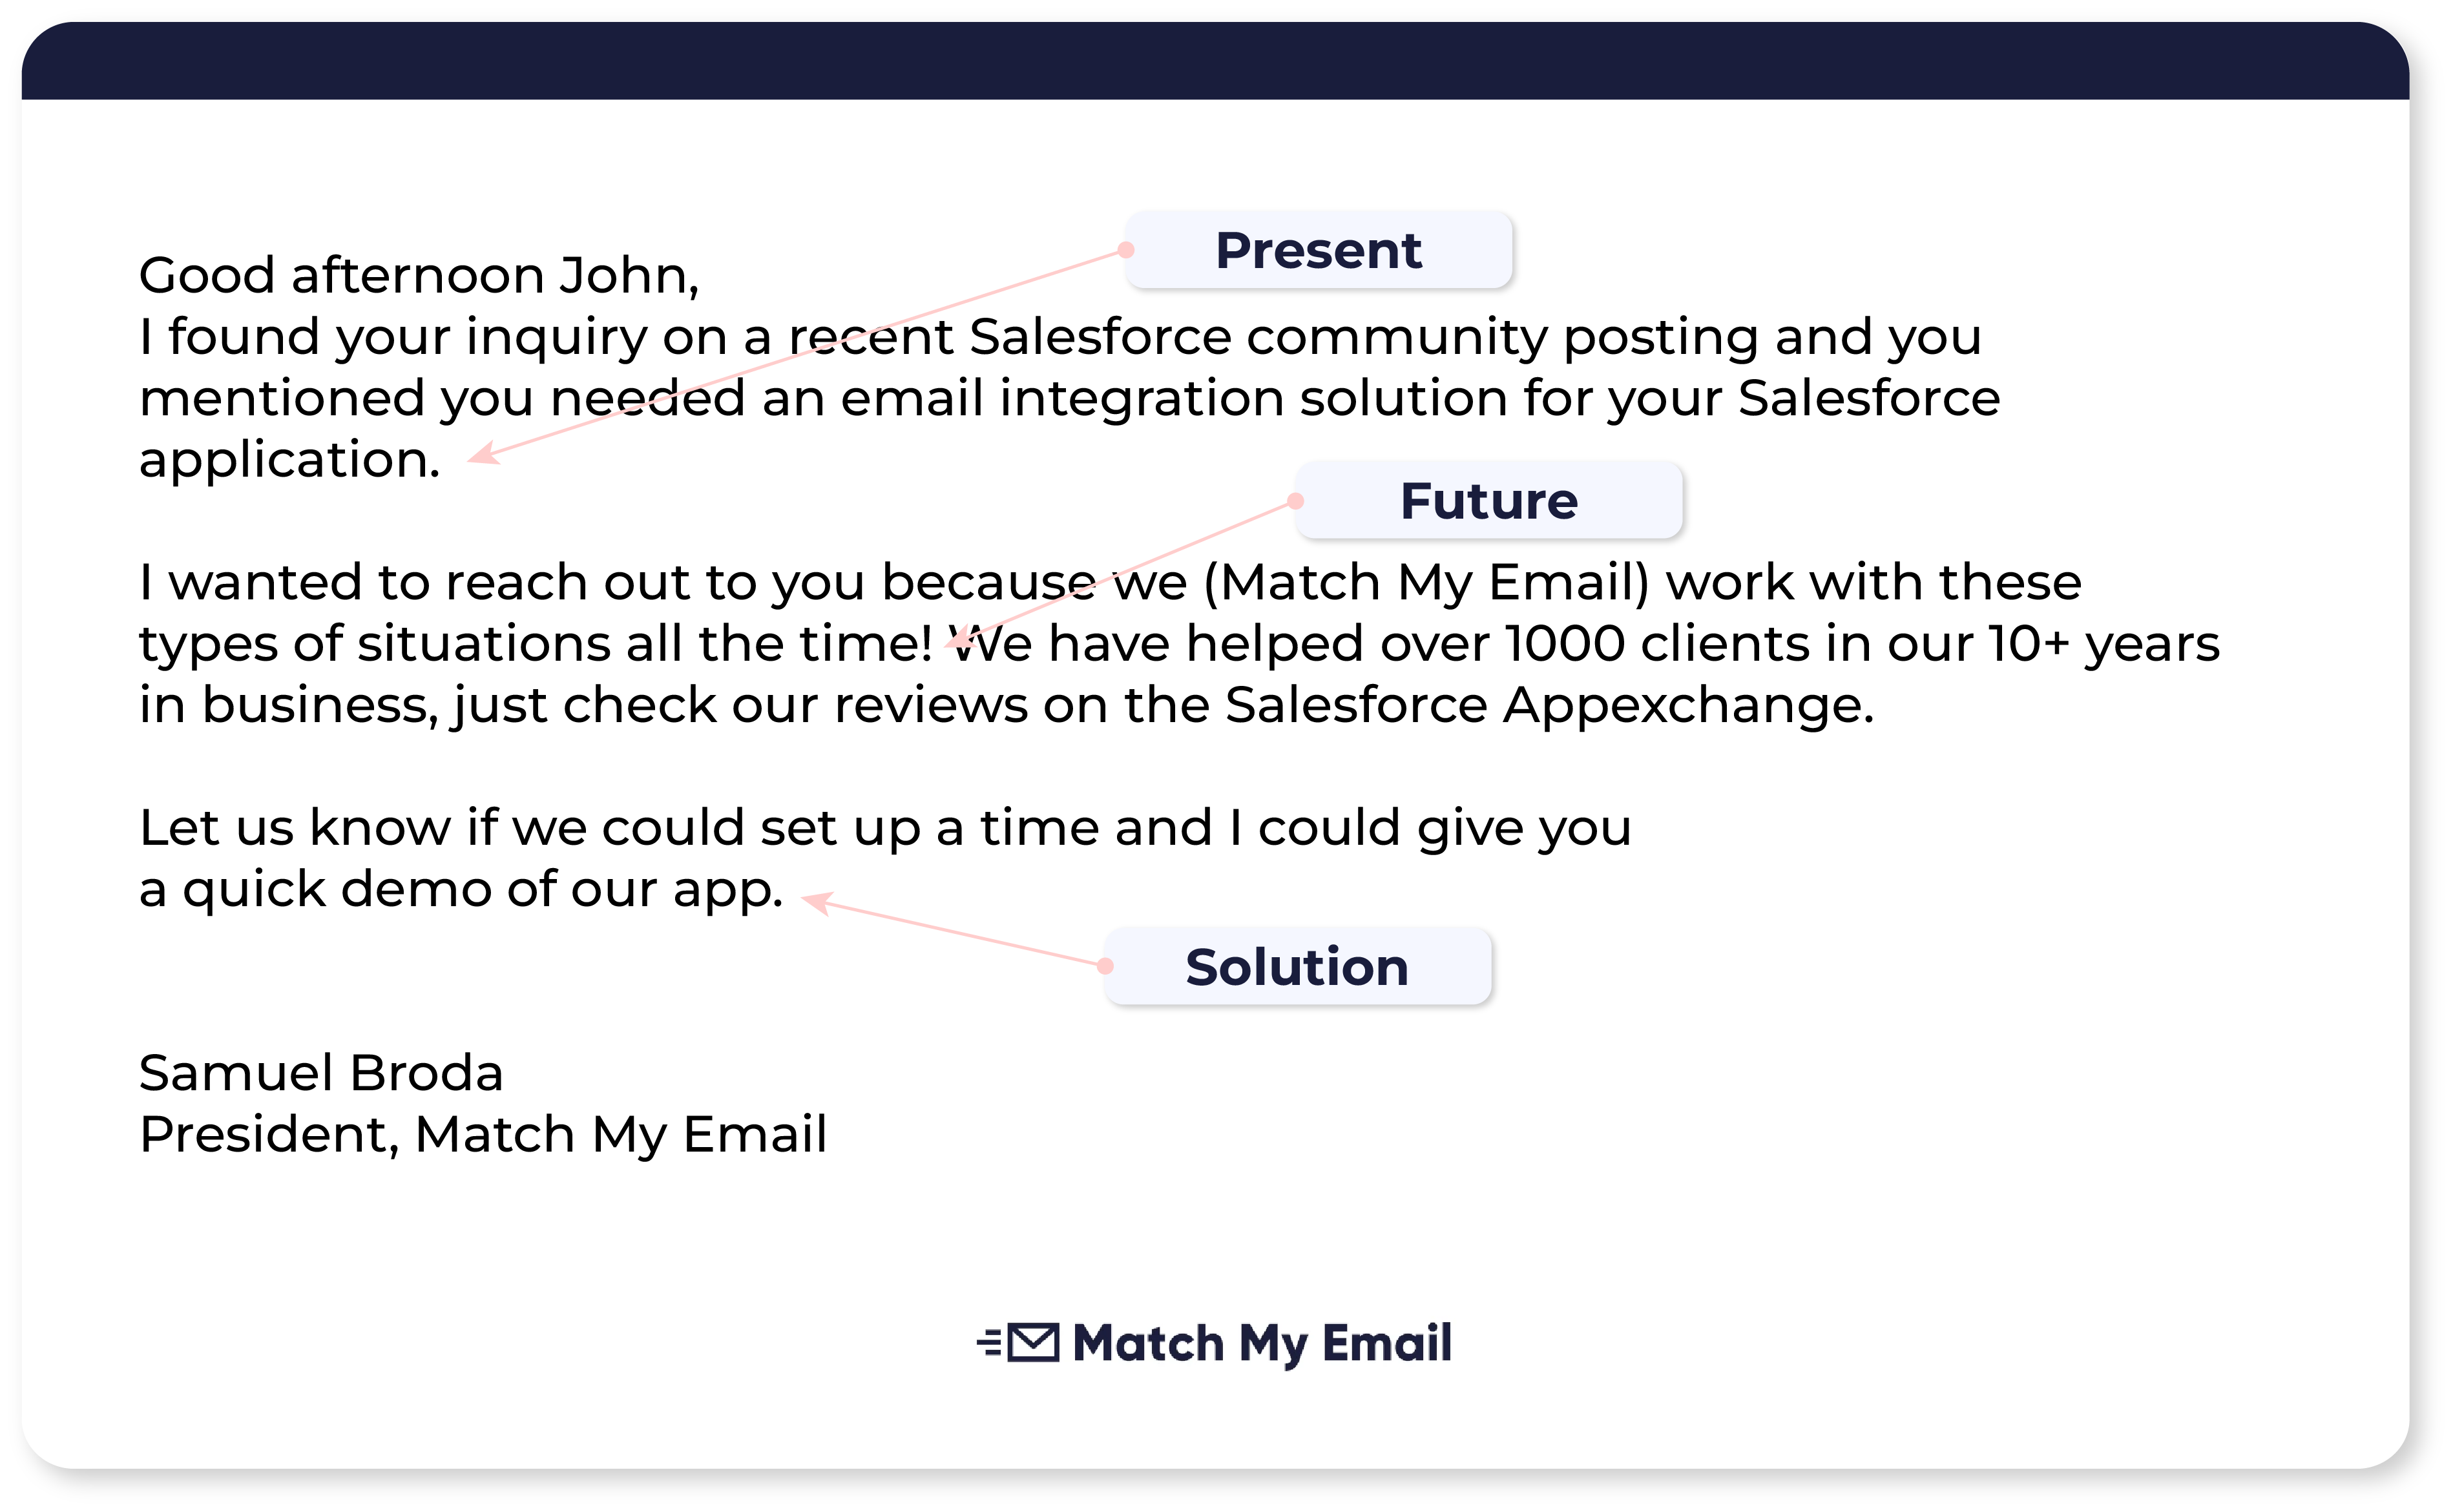
Keep your mass emails in Salesforce brief:
- Open with a challenge the prospect is dealing with.
- Explain how you can help them solve it.
- Add proof (if possible).
- Close with a call to action.
Apart from this, keeping your emails brief will show your audience that you value their time. No one likes a long-winded email that could’ve been a few sentences, especially if you’re working with existing clients and want to create new opportunities.
Get Your Timing Right
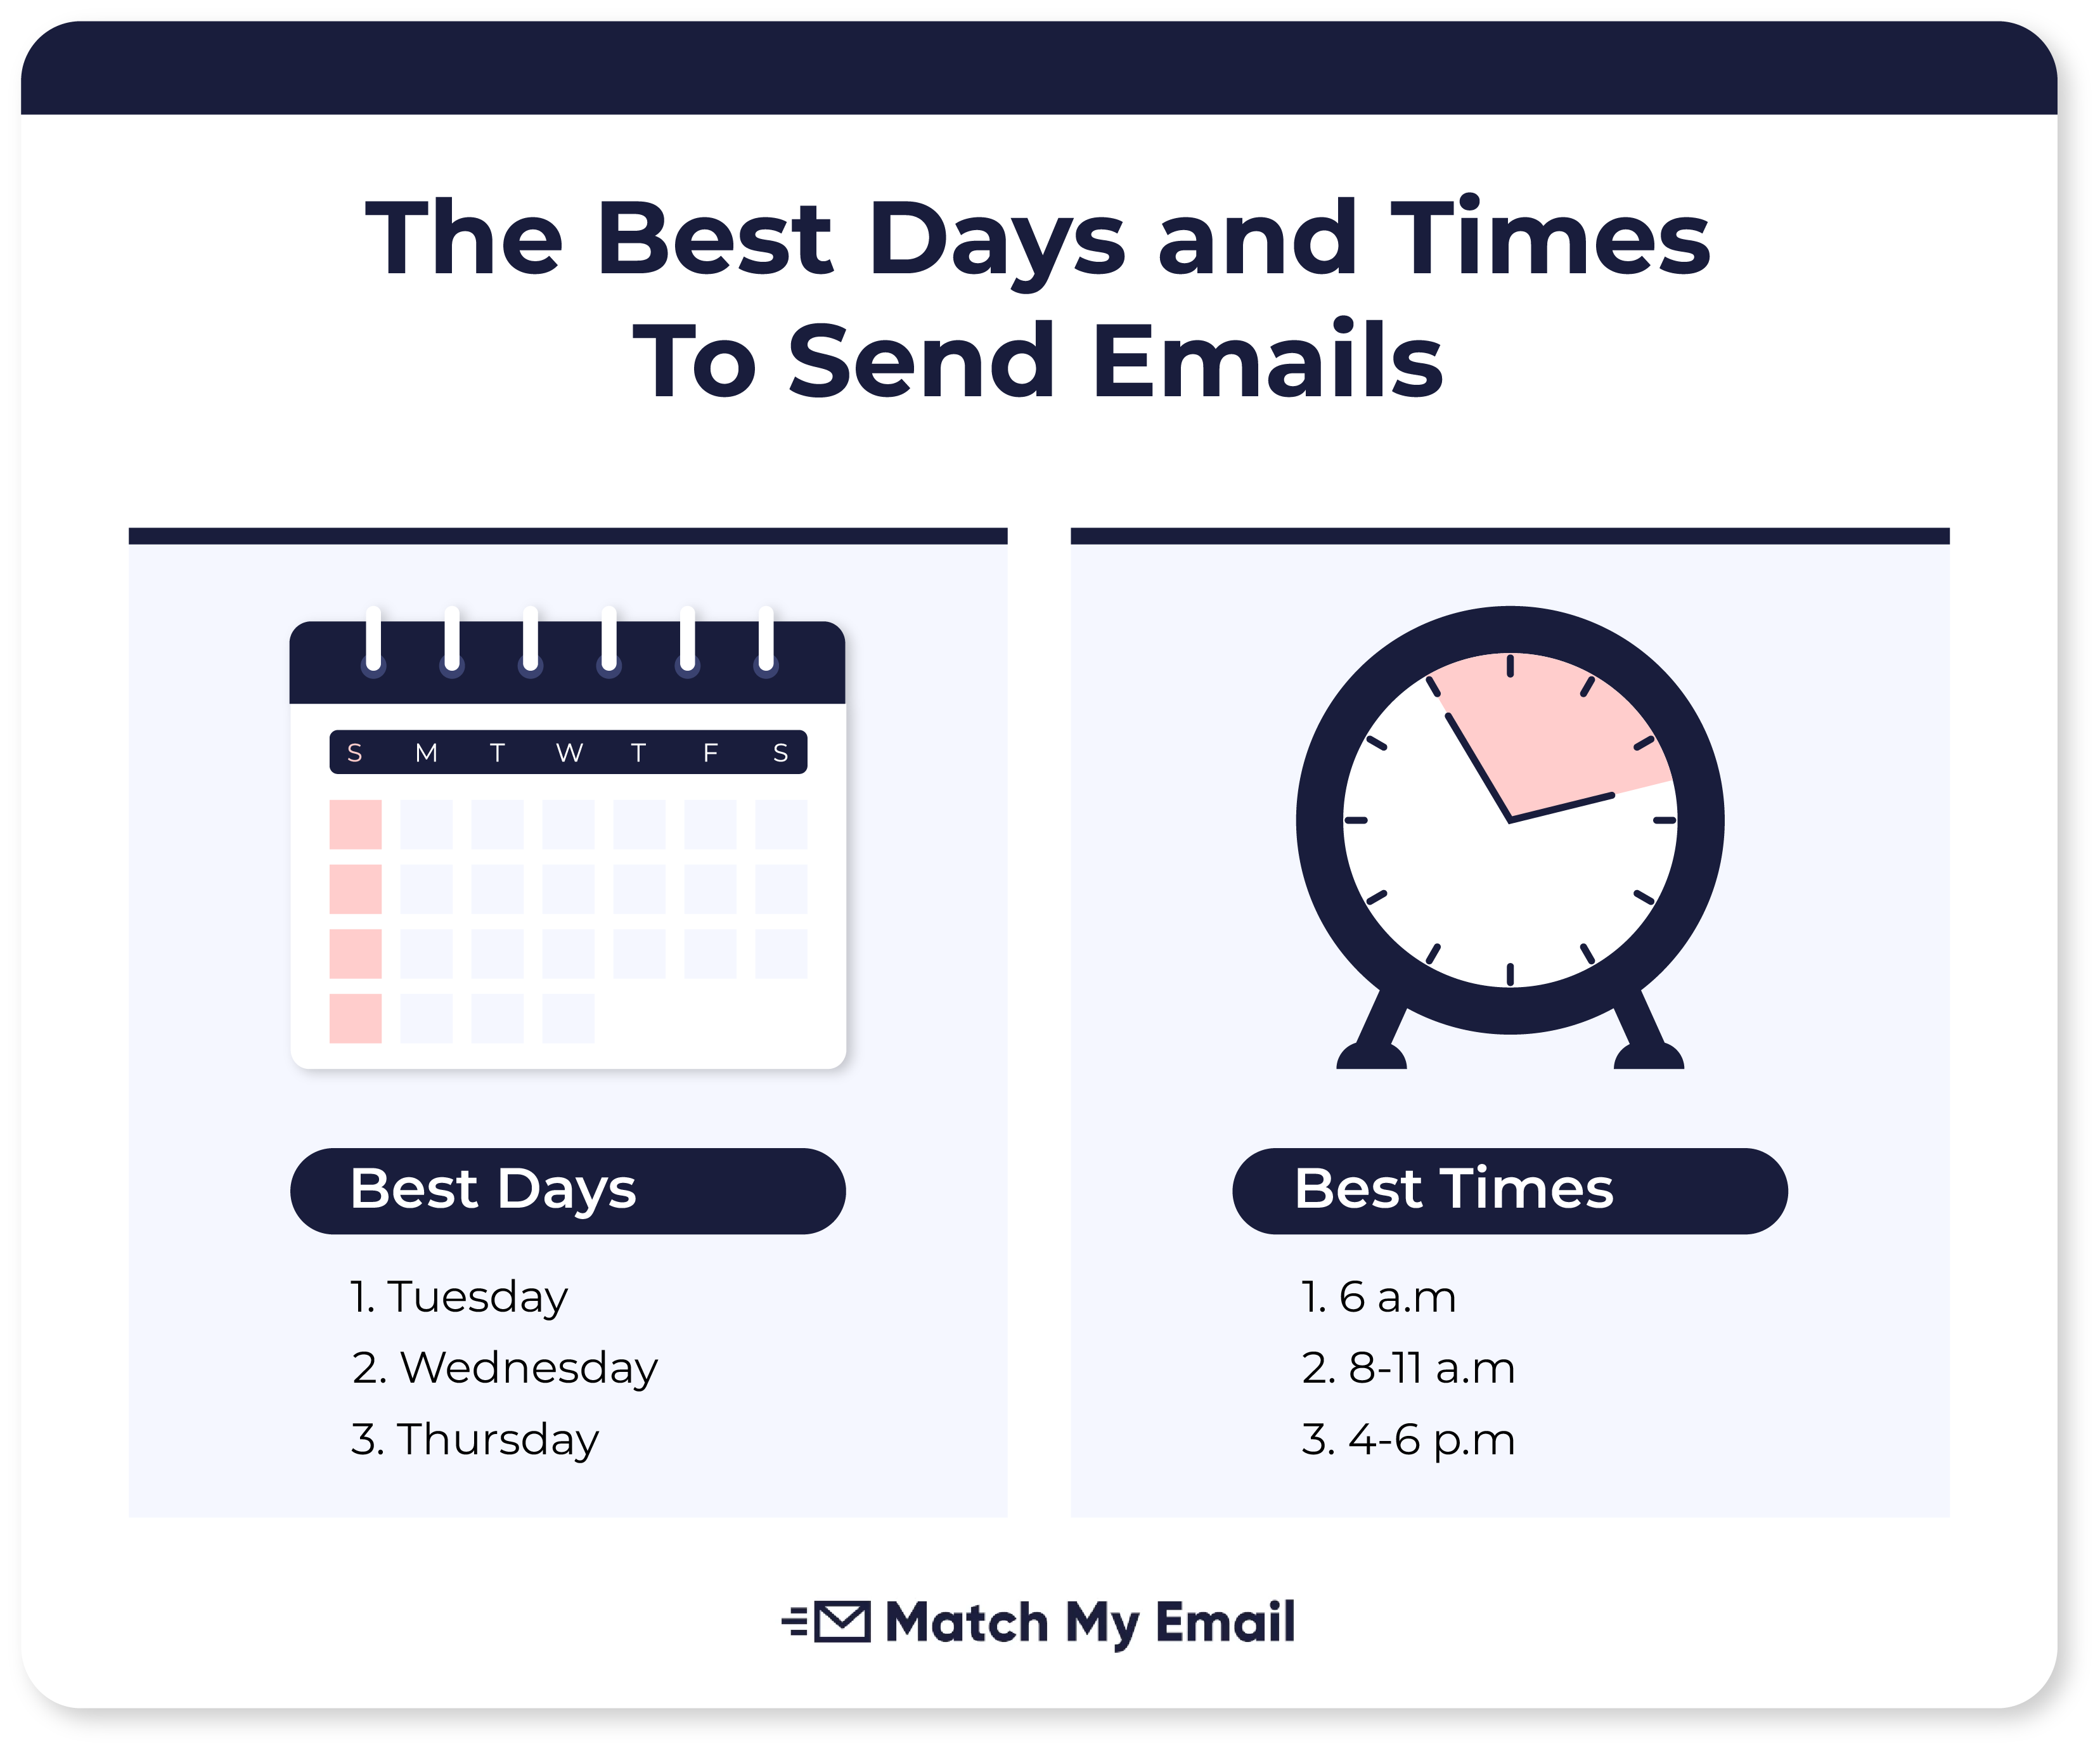
Don’t discount how your timing can influence how many people your emails reach. For example, you may not send emails on a Saturday because you know your recipient’s inbox will be crowded when they get around to checking it on Monday.
But when should you send your emails? While some basic guidelines exist (see the image above), the best time depends on your audience. Test different sending times and track your emails. Once you analyze open rates and engagement at different times, you’ll be able to determine the optimal sending time.
Give Your Audience an Out
Finally, like you’ll ideally want your audience to opt into receiving your emails, you should also give them an easy way to opt out of your emails. This will typically take the form of an unsubscribe link in your emails. If you don’t give your audience a way to unsubscribe, they might send your emails to spam.
If you’re emailing existing accounts, segment your communication so they can opt out of the messages they don’t want to receive. For example, they may want to hear about product updates but would rather skip getting sales emails.
Engage Your Audience with Mass Emails!
Now that you have enough information to get started, it’s time to log into Salesforce! Prepare a great mailing list, segment your audience, and dust off your templates.
Personalization is critical, regardless of whether you’re messaging existing customers or trying to win new business. Add it to your sales success recipe, and you’ll be tasting delicious opportunities before you can say: “Send my email!”
