How to Modify Salesforce Permissions for Match My Email Custom Object
helpH2
Match My Email makes use of a custom object Email Messages and its related Email Messages Related Object to contain and show the matching email information. If Salesforce.com Users are unable to see matched email in the Email Messages section, modifications can be made at user-level, profile-level, and organization-wide depending on edition of Salesforce.com.
Modifying User-level Permissions via Permission Set Assignment
(Professional, Enterprise & Unlimited Editions)
- Navigate to your User list. For Lightning, the quickest route is to use to go to Salesforce Setup and type Users into the Quick Find, and then click on the option presented below.
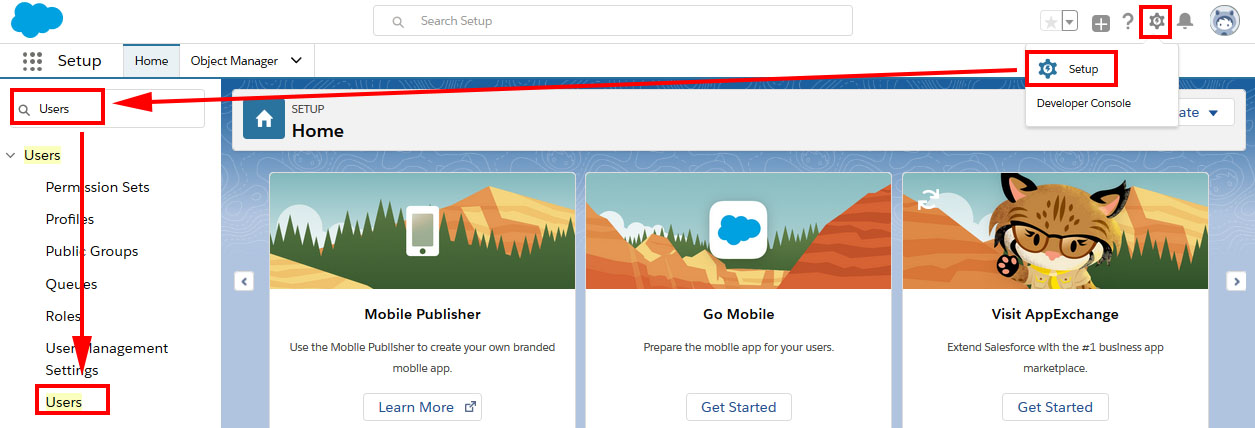
In Classic, the path is Salesforce Setup > Administration Setup > Manage Users > Users.
2. For the User needing permissions, click on User’s name in the Full Name column.
3. At top, above Edit button hover over first hyperlink for Permission Set Assignments and click on Edit Assignments

4. In list on left of Available Permission Sets, Click on a permission and use top arrow button to add to Enabled Permission Sets on right. Choose permission sets based on the following, and then click SAVE.
- Email Messages View– enables Users to view their Email.
- Email Messages Modify– enables Users to modify (manual match or delete) their Email.
- Email Messages View All – enables Users to view any Email.
- Email Messages Modify All – enables Users to modify (manual match or delete) any Email.
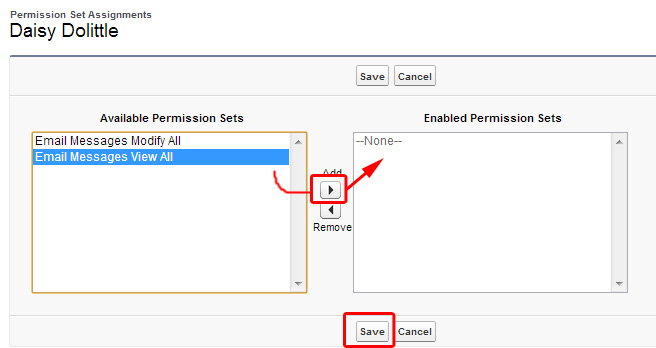
5. Repeat steps for each User where adjustment to permissions is needed.
Modifying Profile-level Permissions
(Some Professional Editions, All Enterprise & Unlimited Editions)
By default, SFDC users with a standard profile such as ‘Standard User’ cannot access/view custom objects such as “Email Messages” and “Email Message Related Objects” employed by Match My Email. Therefore, it may be necessary to create a Custom Profile based on a Standard one, establish permissions, and reassign the new profile to specific Users needing to see matched email data.
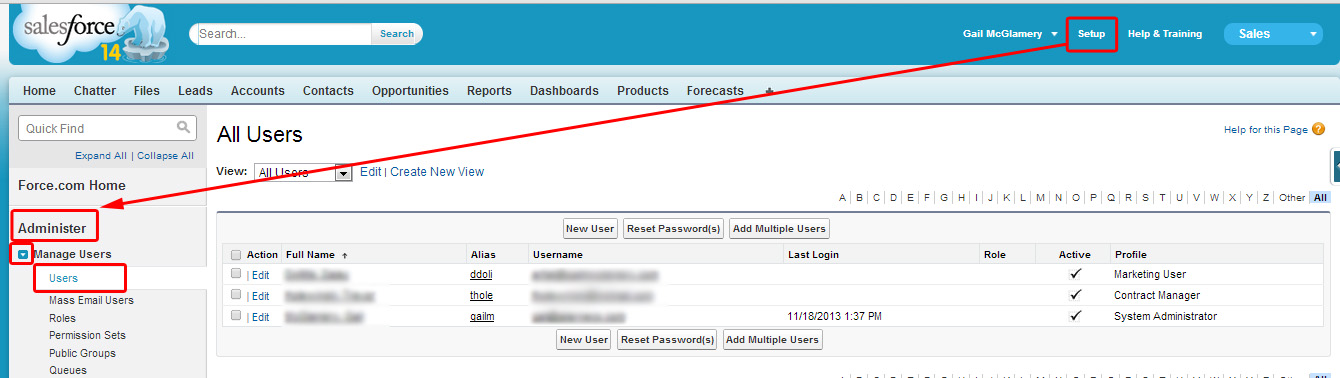
- Navigate to your Profile list. In Lightning, the path is Setup > Administration > Users > Profiles.
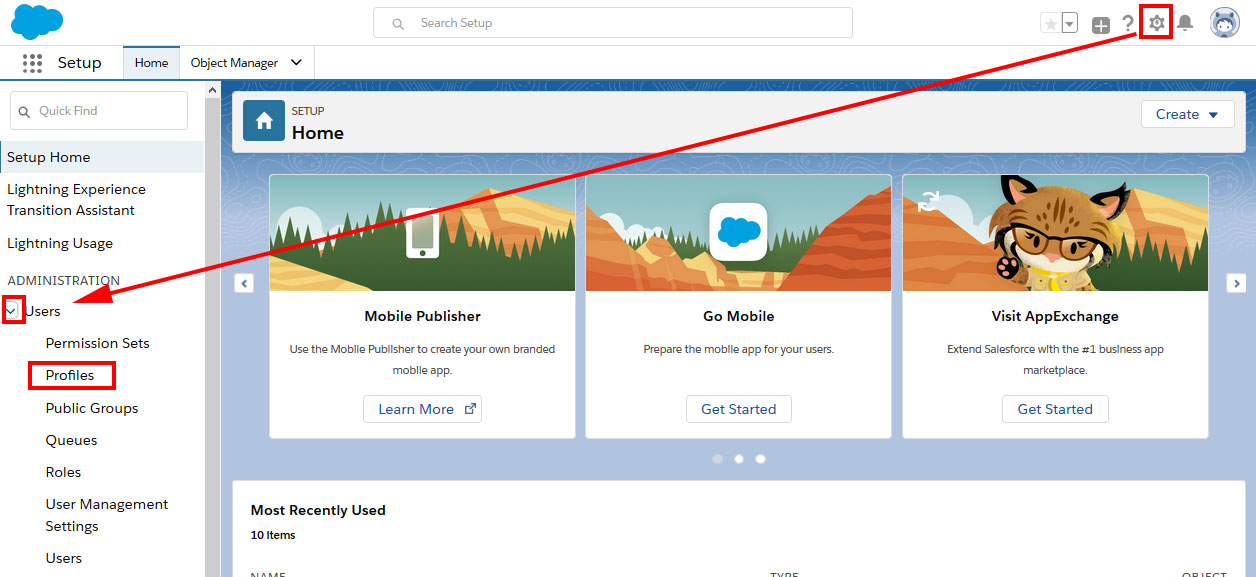
In Classic, the path is Salesforce Setup > Administration Setup > Manage Users > Profiles.
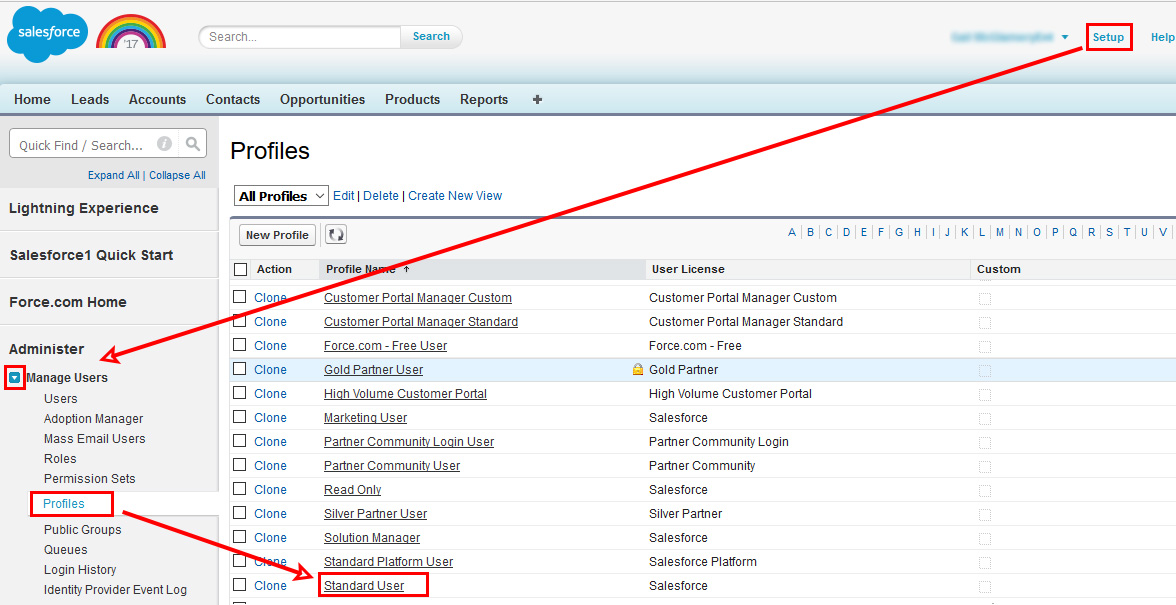
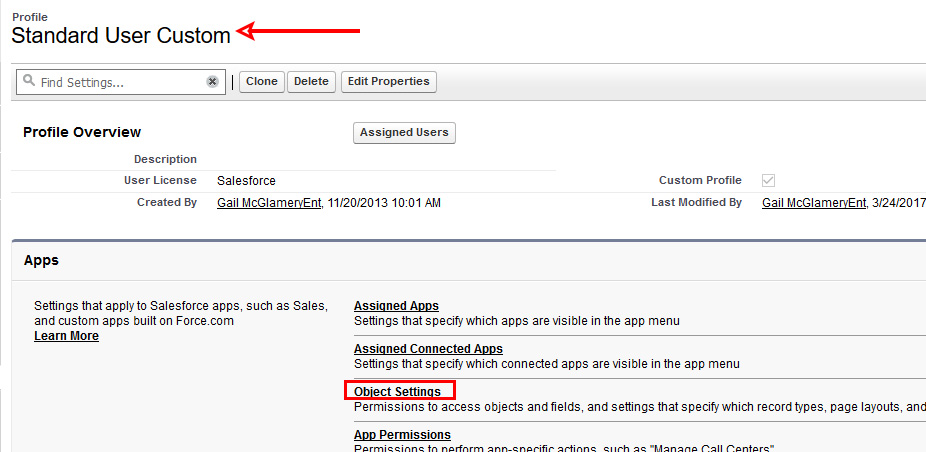
2. Click on Profile Name. (*This is most often done for Standard User profile.)
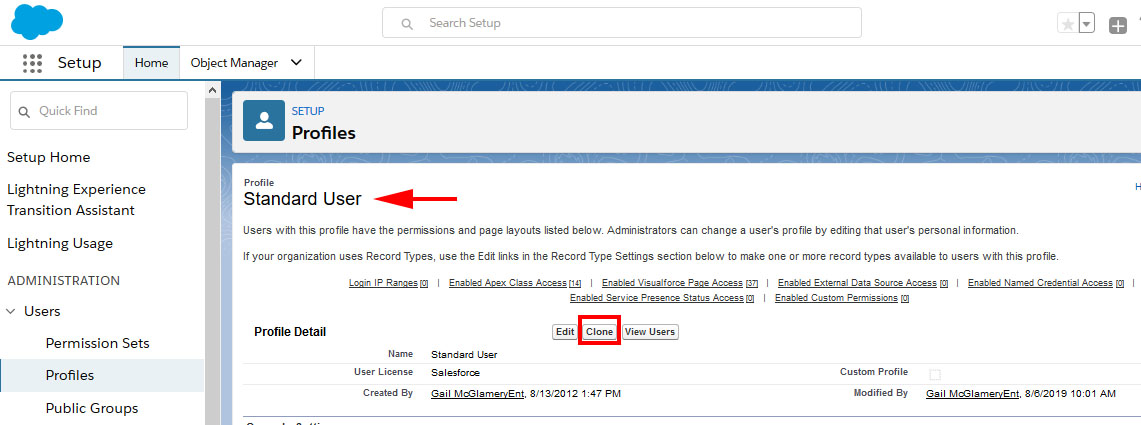
3. At top, click Clone button. (Screenshots reflect Enhanced Profile View for User Interface.)
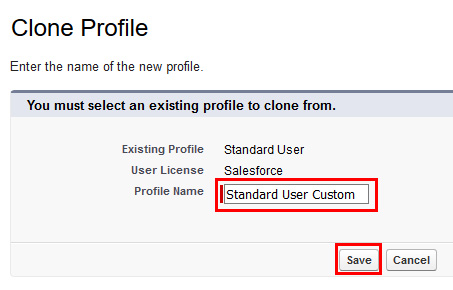
3. Enter new name for profile. As example, for changes to Standard User we would suggest Standard User Custom as new name. Click Save.
4. On screen, the new profile will be showing. On Profile Detail screen click on Object Settings. (If not using Enhanced Profile View, click Edit at top, then scroll to find Custom Object Permissions section and skip to step 6.)
5. In Enhanced View, Click Edit, then check boxes in Enabled column for Read, Create, Edit and Delete. Click Save.

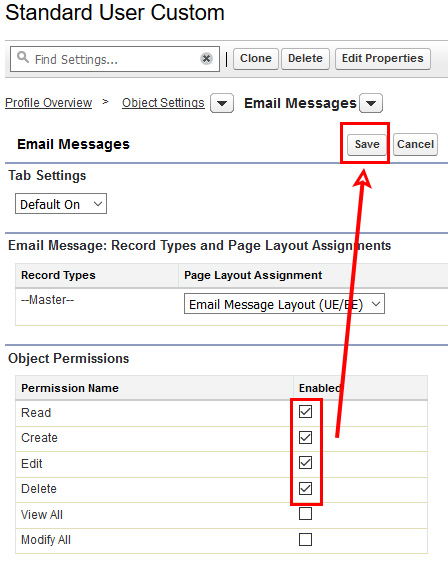
6. If not using Enhanced View, after finding Custom Object Permissions section, note there are four (4) custom objects that can be employed by Match My Email and we suggest granting permissions to all in this step. Locate Email Messages, Email Message Related Object, Secondary Email Addresses and Matching Rules. For these four custom objects, check the boxes/options for Read, Create, Edit and Delete. Click SAVE at top or bottom of screen.

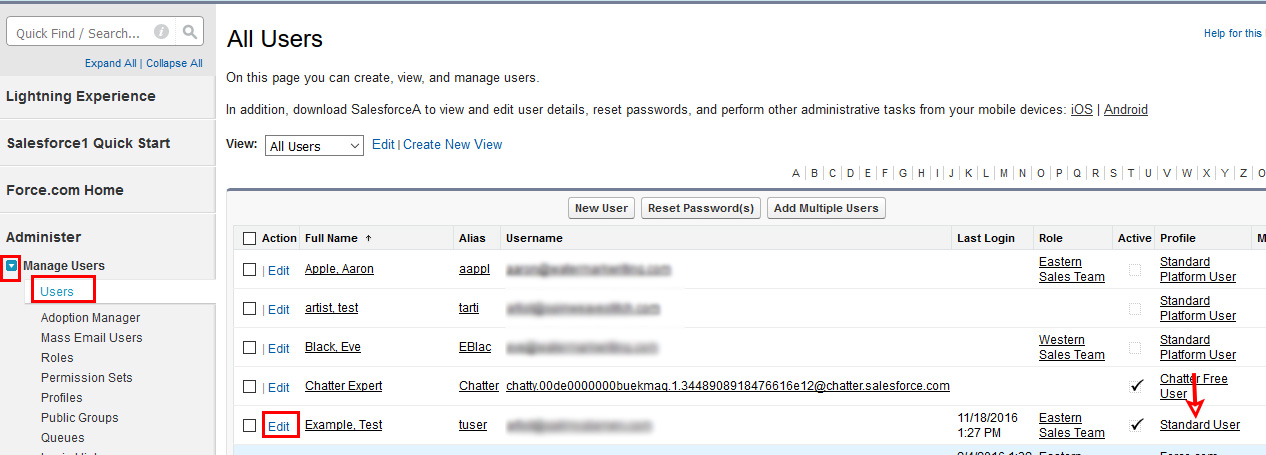
7. With new profile created and modified, return to User list. For User needing to have custom object permissions, click the Edit option next to the User’s listing. (in example below, the Test Example user is Standard User profile).
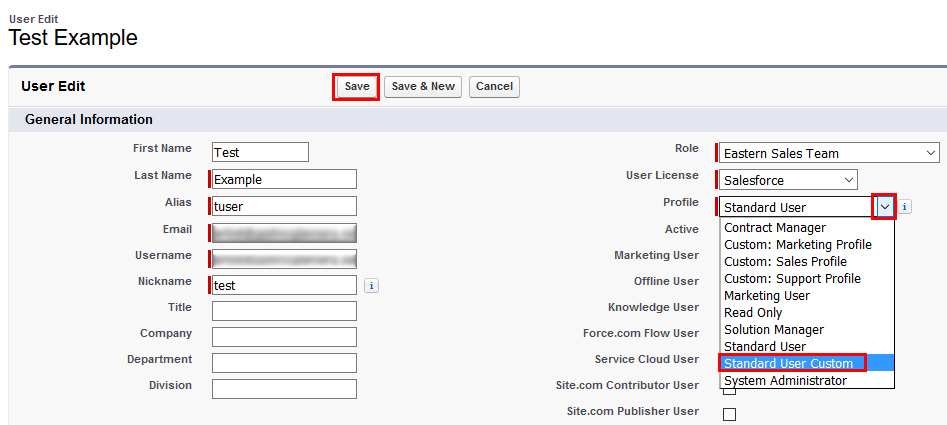
8. On right, where Profile is listed, use drop down menu to assign newly cloned custom profile. Click SAVE.
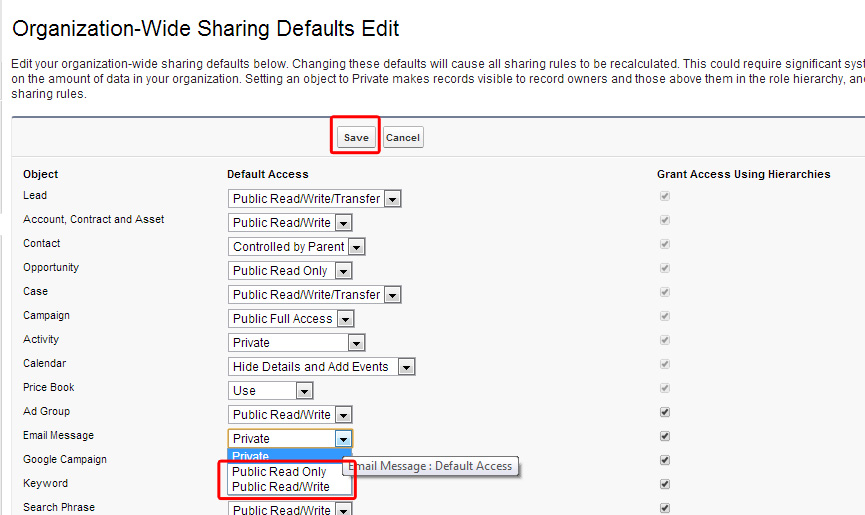
Modifying Organization-wide Sharing Settings
( Professional, Enterprise & Unlimited Editions)
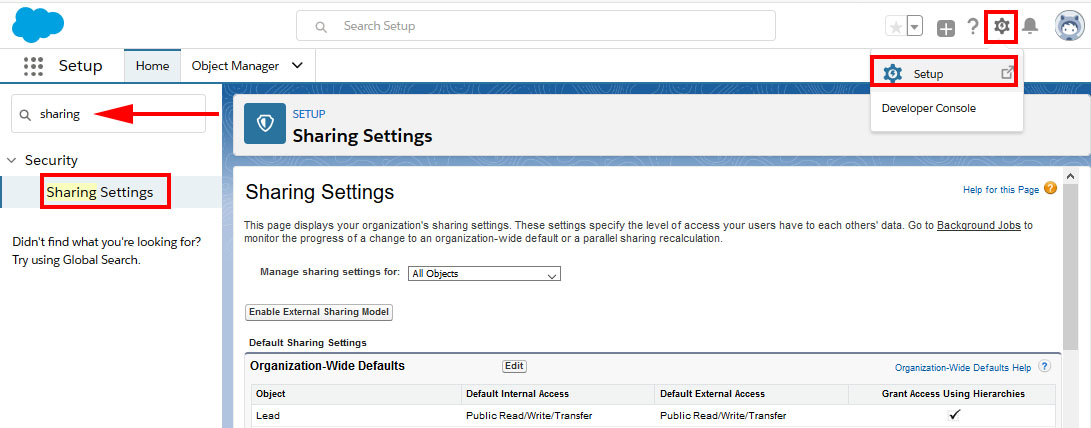
- Navigate to Sharing Settings by opening Setup, entering Sharing into the Quick Find at the top and clicking on Sharing Settings when presented.
2. Scroll to find Email Message. Use drop down menu to change Private to Public Read Only (recommended). Click Save at top or bottom of screen.