Tips on Using a Search Folder in Outlook
helpH2
For customers that use Outlook, especially those with lots of folders and subfolders, using a Microsoft Search Folder for historic email importing can be helpful. A Search Folder will aggregate mail based on criteria and folder selection into one new folder that makes historic email importing easier.
Microsoft provides a helpful page on how to do this at this link. There are tabs for New, Classic, and Web Outlook. We found choosing Classic and then scrolling to the section “Create a customized Search Folder in classic Outlook for Windows” provided the best indepth guidance.
We offer the following suggestions below. Once you have email in the Search Folder, we strongly recommend that you scan through it to be sure the criteria you used resulted in a satisfactory grouping of email for historic email importing.
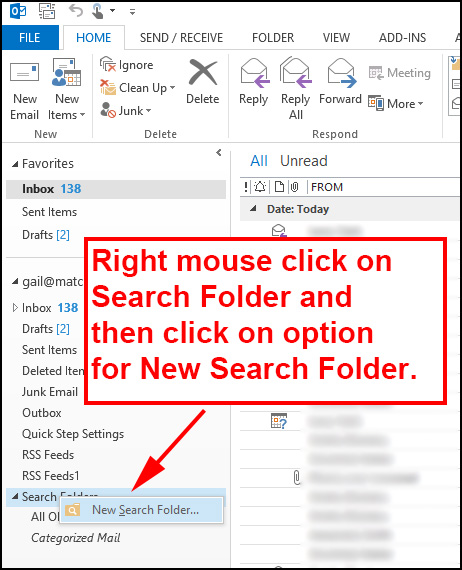
- In Outook, determine where to create a New Search Folder. Below are screenshots from three different Outlook possibilities. If you still cannot find it, search web on “create new search folder Outlook ###” and insert your version of Outlook. While Search Folders can be created in webmail, we have found the options to be limited. We have found the better option is to work through the software client.
In Outlook 2013:
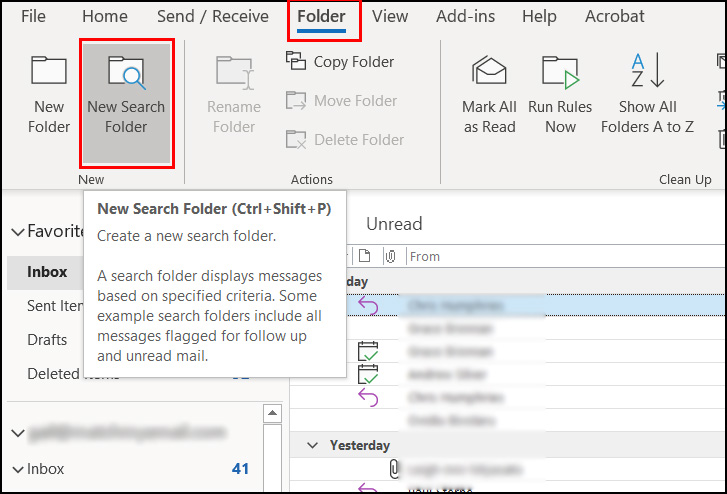
In Outlook for Microsoft 365 (subscription):
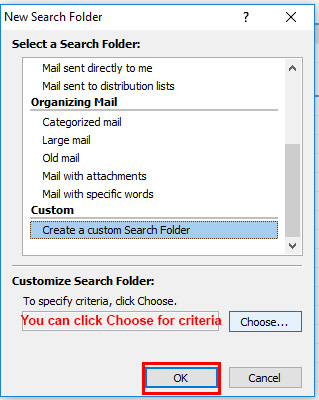
2. Choose Create custom Search Folder which gives you control over criteria and folders.

3. Options at bottom will be presented. You can choose to specify criteria now, or just click OK to do so at a later step. We strongly recommend looking through and specifying criteria so that the emails aggregated in the Search Folder are meaningful.
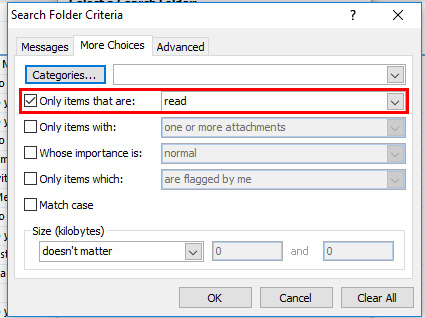
4. An example of the criteria you might want to choose is below. For example, you may only want to copy and move old emails that you have read, as unread messages may be unimportant. You can also choose level of importance, those with attachments, etc. Clicking into the Advanced tab reveals many more options for criteria.
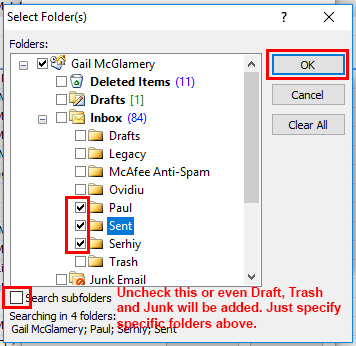
5. Name your new Search folder. We suggest putting what will be meaningful such as purpose or date range. Click Browse to choose folders.
6. We strongly suggest to UNCHECK Search subfolders. If you leave this checked, you may pull in undesirable info such as Drafts or Trash. You can click to expand folders such as Inbox to have access to nested subfolders you would like to include. Check the folders that contain email messages you want in your Search Folder. Click OK.
7. Proceed through windows as needed, making sure you submit criteria to provide a better scope and better aggregation of emails based on your needs. Outlook often prompts you to do so if you have not yet entered criteria for the search.

9. When you return to your initial window, click OK. Outlook will begin aggregating messages into the folder and you will now see the folder in the list under Search Folders. If there are a lot of messages to pull into this Search folder, allow Outlook to complete the process.