Creating a Custom Match My Email Web Tab in Salesforce
helpH2
When the Match My Email package is installed, the package includes a web tab that can be added to Users’ Nav Bars. There is no need to create it manually. When the web tab is available to a User, clicking on it will give User easy access to the Match My Email cloud.
For those with a Match My Email account created prior to June 2019 that did not install the package, it is possible for a Salesforce System Administrator to manually create a new web tab.
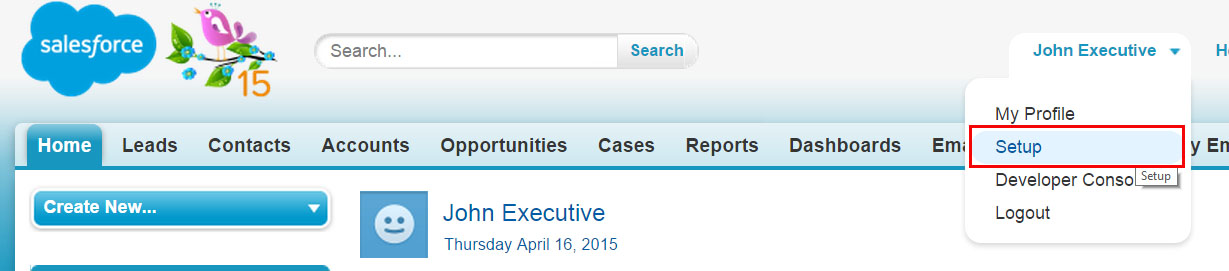
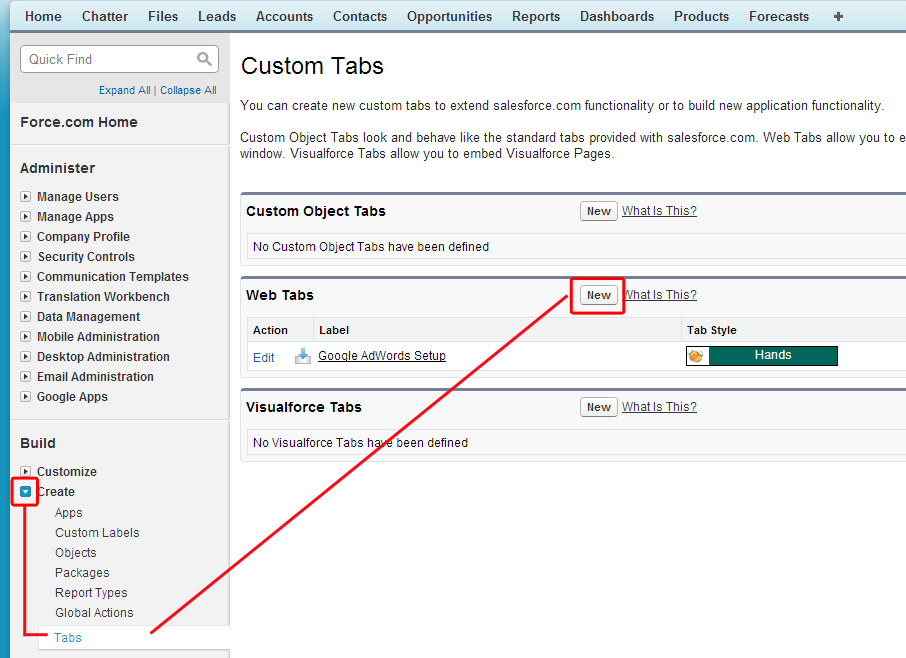
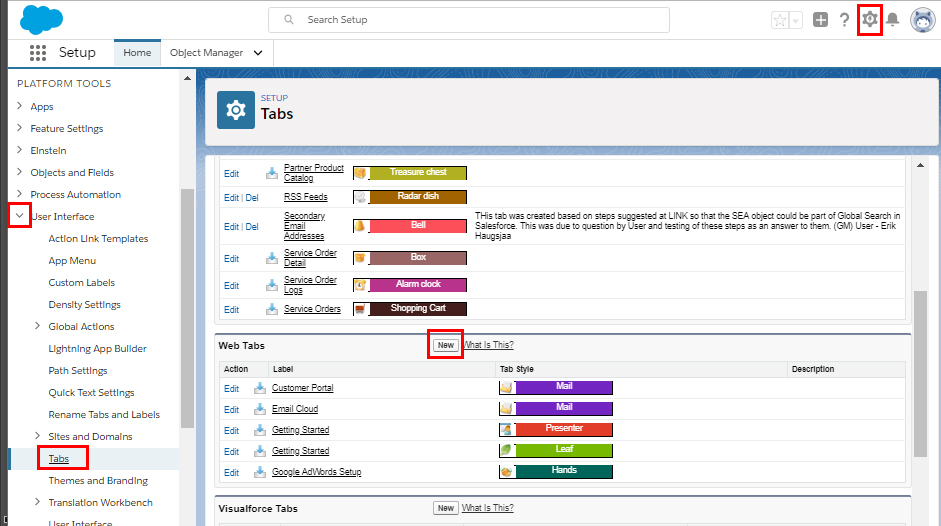
1. In Salesforce.com, navigate to Setup. Then, based on screenshot below for either Classic or Lightning view, find Web Tabs and click NEW. (If you don’t see the ‘New’ button then you do not currently have permission to create Web Tabs. Contact your Salesforce admin.)
FOR SALESFORCE CLASSIC (Setup > App Setup or Build > Create > Tabs):
FOR SALESFORCE LIGHTNING (Setup > Platform Tools > User Interface > Tabs):
2. After clicking new, choose for Tab Layout 2 column. Click Next.

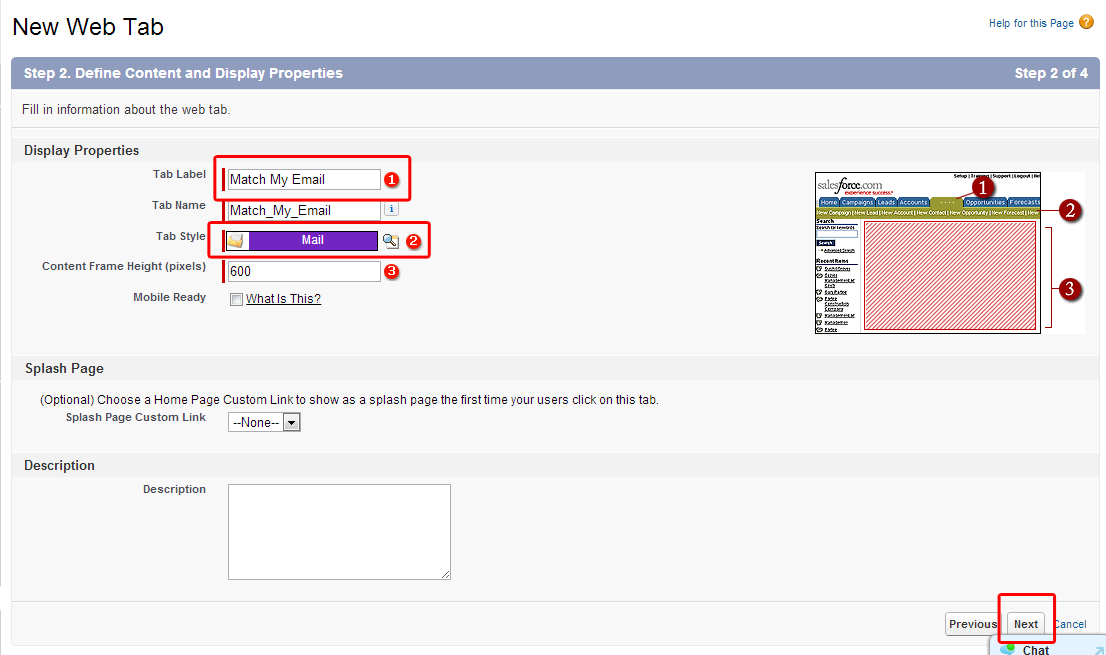
3. Fill in the fields as in screenshot below. Click Next.
- Tab Label: type in “Match My Email”
- Tab Name will auto fill with Tab Label
- Tab Style: click Search Lens button and then select one
- Leave Content Frame Height as “600”
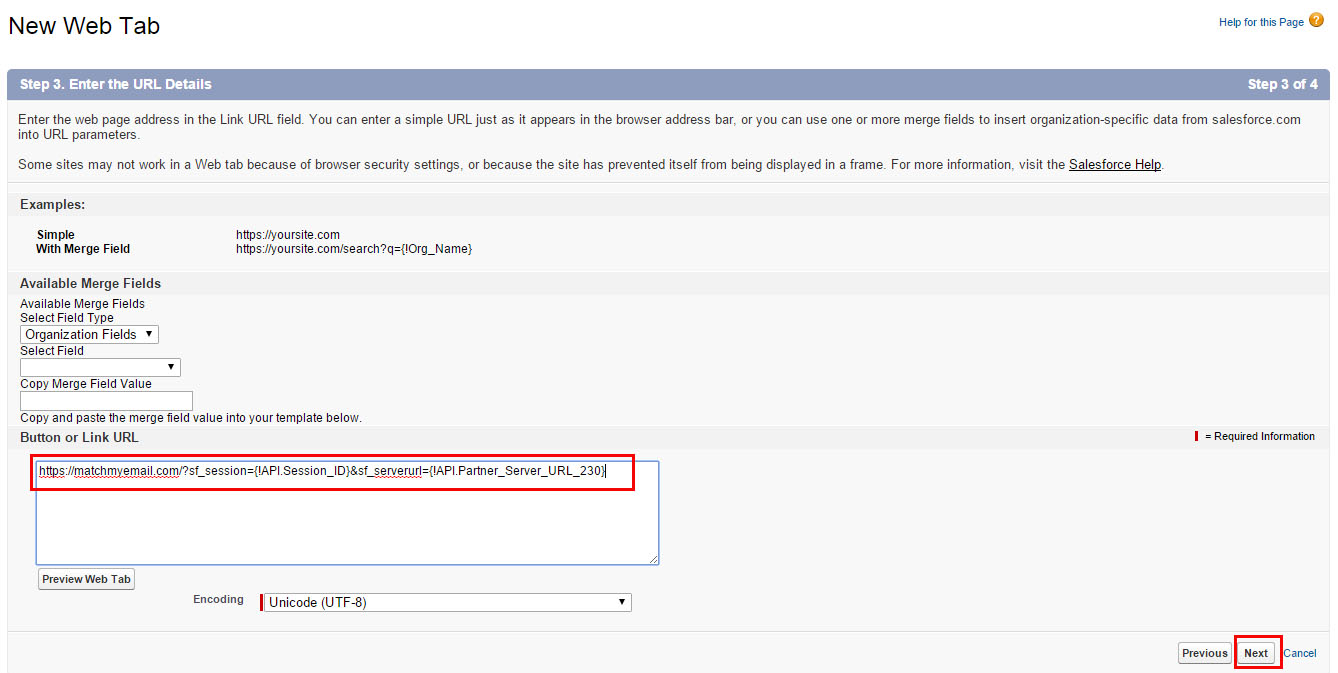
4. In box ‘Button or Link URL’, delete what is there and copy/paste the appropriate URL below. Please note that due to server locations, there are potentially three locations for your Match My Email account. In a duplicate browser tab, navigate to Salesforce Setup > Installed Packages > Match My Email Configure > Installation > Email Cloud Properties and note the Base URL.

If you see https://matchmyemail.com/, then you will use:
https://matchmyemail.com/?sf_session={!API.Session_ID}&sf_serverurl={!API.Partner_Server_URL_490}
If you see https://us000.matchmyemail.com/, then you will use:
https://us000.matchmyemail.com/?sf_session={!API.Session_ID}&sf_serverurl={!API.Partner_Server_URL_490}
If you see https://eu.matchmyemail.com/, then you will use:
https://eu.matchmyemail.com/?sf_session={!API.Session_ID}&sf_serverurl={!API.Partner_Server_URL_490}
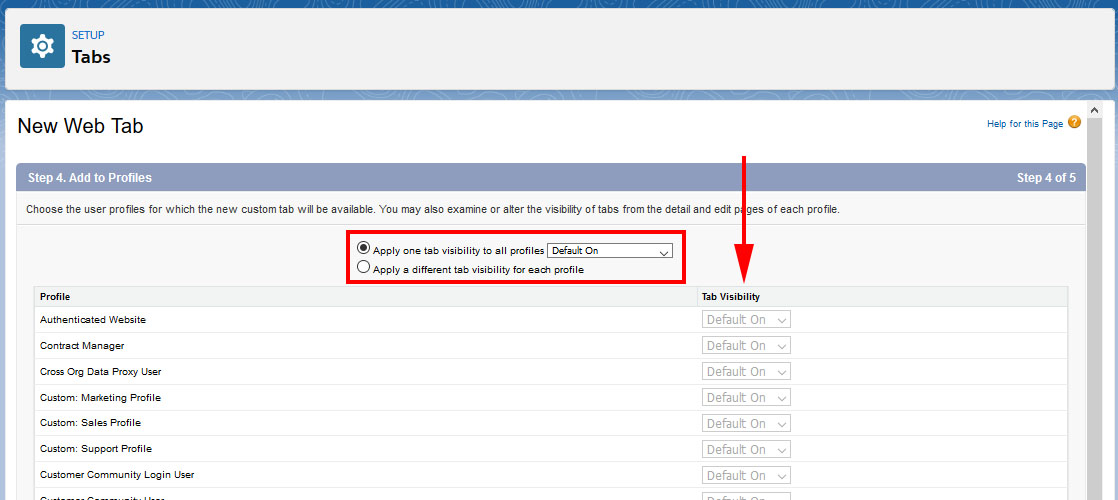
5. Choose for which Profiles the tab will be visible with Default On. Click NEXT.
6. You can then include the tab for different custom apps and (bottom left) check the box to append the tab to user’s existing personal customizations. Click Save.
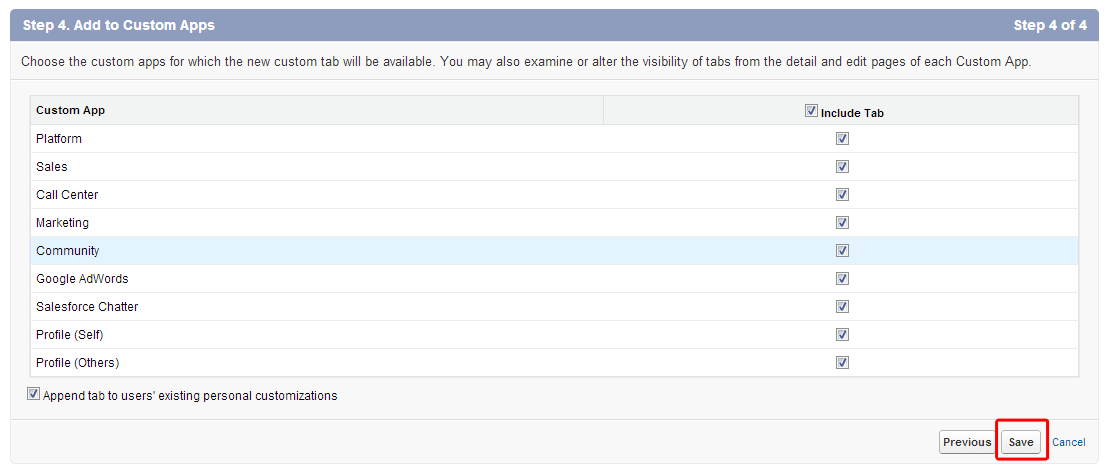
You will now see the web tab in the list of custom tabs, and will appear in the Nav Bar depending on your choices for visibility and Profiles.
For assistance, please contact support@matchmyemail.com.