
Create a new Contact for an Account already in Salesforce
helpH2
1. Once you are logged into the Match My Email Activity Dashboard, find a message for which you want to create a new Contact. In the screenshot below, there is a message from John Executive to a new Contact, Kendall. If possible, choose an email from the person, instead of to them, as will be explained shortly though this works for any item in the Match My Email Activity Dashboard.

2. Click the Create button on the right. This will open a pop up window, landing you on the Create New Record tab as shown below. On the left side of the pop-up will be the email message details that you selected.

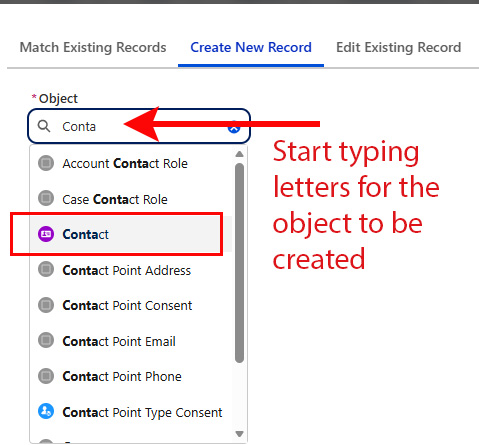
3. In the Object field, start typing letters for the object you want to create. In this example, we have typed Conta to find and then choose the Contact object.
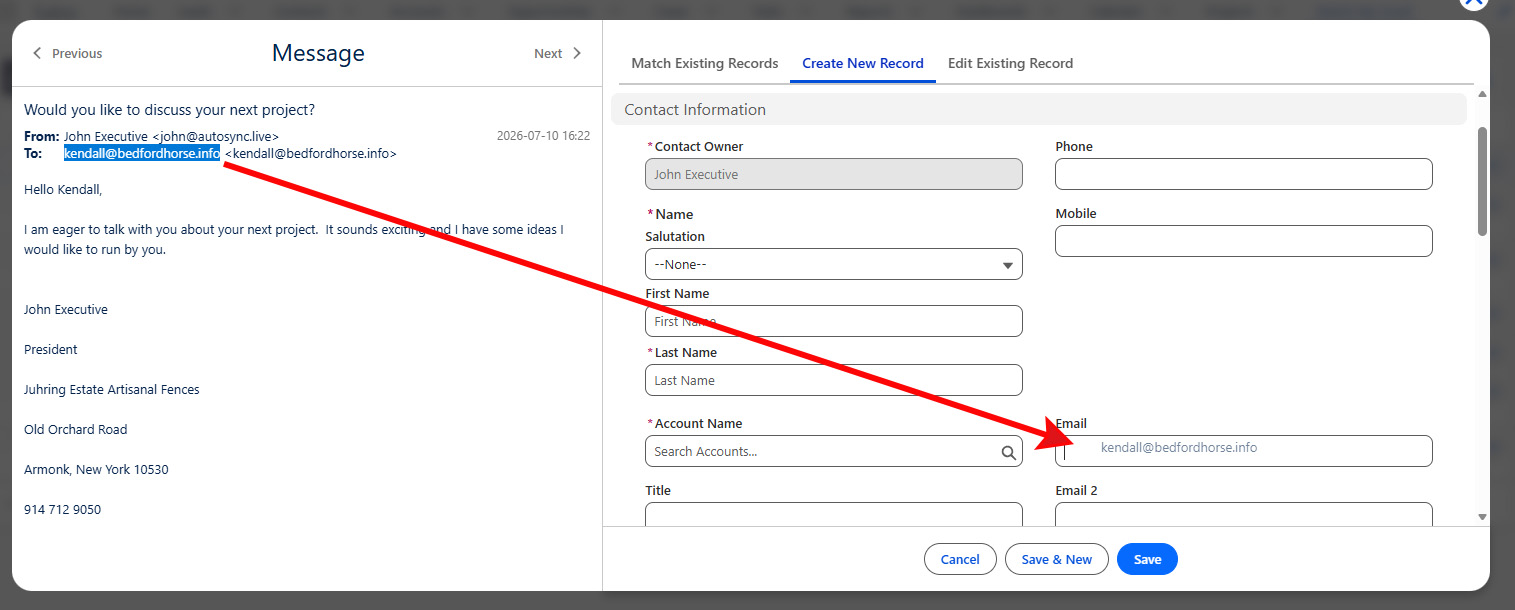
4. You can highlight the email address for your new Contact from the email message details. Once highlighted, it is possible to click on the selection, hold down your left mouse button, and drag and drop the selection into the appropriate field. This works for any information in the email details. If you do have an email from a new Contact, their signature usually would have information such as Title, Address, Phone, etc., as well as name, that you can drag and drop over. You can also select, copy and paste the info into the fields or simply type in the information.
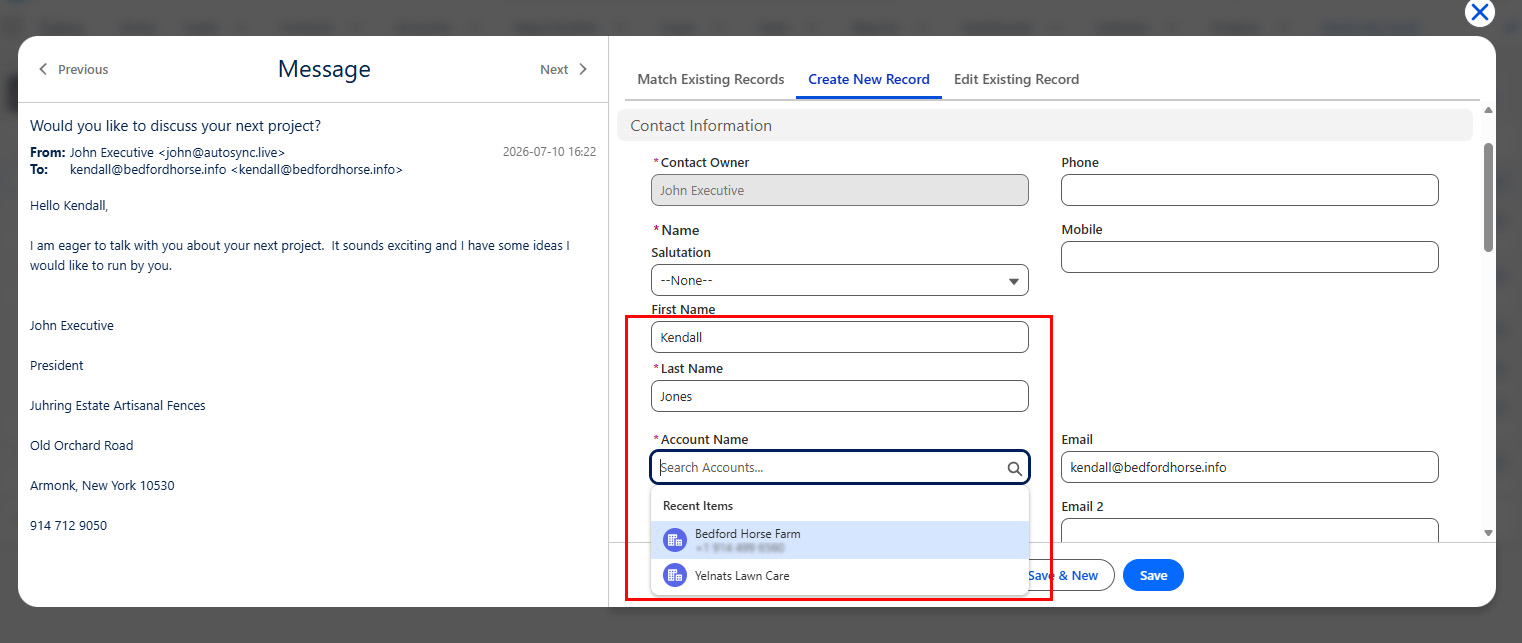
5. Note that a Contact cannot exist in Salesforce without an Account. In the Account field, begin typing a few letters of the Account name, though the app may be able to identify by domain which Account is likely and present that as an option. Once you find the desired Account, click on it to fill in the field. Click Save to save and Create the new Contact in Salesforce which will be related to the chose Account.
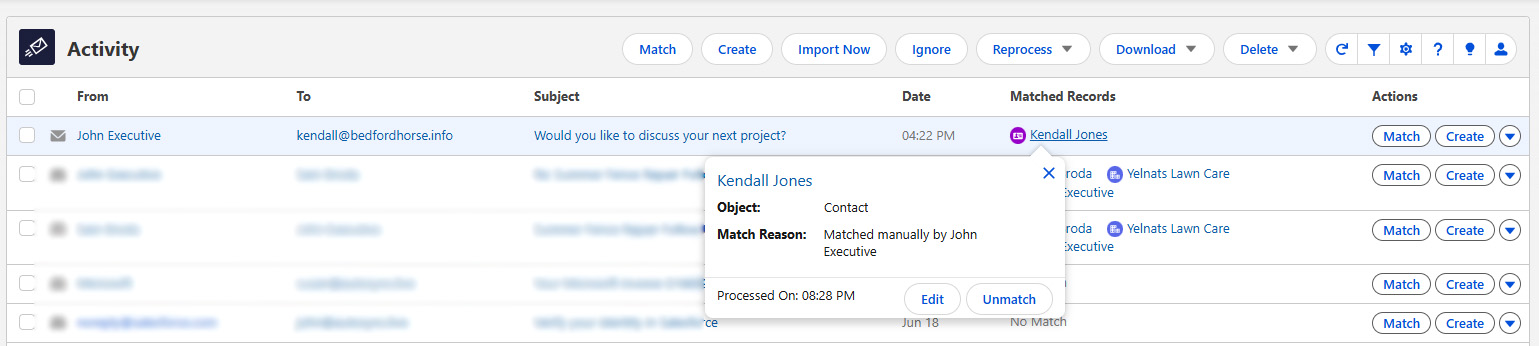
6. After you click Save, you will return to the view of the Activity Dashboard which will show the match for that email listing. If you hover over the Contact’s name in the Matched Records column, the pop-up will indicate the Match Reason, which in this case was created and matched manually.
With the email address added, future email to and from this person will match to their Contact and Account record automatically. Also, any email with status No Match that may be to or from this person in the Activity Dashboard will get automatically reprocessed and matched in the next 20-minute cycle.