Create a new Contact and new Account
helpH2
1. In the list of emails, find a message for which you want to create a new Contact. It can be best to choose an email from the person, instead of to them, as will be explained shortly.
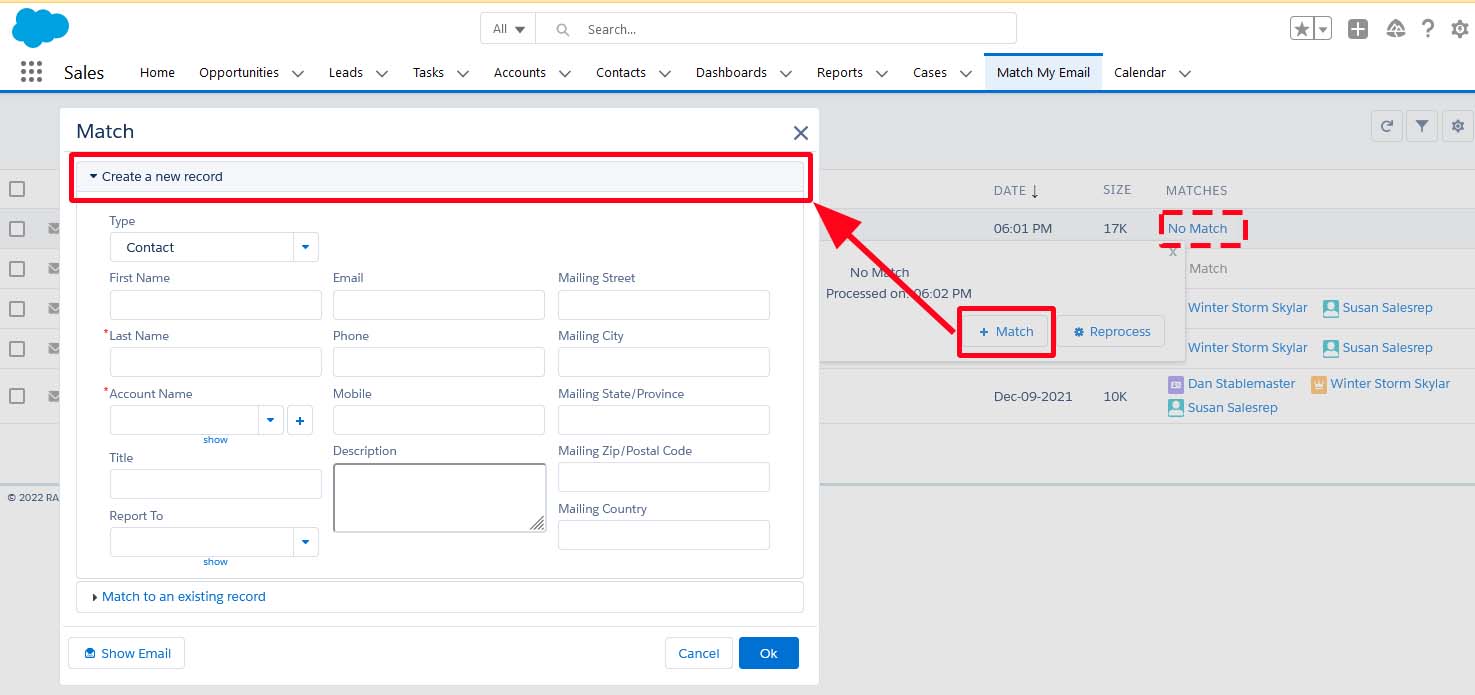
2. Hover over the No Match in the far right column and in the Match Details popup, click +Match button. In the next popup window that appears, click the top bar Create a New Record.
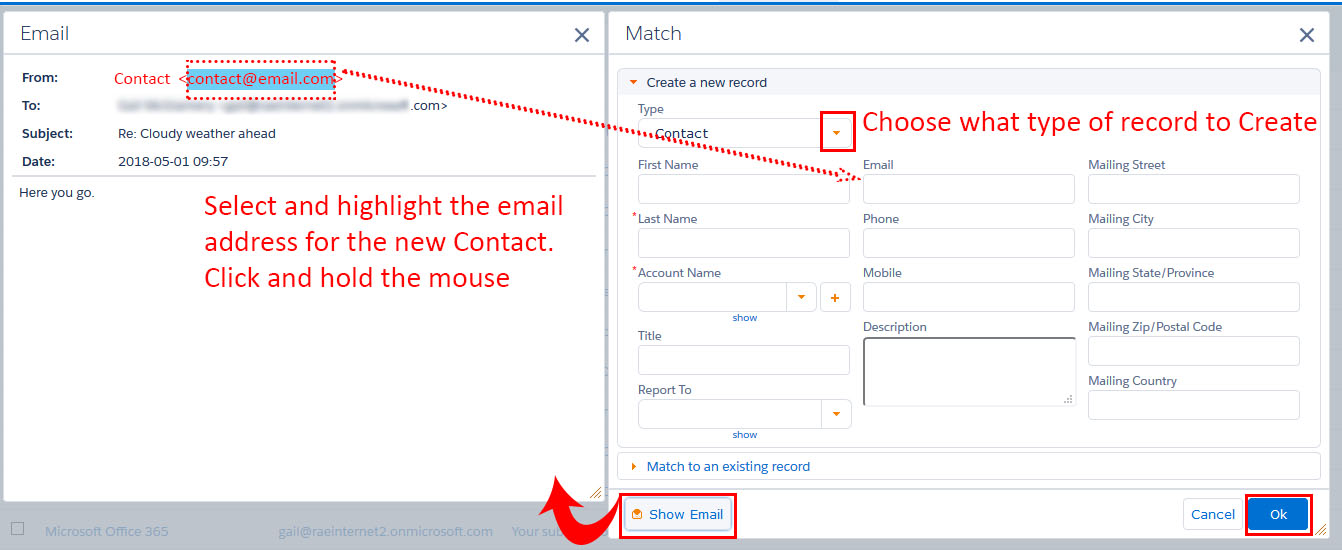
3. From the drop down menu, choose Contact and click the envelope button in bottom left corner of popup window. This will open the email side-by-side. If you selected an email from the person to be made a new Contact, their email may contain a signature which will provide data for populating the web form. You can select text within the email and use copy/paste or drag/drop, or simply type data, to fill in the fields of the web form.
5. Note that a Contact cannot exist in Salesforce without a parent Account and so the Account record can be created here as well. Type in the name for the new Account record. Match My Email will do a forward lookup but will not find it since it is new.
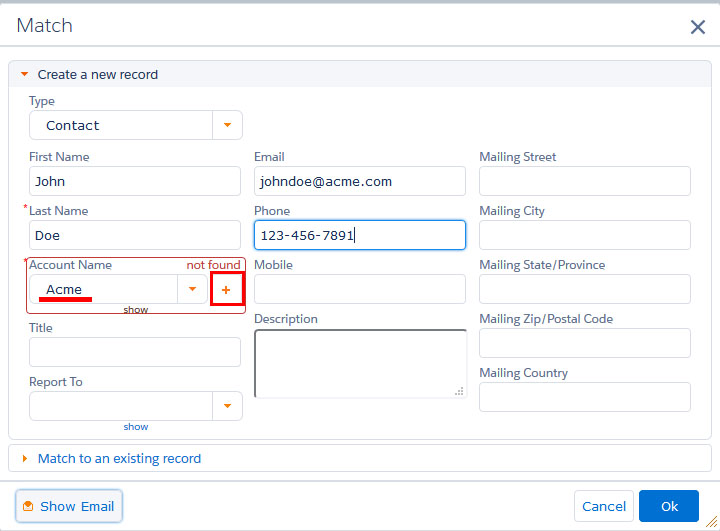
6. Click the +New button to indicate it is a new Account to be created. The area will turn blue and show the word New. Complete the fields as needed and do not miss adding the email address into the email field. Click OK.
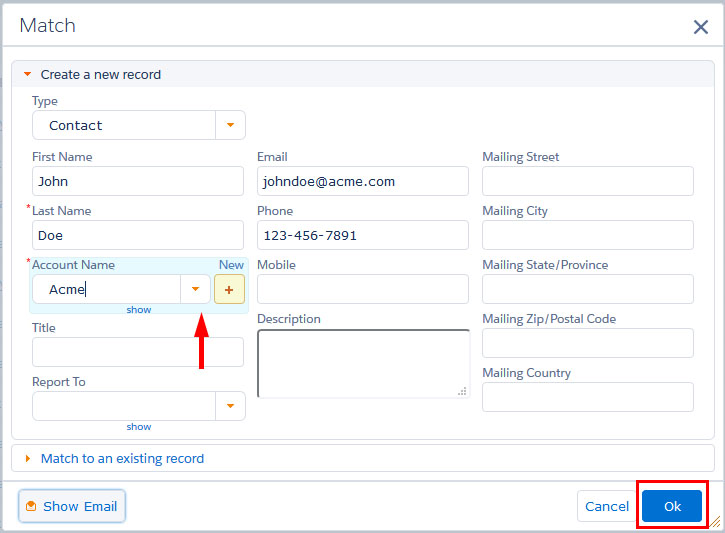
The system will then create the Account and Contact records, link them in Salesforce as parent and child, and match the email message to both. With the email address added to the Contact record, future email to and from this person will match to their Contact and Account record automatically. Also, any No Match status emails to or from this person in the Email Cloud will get automatically reprocessed and matched in the next 20-minute cycle.