Using the Match My Email Composer
helpH2
Match My Email provides its own email composer that can be accessed using a custom Send Email button. When uploading email to the MME custom object, messages can be selected for Reply, Reply All, or Forward also using the MME composer. Why use the MME option?
The native Salesforce Email composer will put a copy of the sent email in the Activity Timeline. Match My Email may then obtain the BCC copy or copy in the User’s Sent folder and sync the message to the same record. This can, inadvertently, result in two copies of the same message in Salesforce. If MME is uploading to the Activity Timeline, a second copy may appear there. If MME is uploading to our custom object, the message is stored in two places.
The MME composer is a way to avoid this. Using the MME composer will not place a copy immediately in the Activity Timeline. It will send a BCC copy to the User’s email account and within 20 minutes, that copy will sync to Salesforce, landing either in the Activity Timeline or custom object depending on company preference. Those that use the MME custom object have the further options of Reply, Reply All, and Forward for selected messages. This functionality is available in both Classic and Lightning.
For Lightning, the MME email composer offers the insertion of merge fields, template creation and use, and previews, with formatting options. One distinction is on a threaded message that is forwarded or replied, a template can be added above the thread with MME’s composer and will not overwrite the thread as happens with Salesforce’s native functionality.
Also, it is important to note that Match My Email will match emails whether one is sending emails from within Salesforce or using their own client or webmail. Sending email out of Salesforce is a convenience that allows Users to remain within Salesforce. However, the benefit of using MME is Users may also send email from their email client or from webmail when not logged in to Salesforce. The key to MME usage is making sure a copy of any email to be synced lands in an email folder selected for importing.
Within Lightning, a company may have upgraded to Dynamic Actions for Lightning pages. If so, the method for placing the “Send Email” button that launches the composer differs slightly from when normal Page Layouts.
Lightning with Dynamic Actions
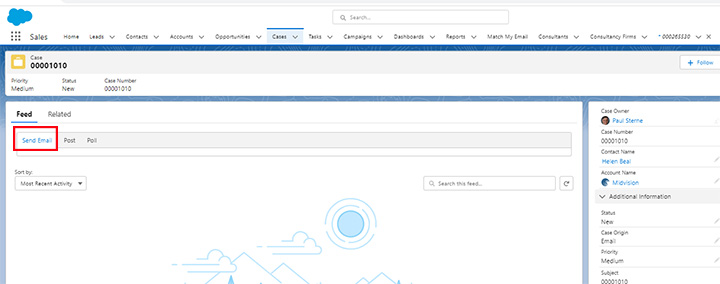
Match My Email provides a Send Email button that will launch our email composer in Salesforce. For most objects, that button can be placed in the Mobile & Lightning actions section and will appear on the top right of the screen. When clicked, the composer launches in the middle of the screen. However, Cases are a different kind of object and Action Buttons work in a different way for Cases.
To illustrate, if placed on a Case object layout in the same manner as the Contact object layout, the Send Email button will actually appear in the Feed Area.
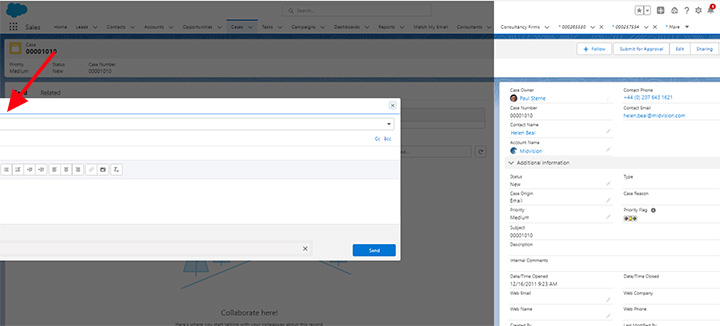
When clicked, the composer opens shifted to the left and chopped off making it unusable.
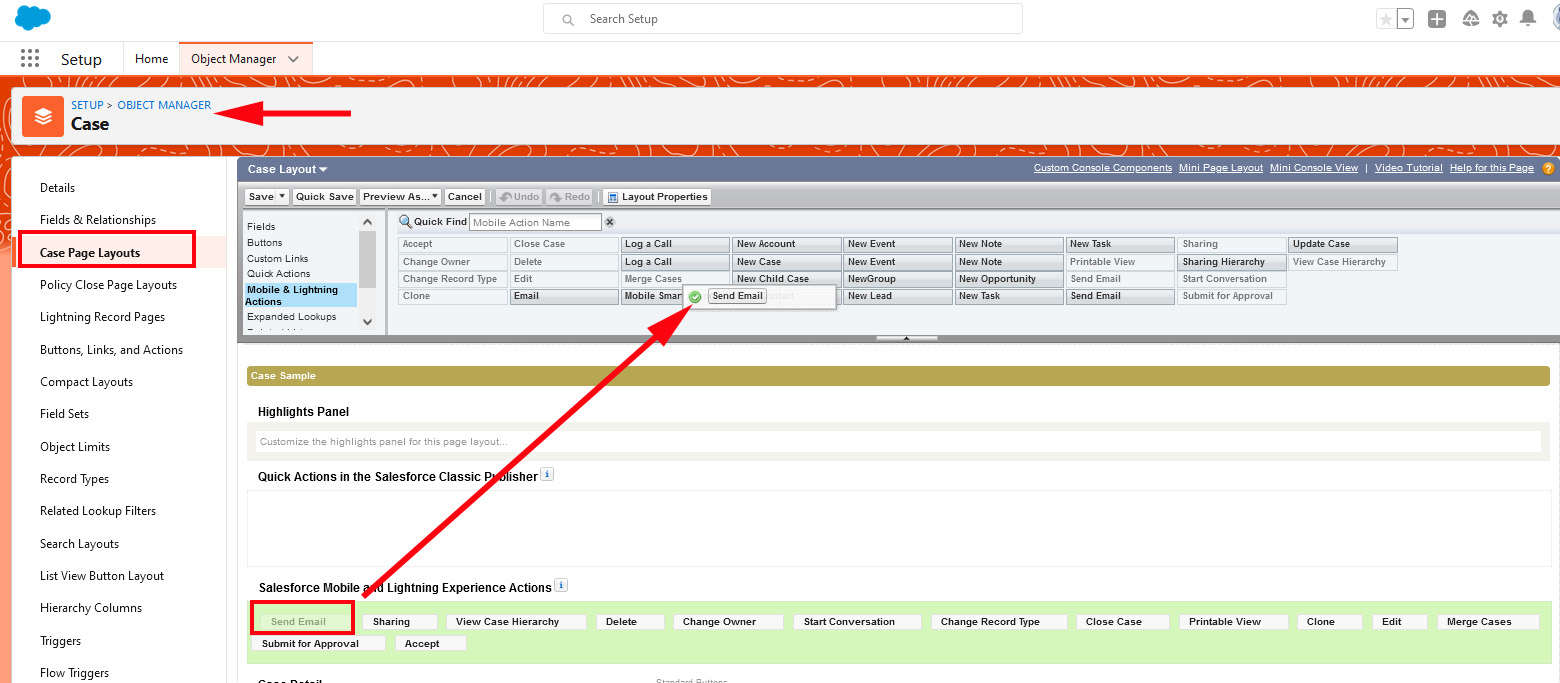
Therefore, if you have previously placed the Send Email button for Case on the object Page Layout in Mobile and Lightning Actions section, you would want to remove it. To do so:
- Click Setup > Object Manager > Case
- Click on Case Page Layouts and then click name of the page layout you need to edit.
- Find the Send Email button in the Mobile & Lightning Actions section and drag it up to the top to remove from page.
- Click Save.
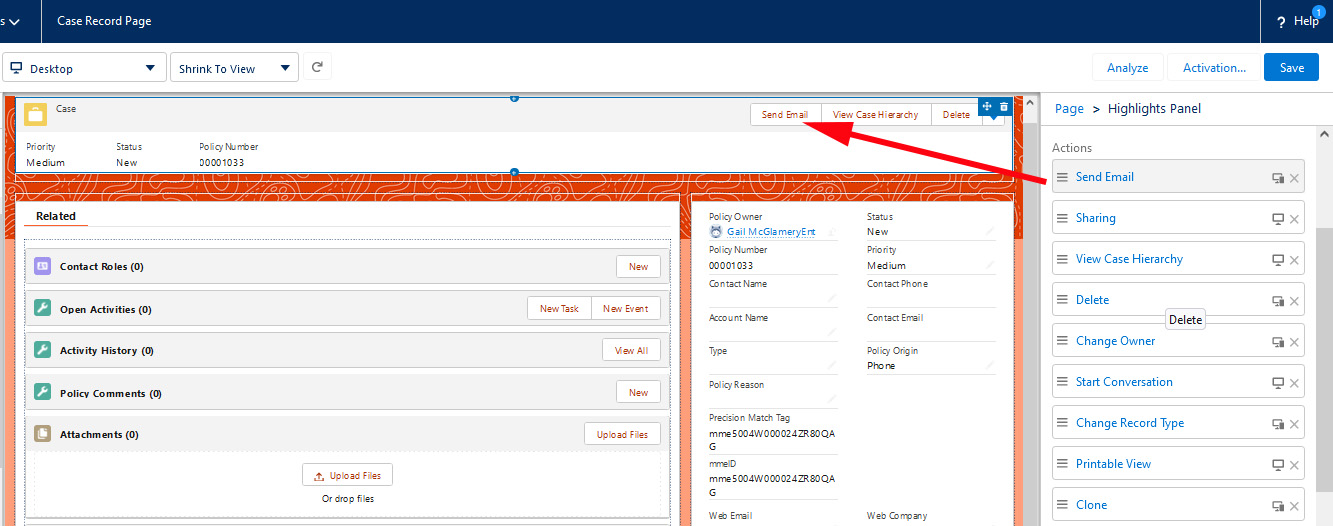
To have the button and composer show correctly on the Case Lightning Record Page, it is necessary to upgrade to Dynamic Actions in Salesforce. The Send Email button can then be added. It will then appear on the page layout at the top, consistent with the location on other objects. More importantly, the composer will open correctly in the middle of the screen. To implement this:
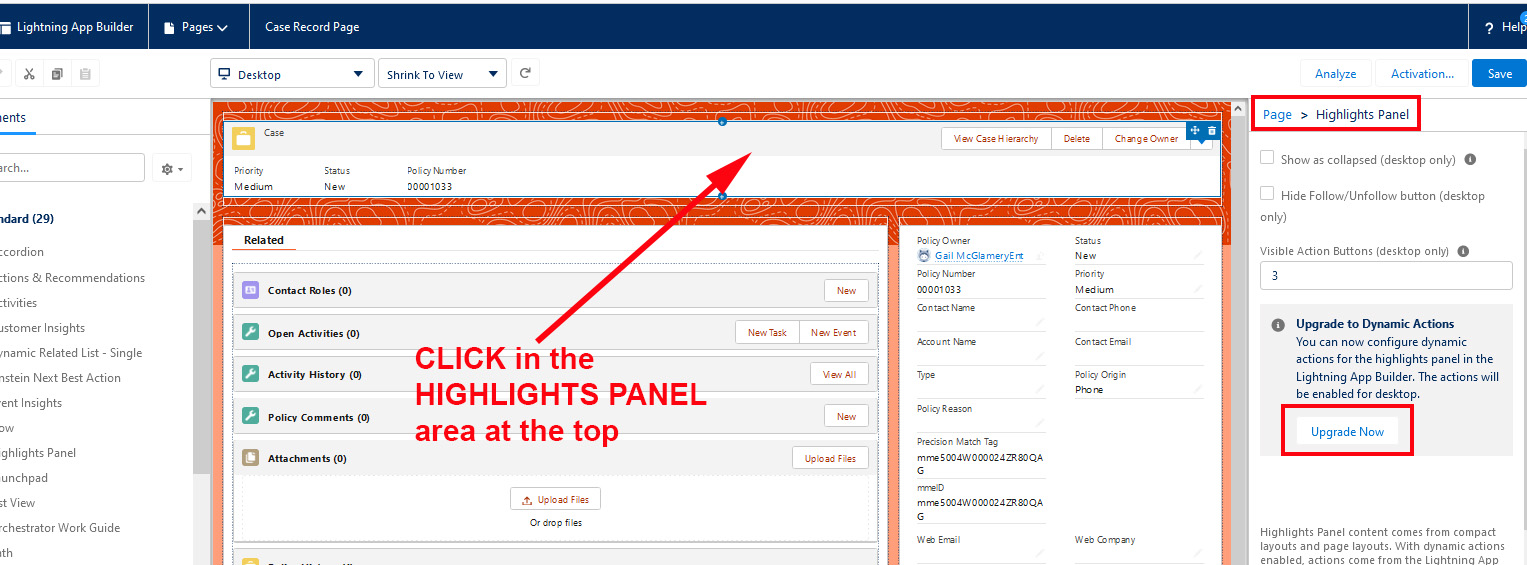
- Open a Case record
- Click Setup -> Edit Page. This will take you to the Lightning Record Page.
- Click the top Highlight Panel
- In the right sidebar, if you are prompted to Upgrade Now for Dynamic Actions, please do so. If you see Action buttons, you are already upgraded and can skip to next step. If you do need to upgrade, just proceed through appropriate choices and complete.
- Click Add Action button and add Send Email button from GLOBAL ACTIONS (NOT from Custom Actions)
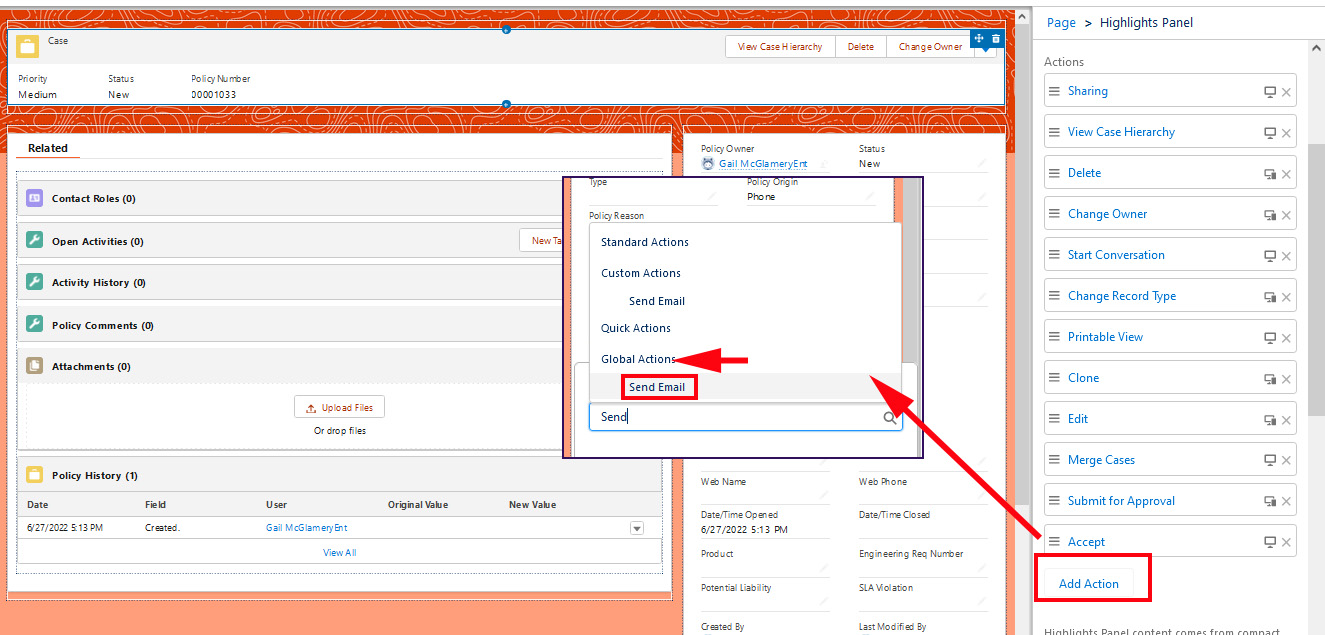
- Move Send Email to be the first button so that it appears prominently when viewing a Case. Otherwise, it will be in a “More” drop list.
- Save. If needed, you can go through Activation of this page to Assign as Default for organization or as is desired for profiles or apps.
If you use more than one Lightning Record Page for Cases, you may want to go to Setup > Object Manager > Cases > Lightning Record Pages and click the label(s) for other pages and make the same adjustment.
Lightning without Dynamic Actions
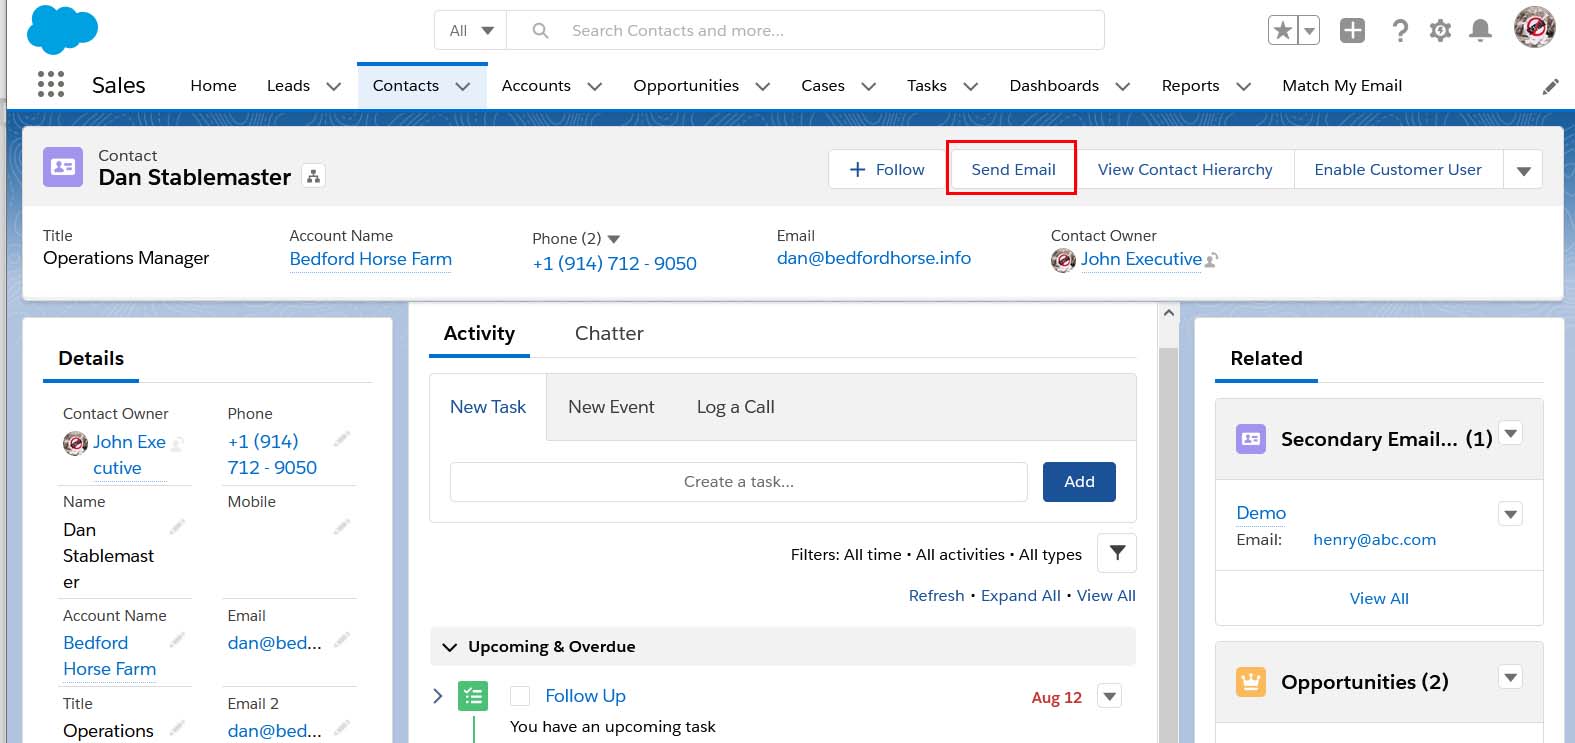
To send an original email from any record, the Send Email button will need to be placed on the Page Layout in the Salesforce Mobile & Lightning Actions area. When placed as the first object, it will appear prominently at the top of the record view as indicated below. If placed in that section elsewhere, it may be required to use the carat and pick the option from a drop menu.
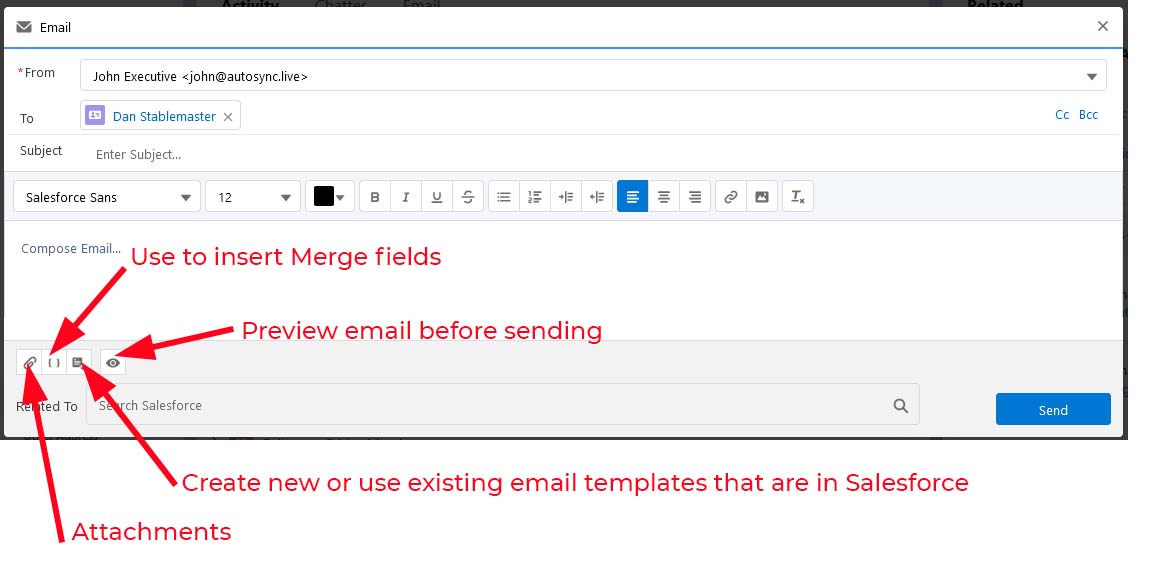
When clicked, the email composer will launch as a pop up window. The From field will automatically fill with the email address of the Salesforce User. If your organization is using Organization-wide email addresses in Salesforce and the user launching the composer has access, there will be a carat to the far left of the From address. Clicking the carat will present the Organization-wide email addresses available to this User for selection.
The to field will automatically fill with the name of the record if the composer is launched from a Lead or Contact record. If the email composer is launched from an Opportunity or Account record, the Related To at the bottom will fill in, but the User will still need to type a few letters to do a lookup for the appropriate Contact. Buttons at bottom left allow you to attach files, insert merge fields, create an email template or use an existing template, as well as Preview the email before sending.
Using Salesforce Classic
In Salesforce the Match My Email email messages object will appear in your Leads, Accounts, Contacts, and Opportunities (You may or may not see our object in all of these as it is dependent on your configuration at time of setup) .
To send a new Email from within Salesforce click the “Send Email” button that appears in the custom object.
Then begin to type a contact or account name etc, Salesforce will search through your records and offer suggestions for auto complete. Here we can also attach files if necessary and other options common with all Email clients, When you have completed your Email click “Send”