Create an IMAP Import
helpH2
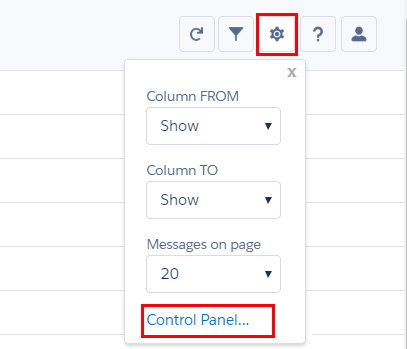
- An Administrator for the Match My Email account needs to sign in to Match My Email. Click Settings on the upper right and to sign in and navigate to the Control Panel.
2. Click Users and find the User in the list that needs to be activated.
3. Click the toggle next to the User’s name and the Activate Import panel appears. The Email Service should automatically fill in with the service connection already created during app setup. If this has not been done, refer to Match My Email’s support page where you will find Setup Guides for IMAP Users.
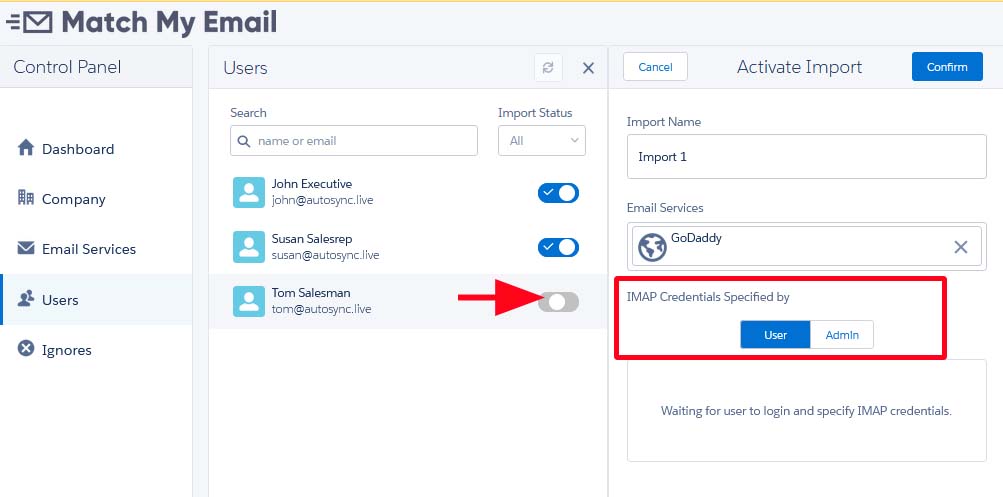
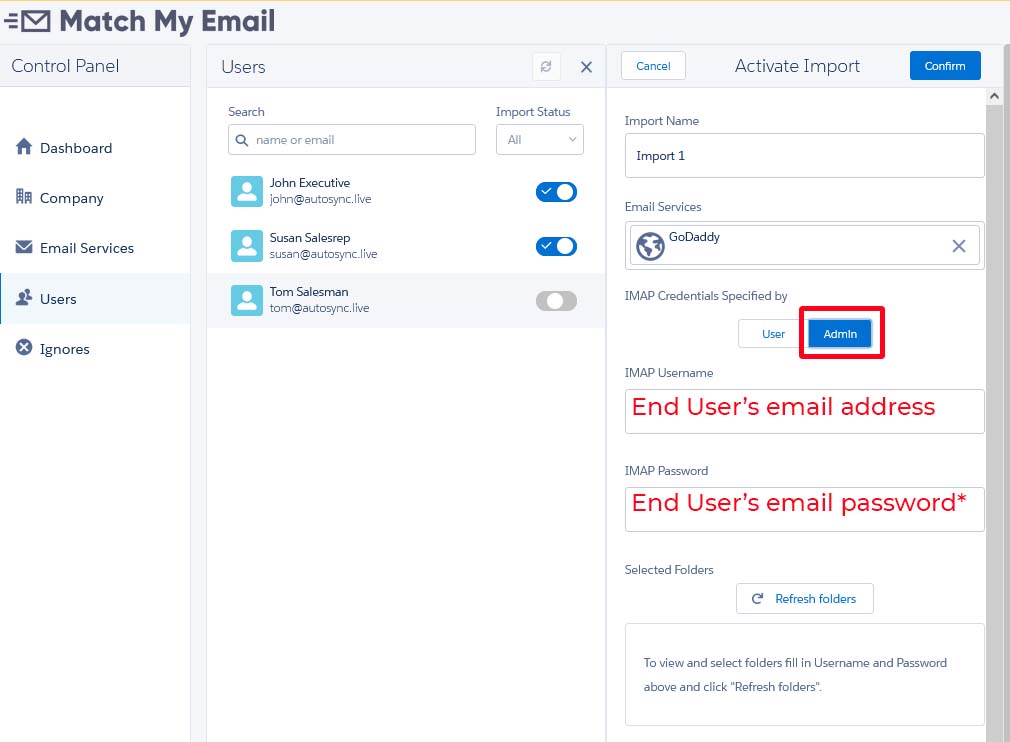
4. You will see “IMAP Credentials Specified By” and a choice. If the Administrative Use already knows the email password for the User, they can click Admin and enter the User’s email address and email password. *IF TWO-STEP VERIFICATION is enabled for the User, then the User will need to have created an app-specific password for Match My Email in their email account and that is what would be entered here. Click Refresh Folders. The Inbox and Sent Folders should be selected already. You can modify and add to the selection, and then click Confirm.
Regarding folder selection: Since Match My Email will only import the last 24 hours of email in any folder, do not select an archive folder or many subfolders to bring in email history. Contact Match My Email support staff about how to use our Legacy importing strategy. As long as emails are left in the Inbox or Sent folder for 20 minutes before deletion or moving to a subfolder, the system will be able to import a copy. If Users are extremely tidy about these folders, or if rules are setup to immediately move emails into subfolders, then those subfolders should be selected if the content in them needs to be uploaded and matched.
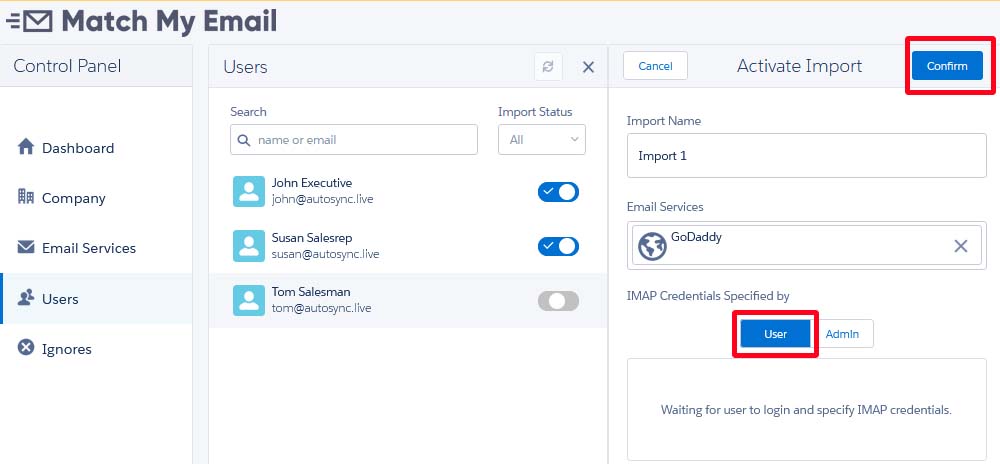
5. If the Administrative User does not have the User’s email password, then the End User will be entering their own email address and email password to complete setup. The Admin User should leave the choice as User and click Confirm at the top. This confirms the ability of the User to see the available import to be completed. The toggle next to the User’s name will be blue, but the import is not yet active. The End User will then need to complete steps beginning with Step 6 below.
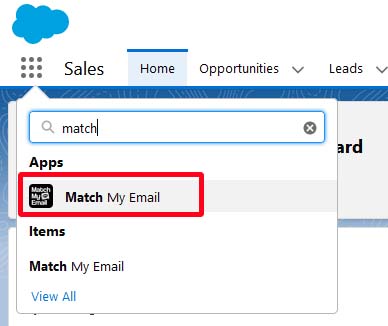
6. The End User will need to login to Match My Email. The quickest way to do so is go to the Salesforce App Launcher, search for Match My Email, click the app name and in app menu click Match My Email again. (If you want to save all these extra clicks, please contact your Administrator about how to add the webtab to your main navigation menu.) Then click the Settings button on the right side of screen and choose Control Panel.
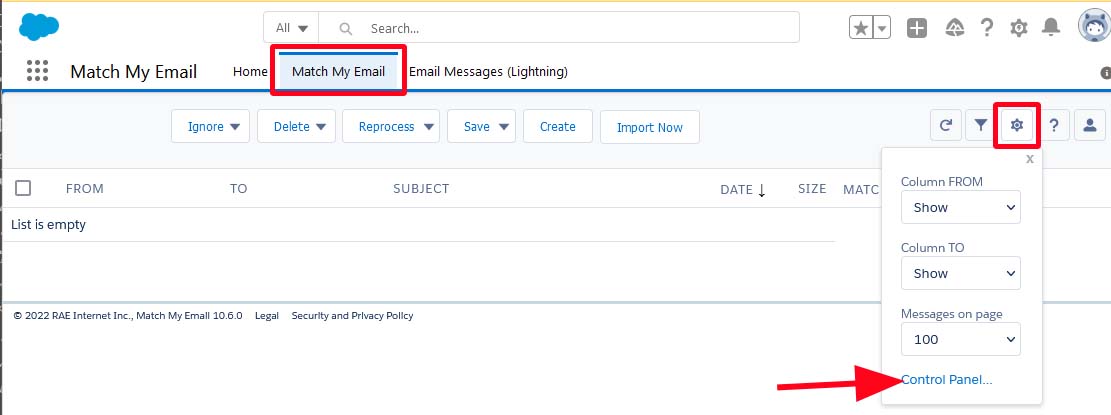
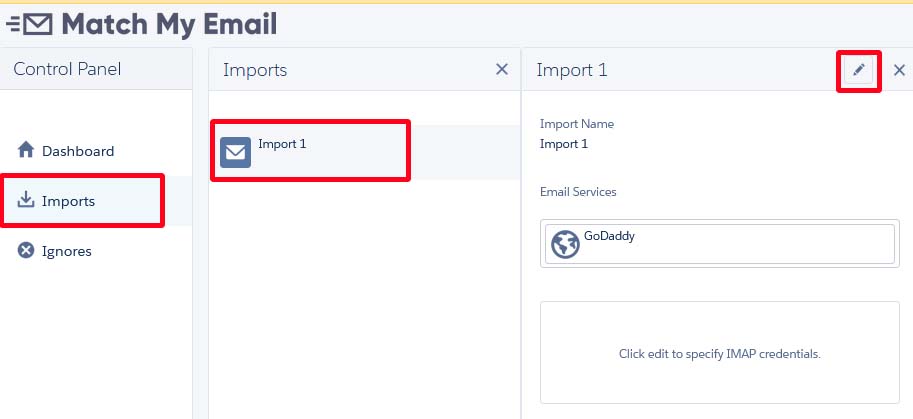
7. When the End User is NOT an Admin in Salesforce, they are not an Admin in Match My Email. Their control panel menu is minimal. The End User will click Imports on the left, the name of the Import that was confirmed by their admin, and then the Edit button. They can then enter their email address and email, or app-specific, password, Refresh Folders, modify folders as needed (with same guidance as mentioned in Step 4 above) and click Confirm.
8. If the End User is an Admin in Salesforce, they will see the same menu as shown in Step 5 above. They would click Users, scroll to find their name and click the toggle. In the Activate Import panel, they will click the edit button, enter their email address and email, or app-specific, password. Refresh folders and modify if needed, based on folder selection info in Step 4 above, and click Confirm.
Within twenty (20) minutes of confirming an import, the system will automatically begin the first import cycle. Be advised that in the first processing cycle the system is going back 24 hours in selected folders. Depending on how many folders were selected and how much data is in folders for the last day, the initial import may time out. Allow the system to run a few cycles if necessary.