
Apple mail customers and App-Specific Passwords
helpH2
Apple requires all third-party app connections to use app-specific passwords for added security. This is a great security feature for Apple users, but does mean those with Match My Email imports may have to follow a few steps to make sure our app can connect. This change applies for @me.com and @icloud.com email addresses.
It is necessary for these users to have two-factor authentication enabled in order to generate app-specific passwords. Two-factor authentication is different than two-step verification. Some users may need to first enable two-factor authentication. First, go to https://appleid.apple.com and login.
- Under Security section, if you see “Get Started” under Two-Factor Authentication then it is not yet turned on and you will need to proceed.
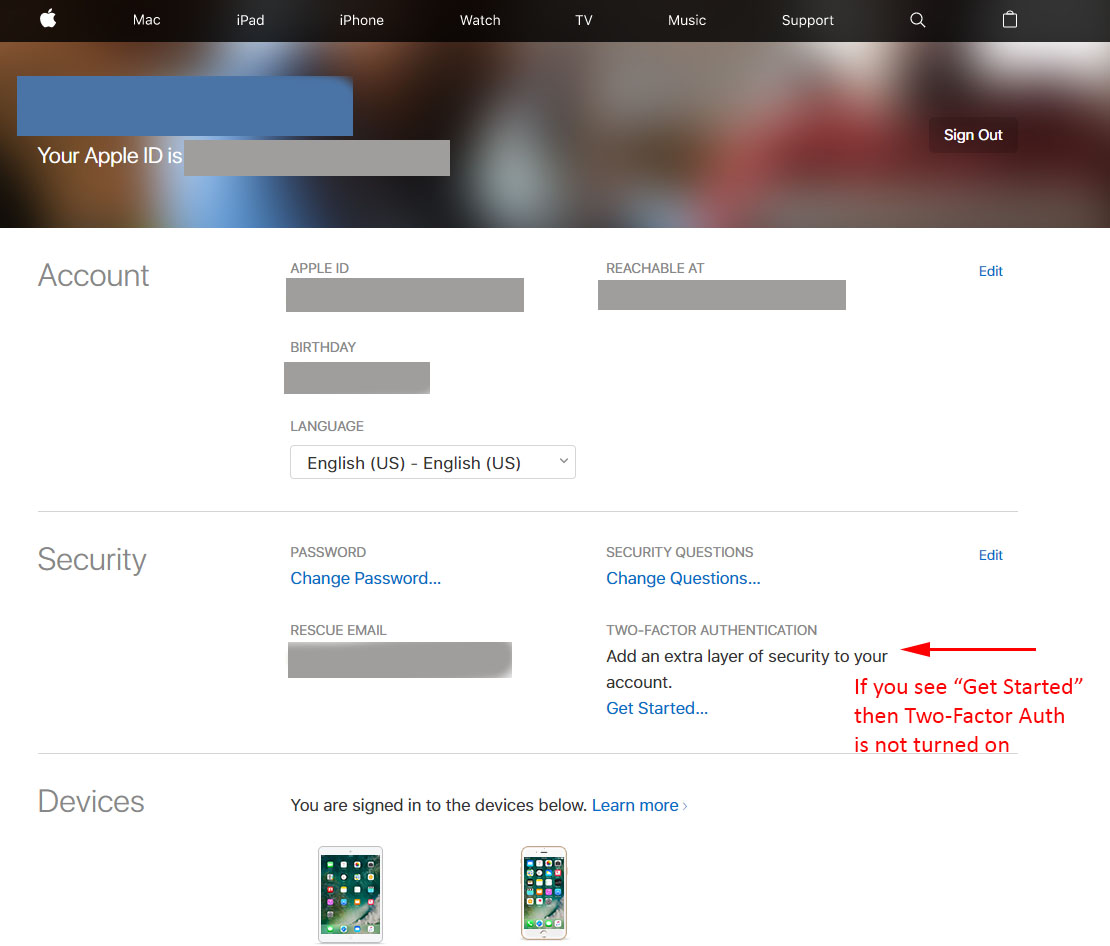
- Click Get Started. Read interim window and click Continue.
- This takes you to a window on How to Turn on Two Factor Authentication. Thus, follow steps as directed based on if you have an iphone, ipad, or Mac with El Capitan. Then click OK.
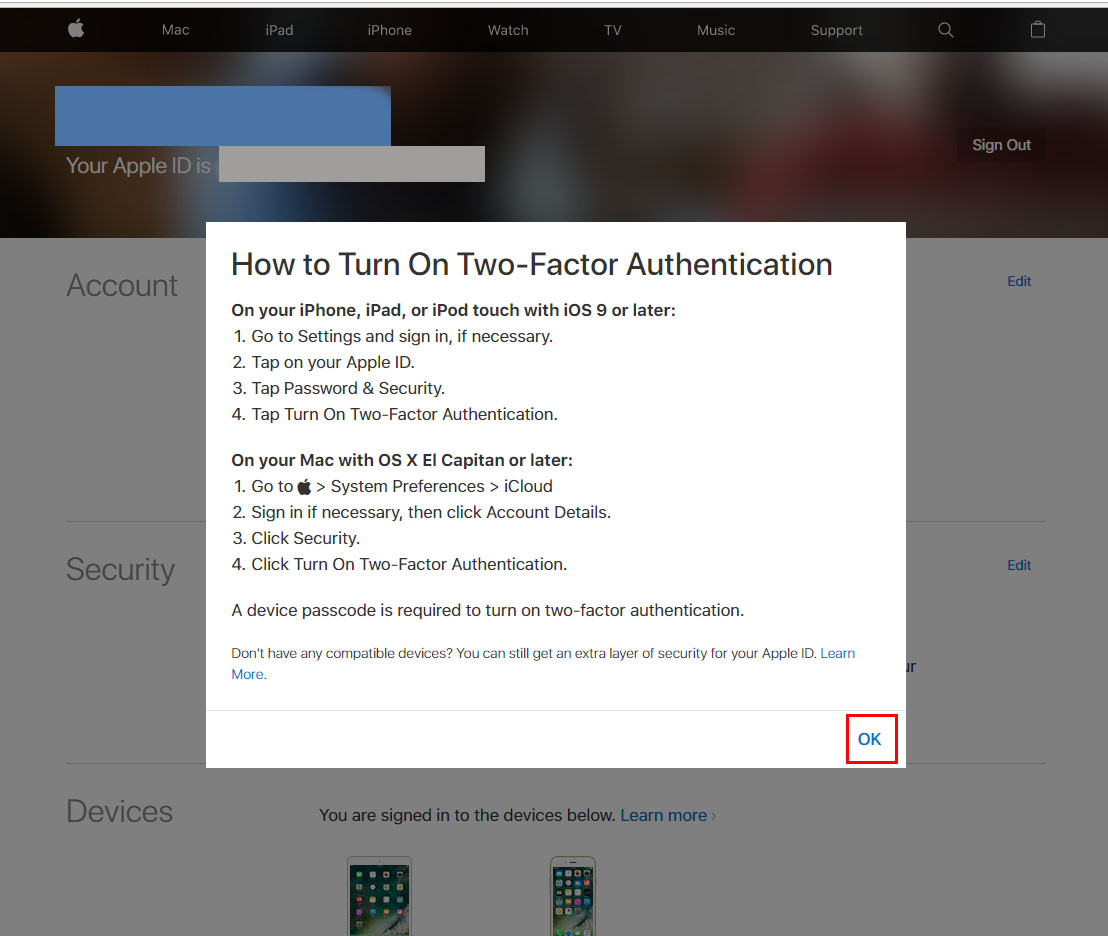
Our support staff followed the steps on an iPhone.
At Settings they touched name for Apple ID at top. Touch Password & Security, Touch Turn on Two Factor Authentication > Click Continue > Enter Phone number or accept option for text/phone call. Click Next. Enter verification code – or in our tester’s case they could use touch verification with fingerprint. It will then be turned on.
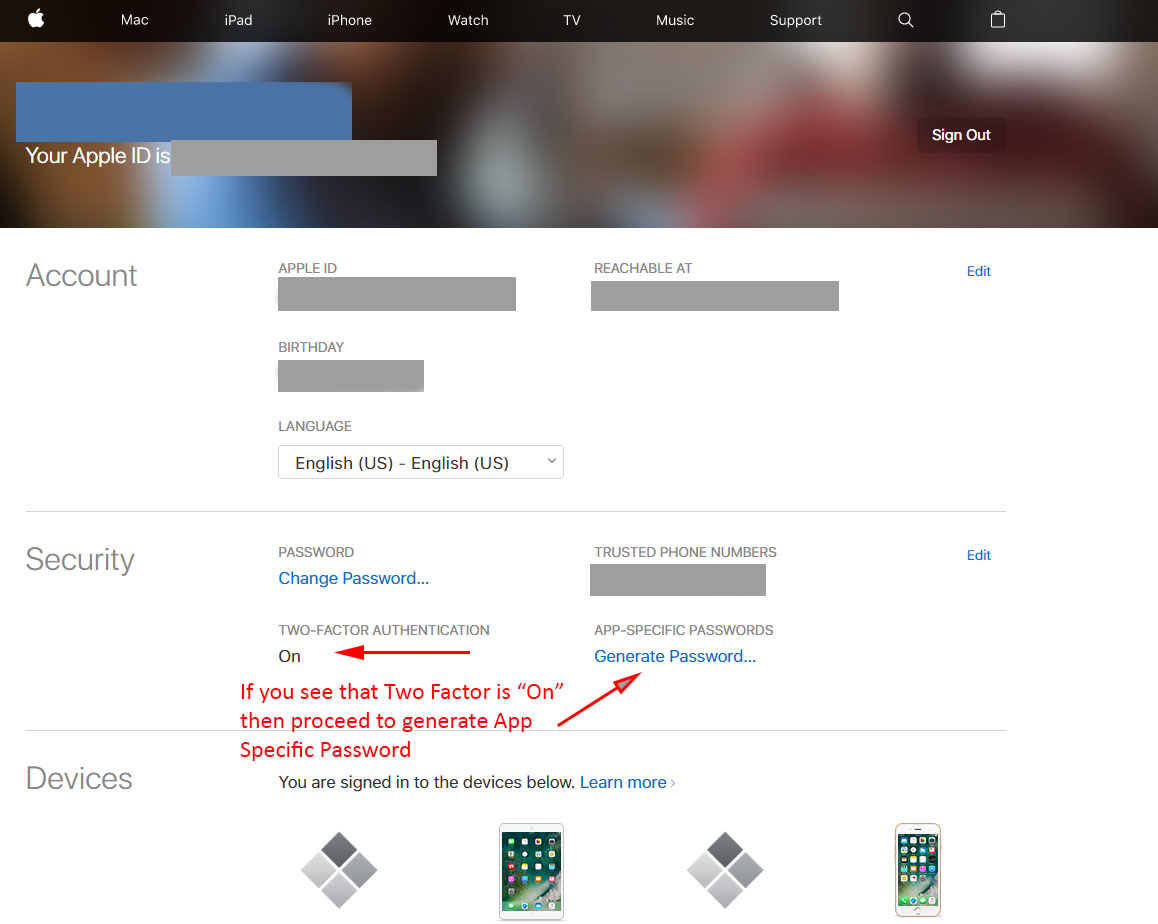
It may be necessary to login again to Apple ID. Now, the Security section will show Two Factor Authentication is turned on. To the right, for App-specific Password click Generate Password.
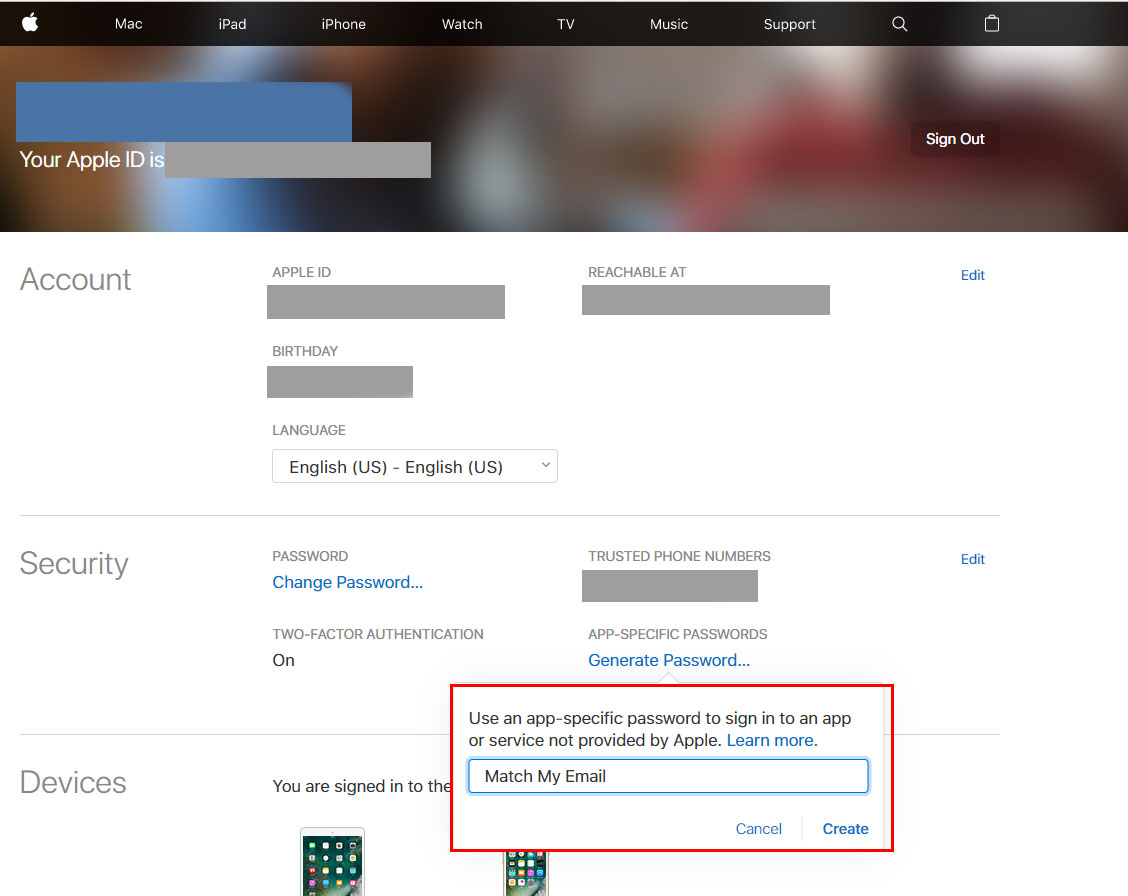
In little pop up, give a label to the password you are creating – in this case Match My Email. Click Create.
An app specific password will be created and will show in the next window. It will be a very complex password. Select and copy. Now, you can use this for your Match My Email import.
- Navigate to the Salesforce App Launcher > Match My Email Setup > Control Panel
- If you are an Admin in Salesforce, you will have a robust menu and should click Users and then the toggle by your name.
- If you not an Admin in Salesforce, you will only need to click Imports and the +.
- To add an import, choose Other for hosting as you are wanting to connect via IMAP to your icloud.com or me.com account.
- In the list, find the correct option for your IMAP service
- On the next screen, enter your email address and then for your password, enter or paste the app-specific password that was generated.
- Click Refresh Folders. You should connnect and see your folders. Select those desired in addition to Inbox and Sent and click Confirm at the top.