For Upload as Task – Adding Notes & Attachments section to Email Message Layout
helpH2
Users that choose to upload email messages as completed tasks (which places them in Past Activity/Activity History), attachments are uploaded and stored in Notes & Attachments.
When viewing an Email Message in Salesforce.com, you should be able to see a section for Notes & Attachments, in which Attachments are available. If the section is not visible, follow these steps to add it to the page layout.
1. Sign in to Salesforce.com
2. Navigate to a view of custom objects.
In Lightning, the path is Setup > Object Manager and click on the label for Email Messages (in which API field name begins with MME).
In Classic, the path is Setup > App Setup/Build > Create > Objects and click on label for Email Message.
3. Edit the Email Message page layout.
In Lightning, click Page Layouts on the left, then click on the correct page layout based on your Salesforce edition (PE/GE for Professional and UE/EE for Unlimited or Enterprise).
In Classic, above the Edit button hover over the link for Page Layout(s) and click Edit next to the correct layout for the edition of Salesforce.com used.
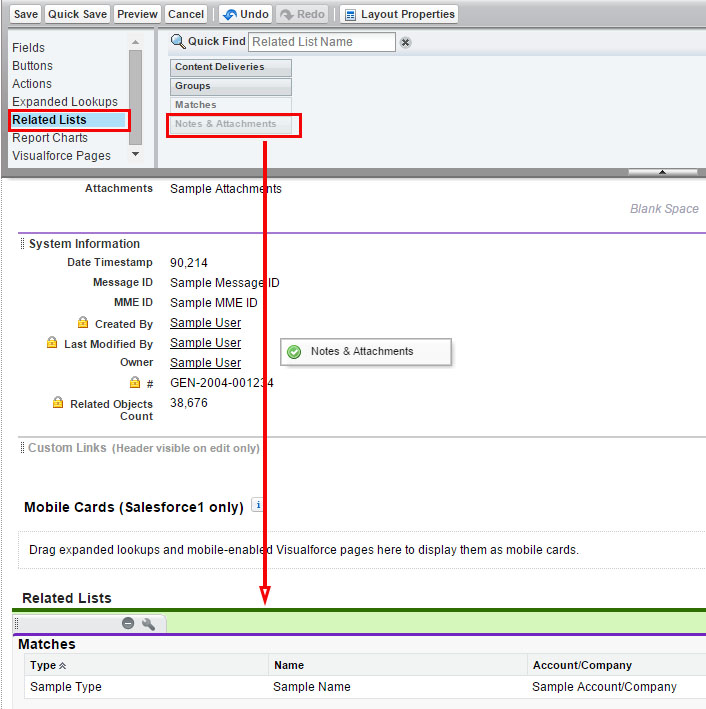
4. Click Related Lists option and then click and drag the Notes & Attachments down onto the page. The green line will guide placement in Related List area and must be showing when you release the mouse button.
4. As will be indicated, this related list is not customizable. Simply click Save.
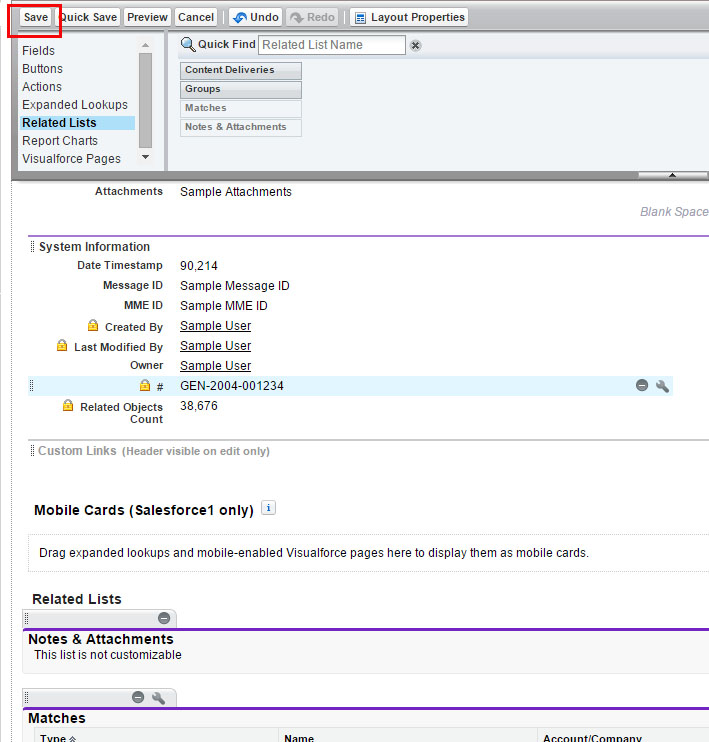
5. Click OK to confirm change to Email Message page layout.