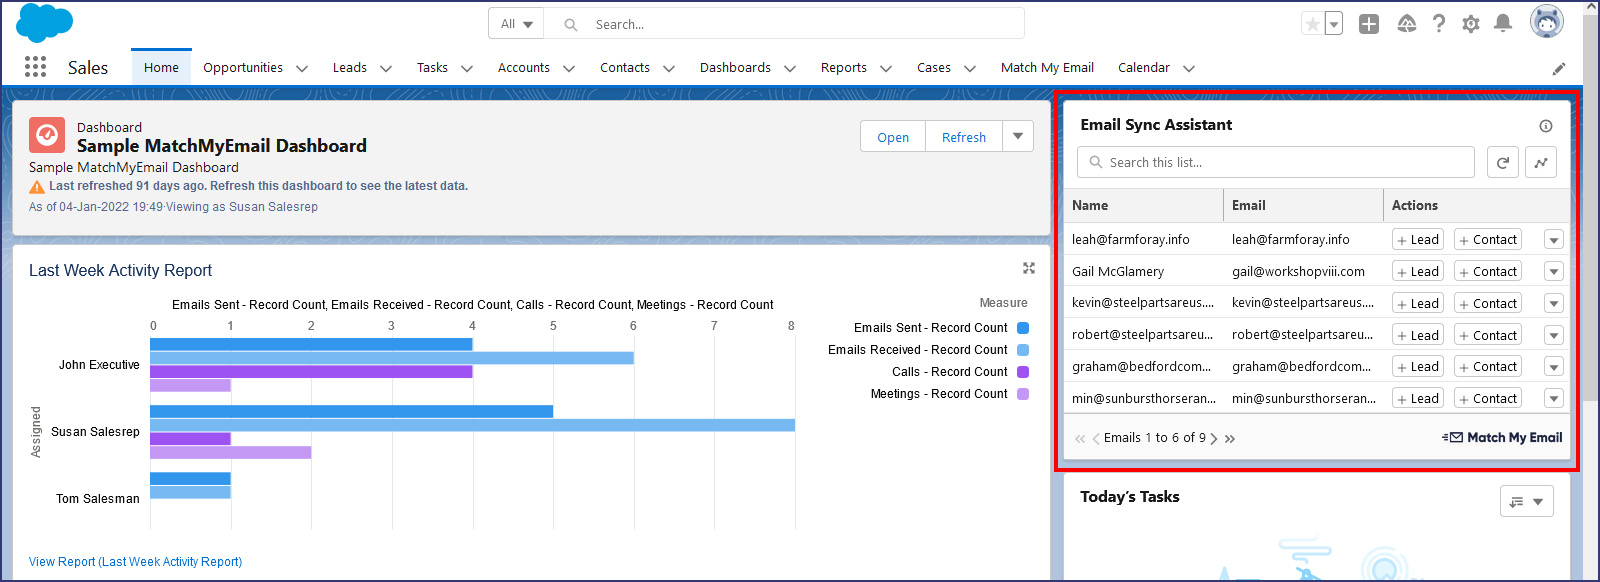
Using the Email Sync Assistant
The Email Sync Assistant will present a list of individuals with email addresses to which Match My Email (MME) has not made a match. The addresses come from email messages on the MME Activity Dashboard. In most cases, the status of the message to or from the individual was a No Match. However, if an email is sent to three individuals and two are matched, the third individual’s name will show up in the list.
Previously, Users could only perform actions such as creating new Salesforce records or creating ignore rules by signing into the MME Activity Dashboard. While this is still possible, the Email Sync Assistant brings this information into a component that can be placed on a Salesforce homepage. The goal is to make access to these features easier, just a few clicks away, and ensure an organization’s Salesforce database is as complete as possible.
The Email Sync Assistant component is installed with the managed package into Salesforce and is available for placement by a System Administrator.
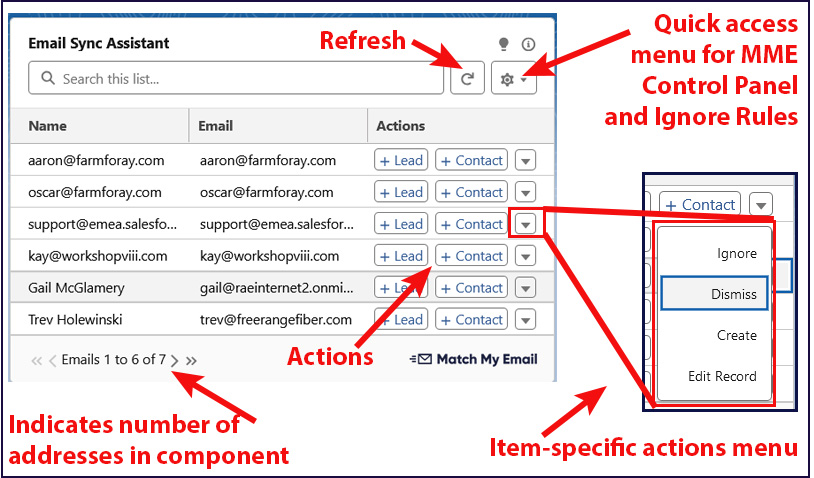
Taking a closer look at the component, it is possible to create a Lead, create a Contact for an existing account, create a Contact and a new Account, create an Ignore rule for the email address or dismiss the listing for later consideration. A User can refresh the list or quickly jump to the Control Panel to check the Ignore list. There is a search field at the top and the ability to advance through listings when there is more than the space allows on the first screen.
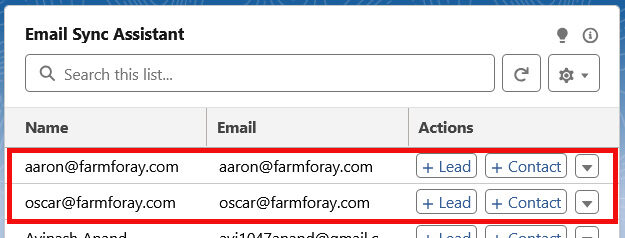
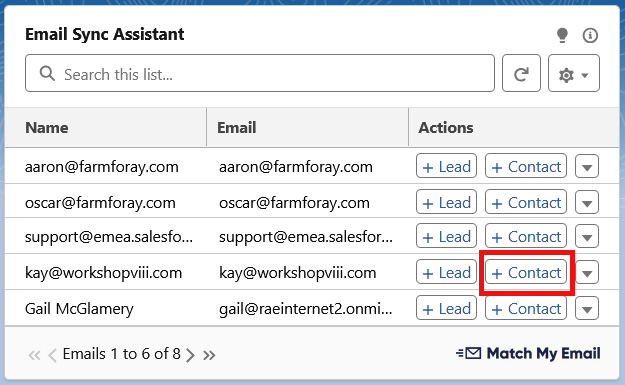
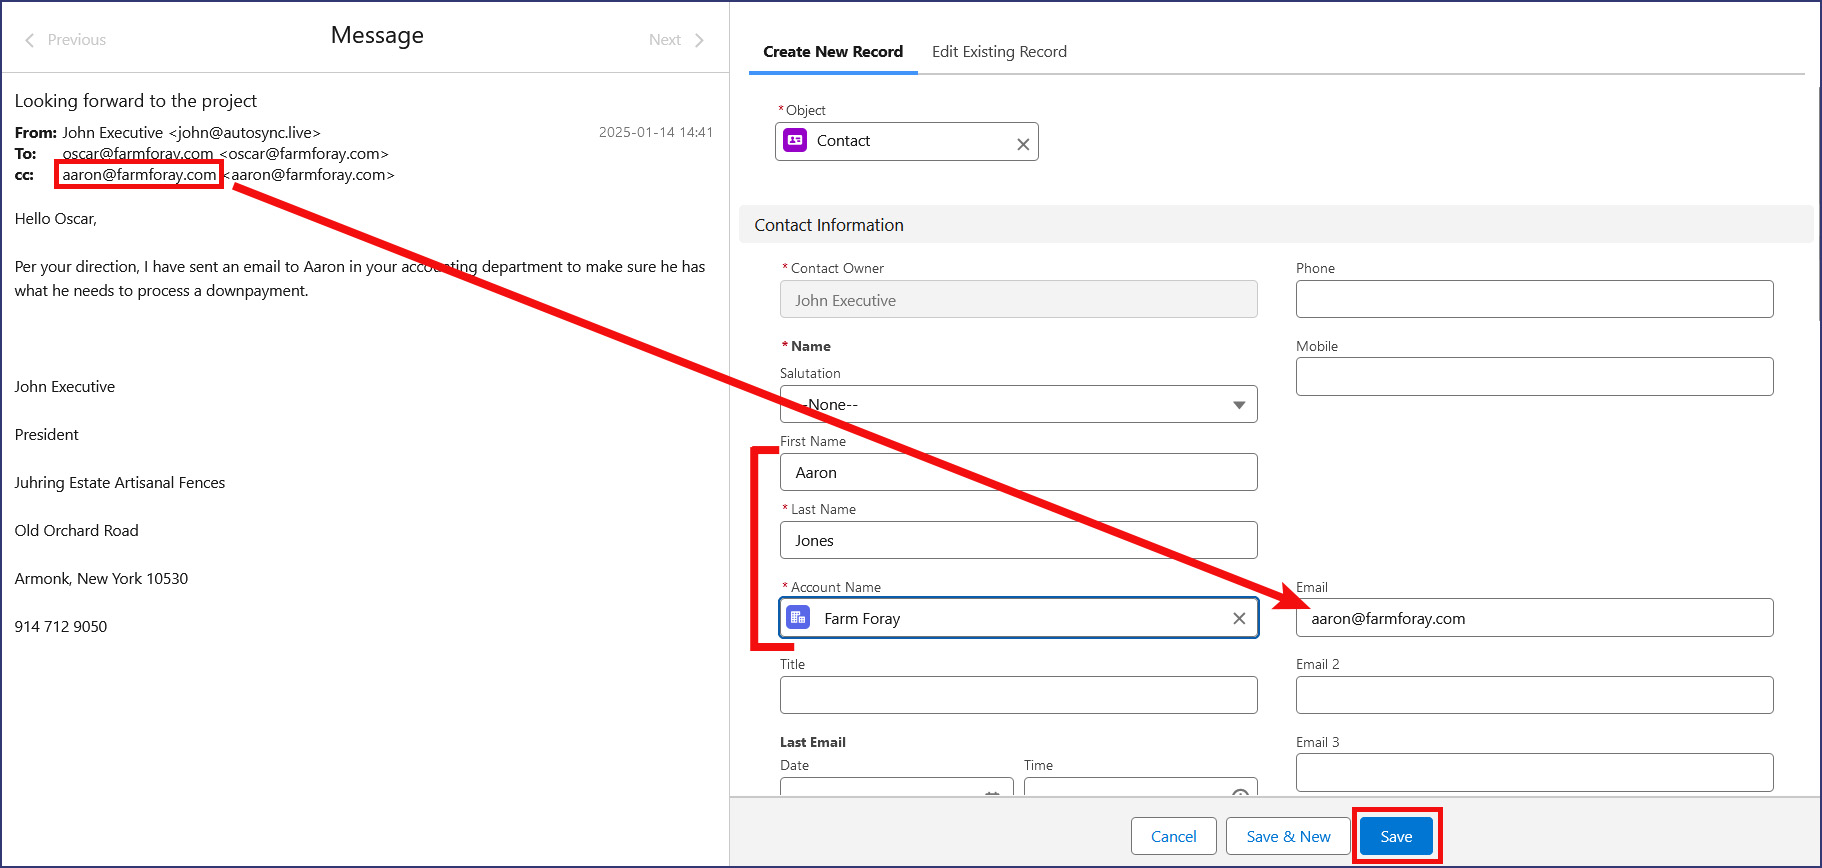
When someone appears in the Email Sync Assistant List, this reflects that there are emails in your Match My Email Activity Dashboard to or from these individuals which we didn’t sync to Salesforce. In the following screenshots, we can see the Email Sync Assistant shows both Oscar and Aaron from Farm Foray. Indeed, there are a few emails in the Match My Email Activity Dashboard that were sent by our User John Executive to them. These have No Match status because neither of these individuals is in Salesforce.

1. Creating a Lead
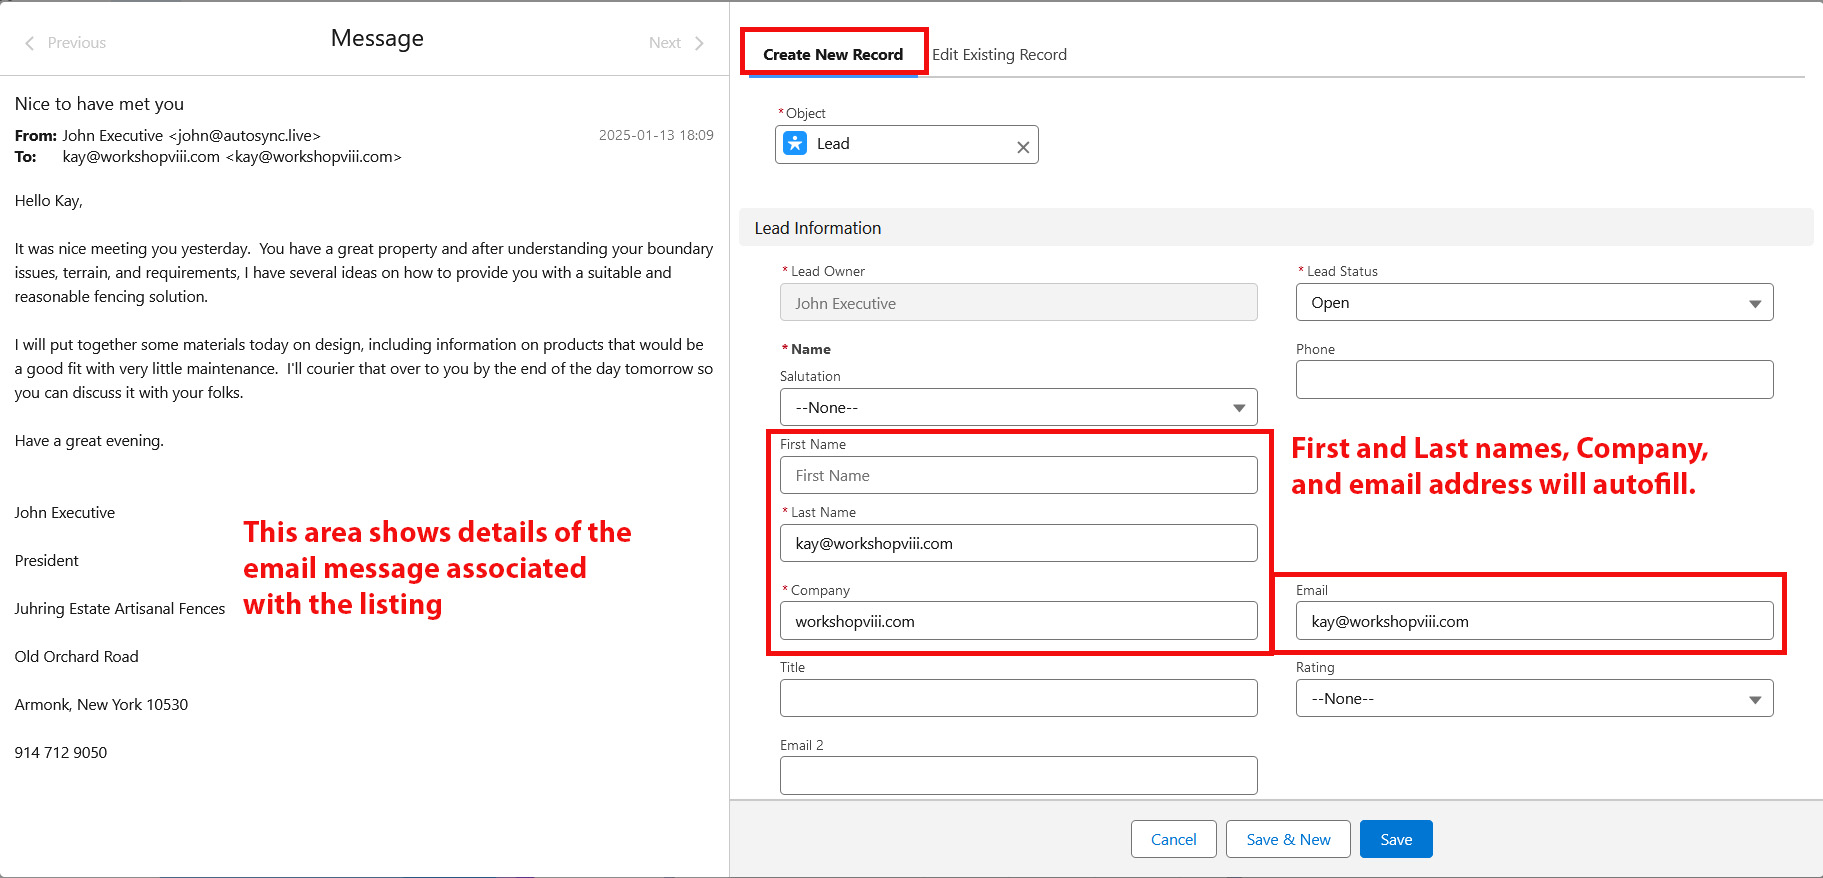
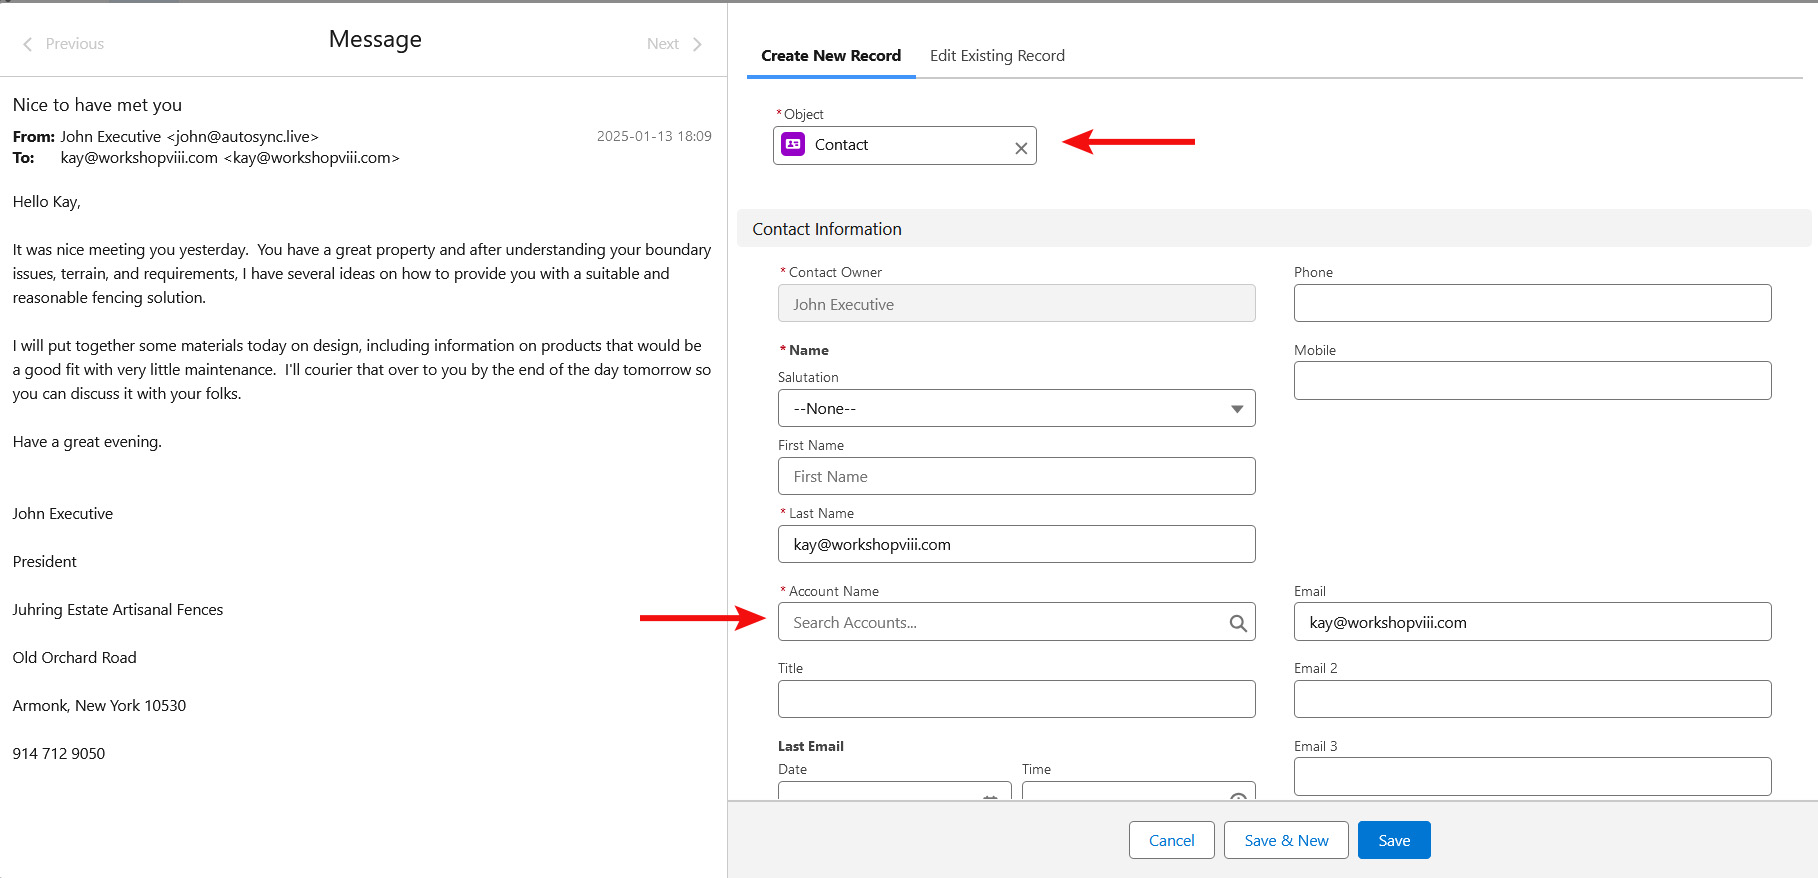
To add someone as a Lead, click the + Lead button next to the listing. For this example, we will create Kay as a new Lead. After clicking the +Lead button next to their listing, we will see a pop up window. The source email message will display on the left. On the right will be the Create New Record tab. Several fields will automatically populate including the Object type, First Name and/or Last Name, Company, and Email address.
When there is a display name in the email message, our app will normally fill in the First Name and Last Name. When this isn’t the case, as in the screenshot below, the email address will fill into the Last Name by default. You can overwrite this by typing in the correct info or using the email message on the left to copy/paste or select/drag/drop the information in. The Company Name will become the email domain from the email address which, again, you can overwrite. Don’t forget to Save.
2. Creating a new Contact and a new Account
To add a new Contact with a new Account, in the Email Sync Assistant, click the +Contact button. Let’s instead create Kay as a new Contact.
After clicking the +Contact button, in the pop-window we see a similar screen as Lead with a few differences. The Object will show the correct type of object – Contact. The same fields will auto-populate as we saw with a Lead.
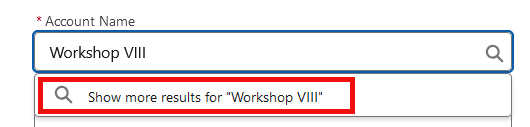
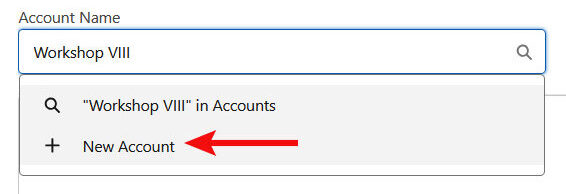
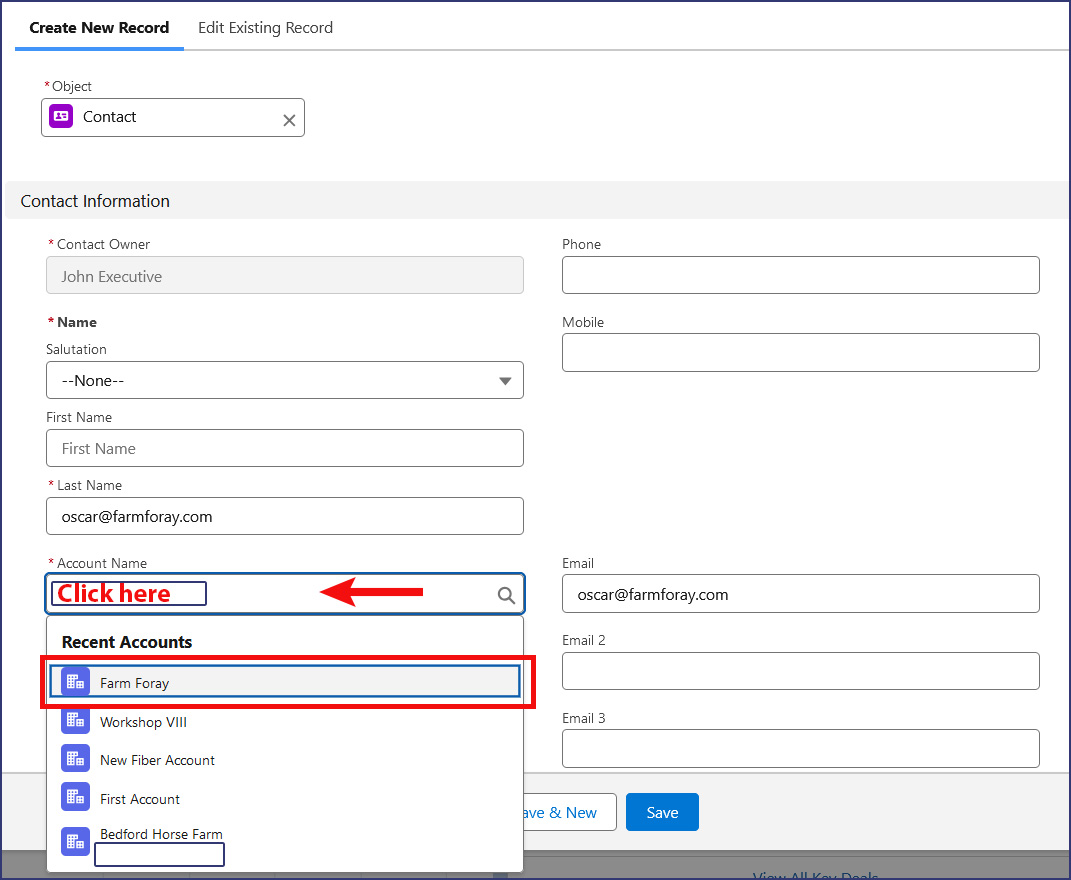
Contacts typically belong to an Account. To also add a new Account, click into the Account Name field. Initially, you will only be presented with existing options. Go ahead and type the Account name in and click “Show more results for …” prompt. In the next pop-up window, click on the Account name as displayed and choose +New Account in drop menu.
In the New Account form, you will need to type in the name of the Account as you would like it to appear. You will notice there is a red asterisk (*) by this field meaning it is required. If you have other required fields for Accounts, you will see this indicated and would need to fill those in. Then click Save.
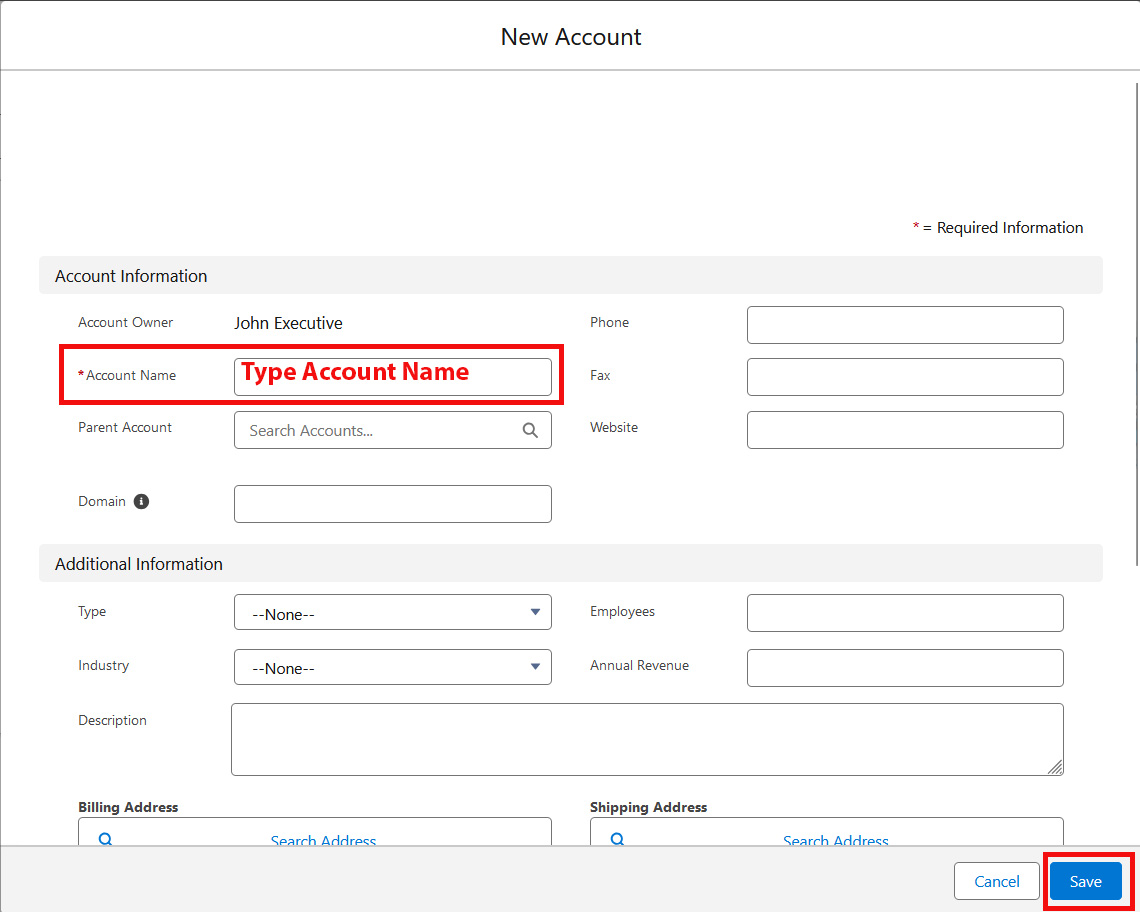
This will take you all the way back to the New Contact form where the Account will now be filled in. You can then complete any other field that is required or needed. Once ready, click Save.
You will return to the Home Page and the listing for this individual will no longer be in the Email Sync Assistant. Now that they exist as a Contact with an email address, Match My Email will be able to match any future email to or from this individual. Additionally, on the next processing cycle (every 20 minutes), Match My Email will automatically reprocess any email in the Match My Email Activity Dashboard that has No Match status. This will sync any other emails to or from this person to their new record.
3. Creating new Contacts for an Existing Account
In our sample Email Sync Assistant, we have two individuals that are with the same company. That company already exists in Salesforce. Pick one and click the +Contact button.
Similar to Step 2, you can verify the autofill fields. In some cases, Match My Email may be able to suggest what Account you need based on the email domain. If not, click into the Account field and select the Account.
A trick here when there is another Contact to add is to click the Save & New button. This will save the first Contact and present a blank new Contact form to be filled in.

On the left, you can see the second person in the email. Using a combination of typing, copy/paste, and drag/drop, fill in the vital fields and click Save.
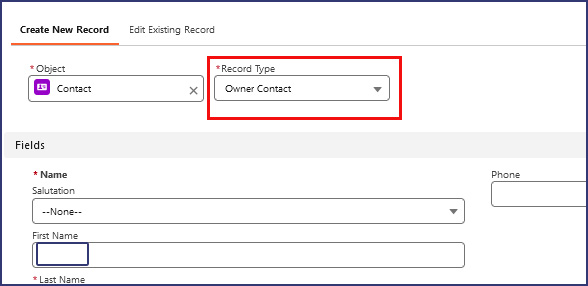
4. Creating Records with Record Types
If you are using Record Types for objects, you will see those options available via the Email Sync Assistant. For example, when creating a Contact, the Record Type field will be clearly visible. For a new Account, once you choose the +New Account option, you will be asked to select an Account Record Type.

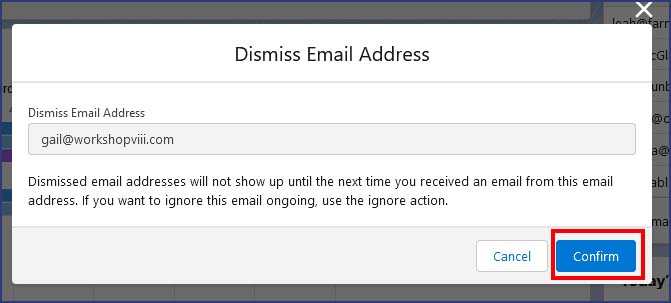
5. Using the Dismiss Option
For a listing in which you want to defer a decision, you can use the Dismiss option. Click the caret button and click on the Dismiss option. In the pop-up window, we will display the email address on which you are deferring action. As is stated in the help text, this individual will not show up again in the Email Sync Assistant until you receive another email from this person.
![]()
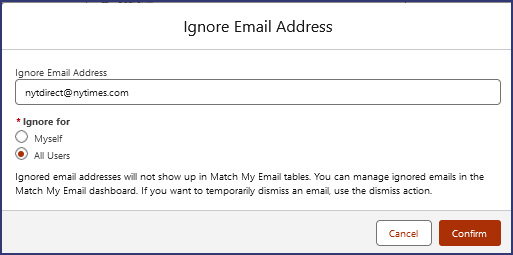
6. Creating an Ignore Rule
If the individual is someone you will never want to match into Salesforce, you can create an ignore rule. As above, you would click the caret and choose Ignore.
![]()
In the pop-up window, we will display the email address for which you are creating an ignore rule. Ignore rules tell our system to ignore matching to a particular record. The ignore type will be “skip address” in any direction. Administrative Users will have the choice of making this a personal rule or one to apply to All Users.
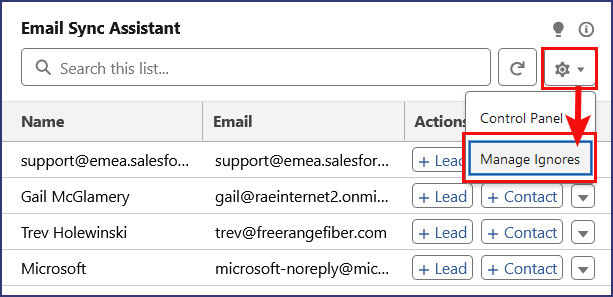
To view or modify ignore rules, such as changing the Ignore Type or the scope of the ignore to include all Users (Admins only), you can click the Email Sync Assistant Setting button and choose Manage Ignores. You may need to follow prompts to login via your Salesforce Credential to arrive at your Control Panel. Then click on Ignores.
7. Customizing aspects of the Email Sync Assistant
When viewing records in the Email Sync Assistant, the default number of rows is 6. This can be changed by editing the Home Page. From your Home Page, click the Salesforce Settings icon and choose Edit Page. Click on the Email Sync Assistant component to view details about this component in the right sidebar. Here you can change the number of records showing or remove the +Lead or +Contact button if your organization doesn’t need it.
If you do not use Leads, you can remove the +Lead button. Again, from Home Page click Salesforce Settings > Edit Page. Clicking on the Email Sync Assistant shows details in the right sidebar. Uncheck the Show Add Lead Button and Save.