Leveraging Email Data with Custom Report Types
helpH2
Those that choose to upload matched messages to the Match My Email custom object can benefit from enhancements for reporting in Salesforce.
Reports in Salesforce are pre-designed based on default report types. These often just involve standard objects such as Contacts and Accounts as is. Since Match My Email is a third party application, the custom object is not already added to report types. However, custom report types can be created so that when email messages are matched to Contacts, as an example, the Email Message object can be a secondary object. Consequently, reports created based on such a report type will allow fields from both objects to be brought in. This means a report could show the email From and To fields, email subject, name of attachments, etc.
You can extend the value of Match My Email data with the use of our Summary fields. Examples of these fields that would be placed on the standard objects of Contacts, Leads, Accounts, Opportunities and Cases contain data such as Last Email Sent Date, Last Email Sent From, Total Emails Received, etc.) When placed on these objects they are then available on existing and new Salesforce reports and do not require custom report type creation. These fields are updated each time a processing cycle is completed. Our summary fields can be used to simply display data, filter List Views and Reports, and be brought into formulas. For more information or to request our Report Guide for field installation, please contact our support team.
As a brief example, to create a report that would show Contacts and Email communication, one would do the following:
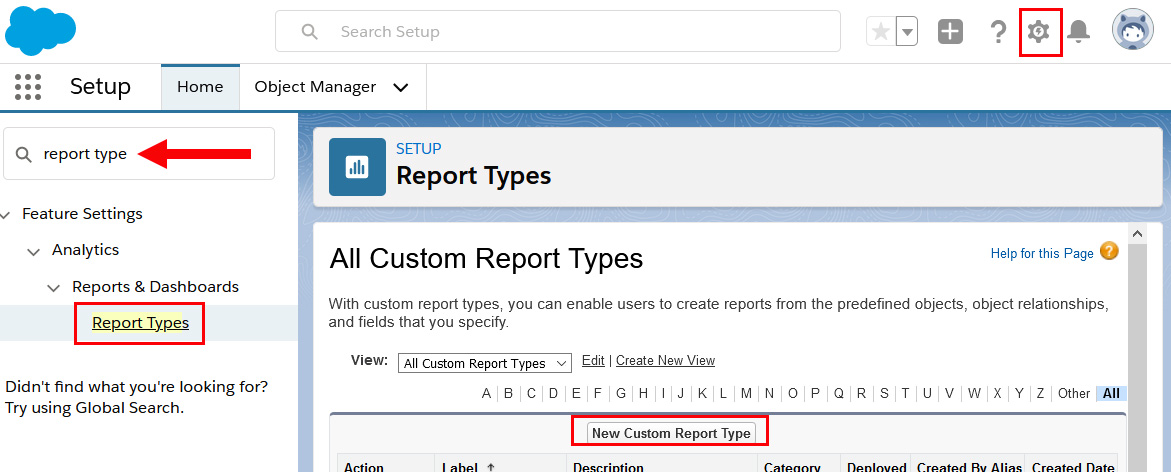
1.1 Go to Salesforce Setup, and in the Quick Find enter report type. Look for and click on Report Types presented in list. Click the button for New Custom Report Type.
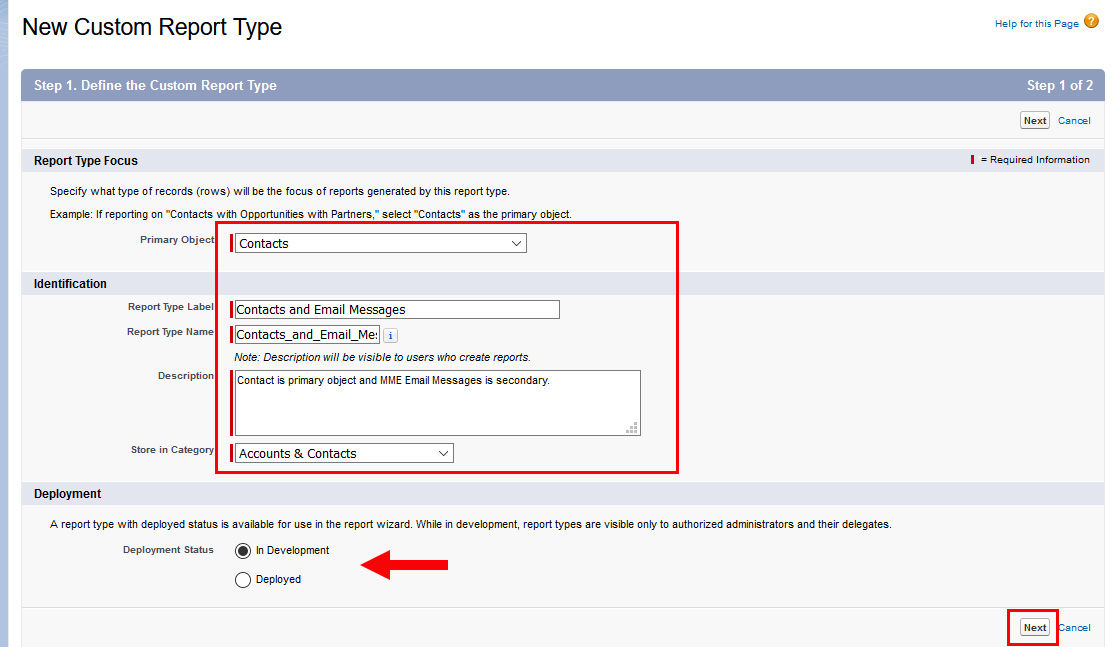
1.2 Choose a Primary Object. In our example, we are focusing on Contacts. Enter a Report Type Label, a description, choose where you want to store this report type, and whether it will be in development or deployed and available once complete. (We often make the label descriptive since it will be what you see when choosing the type from a list.) Click Next.
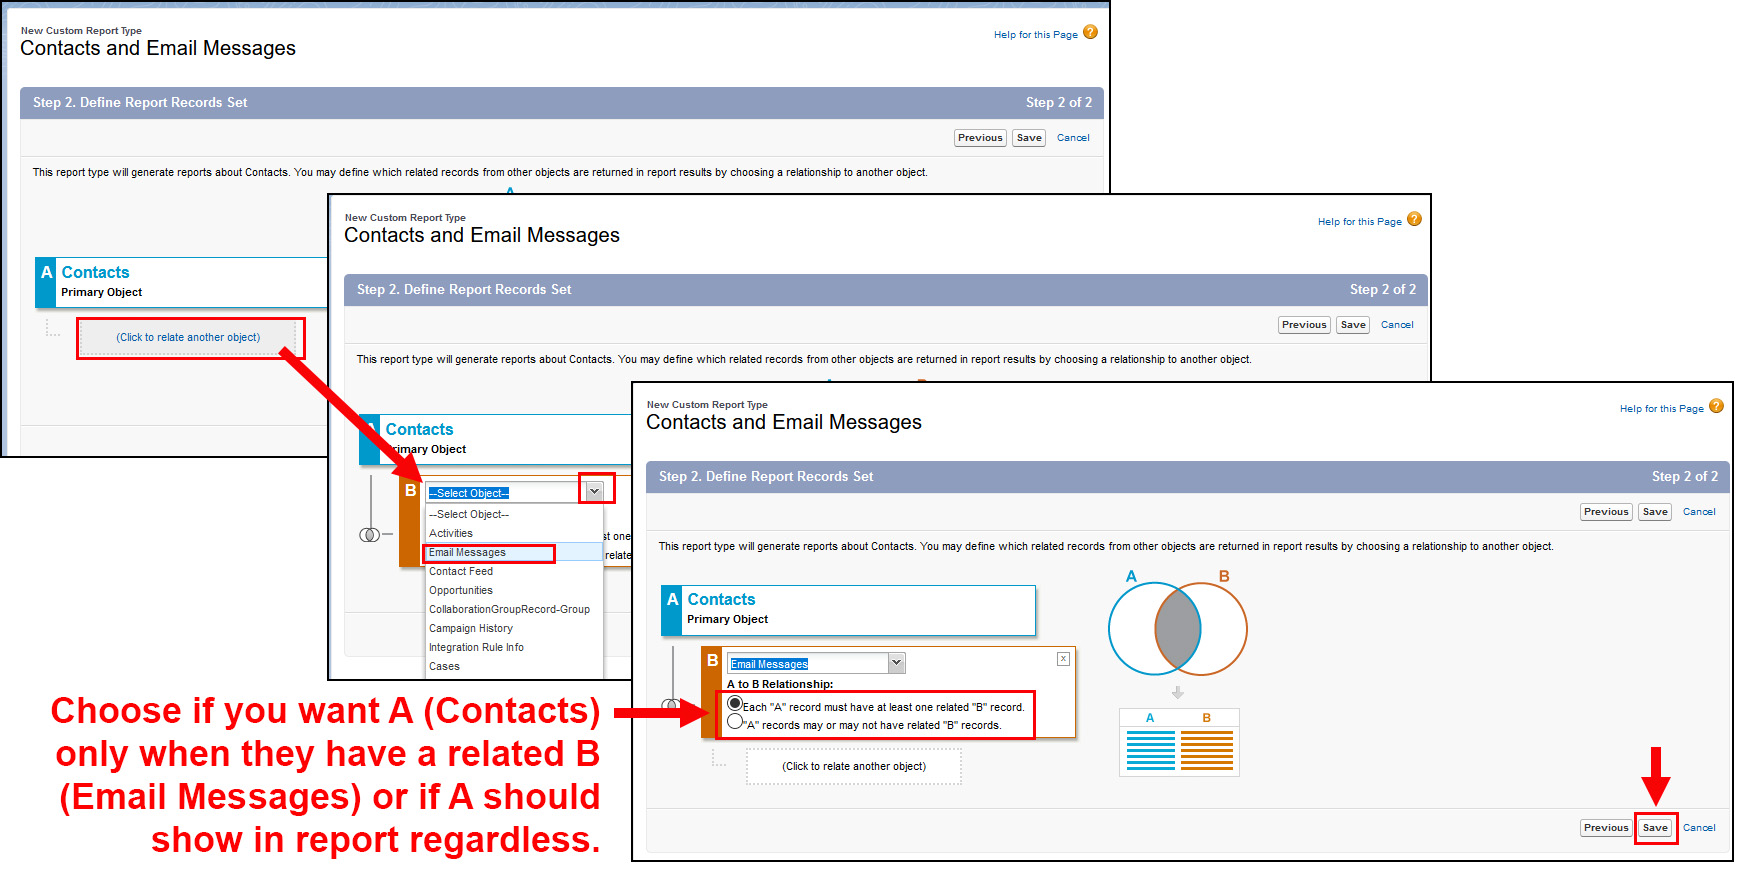
1.3 The following screenshots provide guidance on how to make choices for your new report type. Click to relate a second object, using the drop down to choose Email Messages. You can see that Contacts is your A object and Email Messages becomes the B object. You then need to choose if your report should show Contacts only when they have matched Email Messages, or if the report should show Contacts whether or not they have matched emails. This depends on what you are trying to achieve in your report. Click SAVE.
1.4 With the report type saved, go to your main Salesforce menu (App Launcher > Sales for example), click Reports, and then New Report.

1.5 Click the name of the folder where you stored the new Report Type. Then scroll in list to find it. This is where the Name you give it, if descriptive, can help you find it since the full description is not visible. Click Continue.
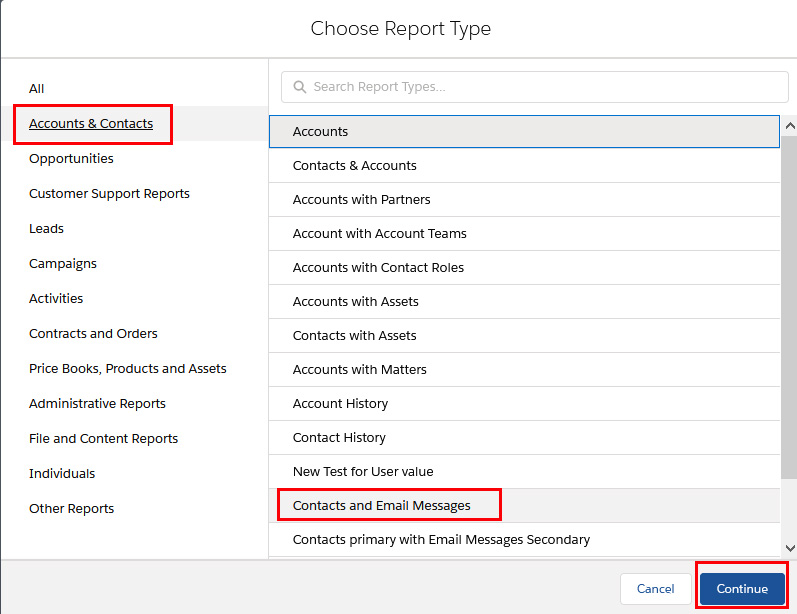
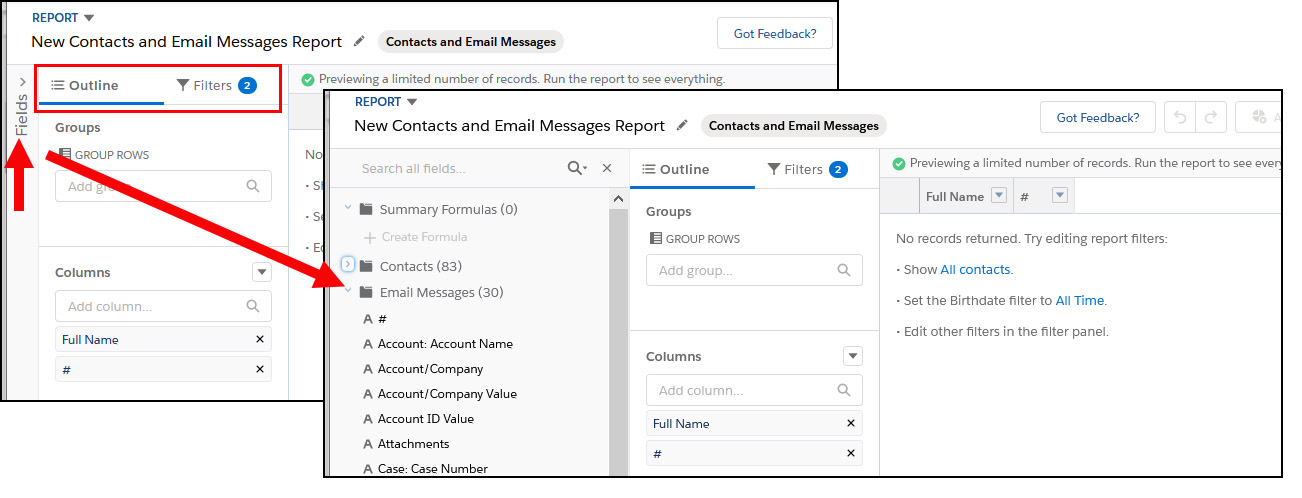
1.6 You can now design the report. On the left, click Fields to expand. Scroll down below Contact fields, or click the arrow to compress Contacts, to view that the Email Message object fields are in the list. These can be brought over into columns, used in grouping, and used in filters.