[vc_row][vc_column width=”2/3″][vc_column_text]Users that send emails from Salesforce, using the standard Send Email button or the buttons provided by Match My Email, may have noted that the message, when received, contain a “via” caption. The wording may also include noreply@salesforce.com. In a larger sense, many bulk and non-personal emails can be sent this way, such as from spammers and unsolicited entities. Thus, Inbox spam filters often look for the ‘via’ caption and catch these emails before they get through, which is not ideal when Salesforce Users are sending their communication.
To solve this issue, there is a feature in Salesforce called Email Relay Activation. The following steps explain how those that use Microsoft 365 can set this up to relay emails through their Microsoft 365 domain. In this way, the emails will then be received without ‘noreply’ language and will appear to come as if they were sent from an email client.
A System Administrator for the Salesforce organization and for Microsoft 365 can follow these steps that are required with the administrative section of Microsoft 365 and also in Salesforce.
Steps in Office 365
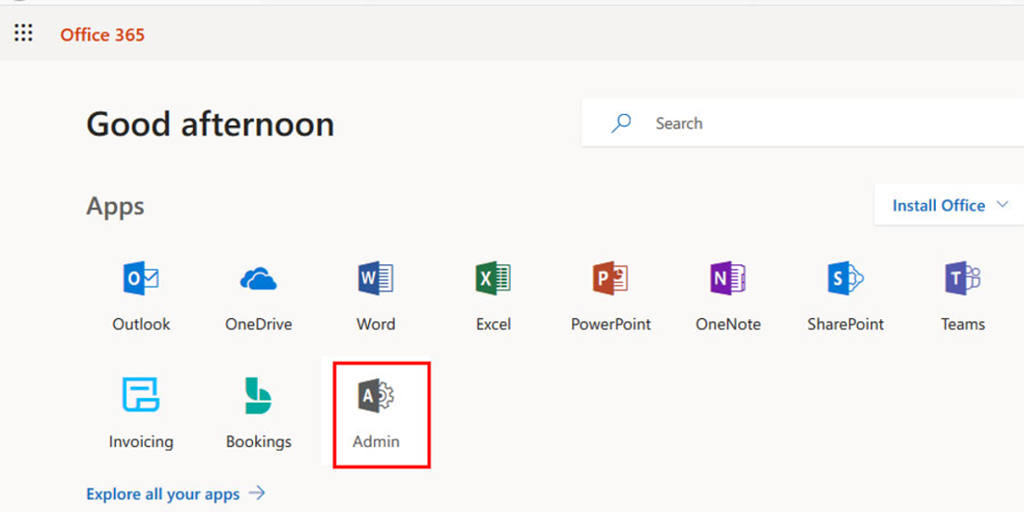
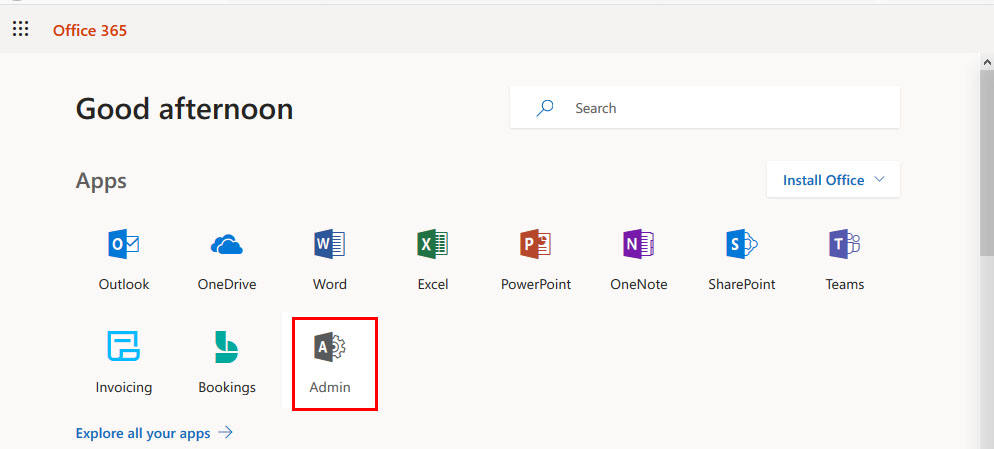
Sign in to Microsoft 365. (If you don’t normally do this, you would open a new browser tab and go to https://www.office.com. Enter your email address and then email password.)
Navigate to your Admin Center.
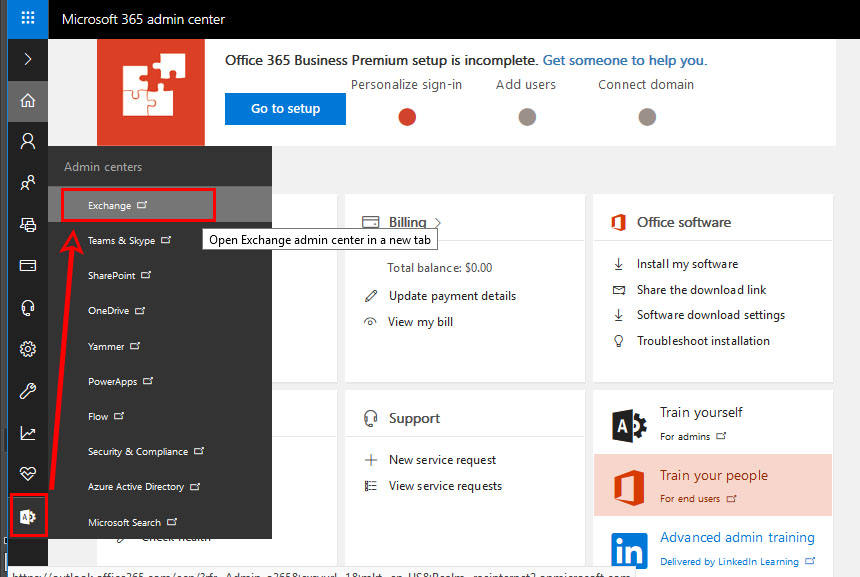
Scroll to bottom of icons on the left, click the Admin icon and choose the Exchange option.
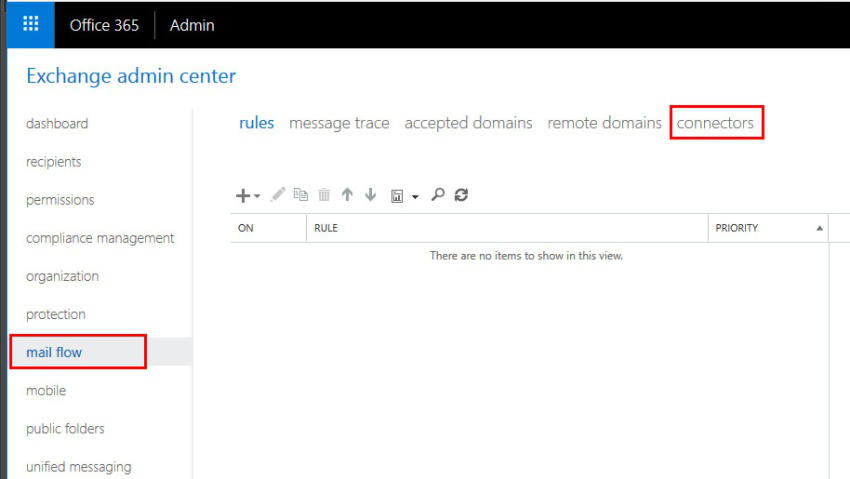
In the Exchange Admin Center, in the list on the left click the option for Mail Flow and at top click Connectors. Click the + to add an Inbound Connector.
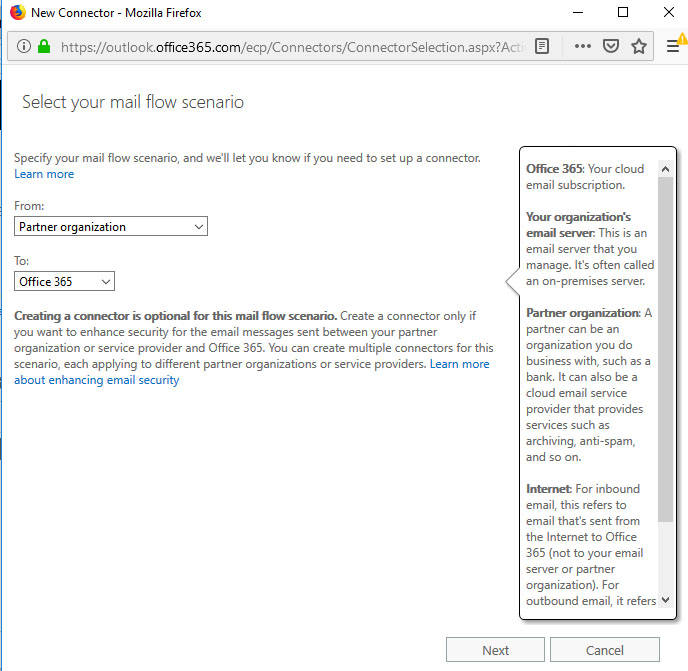
For the mail flow scenario, for From choose Partner Organization and for To choose Microsoft 365. Click NEXT.
You can give this Connector a Name and Description. You can choose to have it enabled as soon as created, or uncheck Turn it on and it will not be immediately active. You can enable later. Click NEXT.

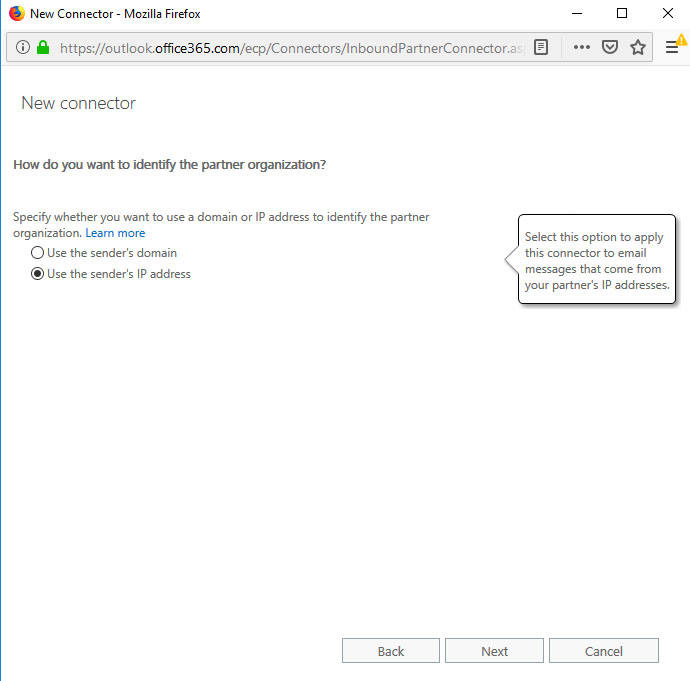
Choose the option for sender’s IP address. Click NEXT.
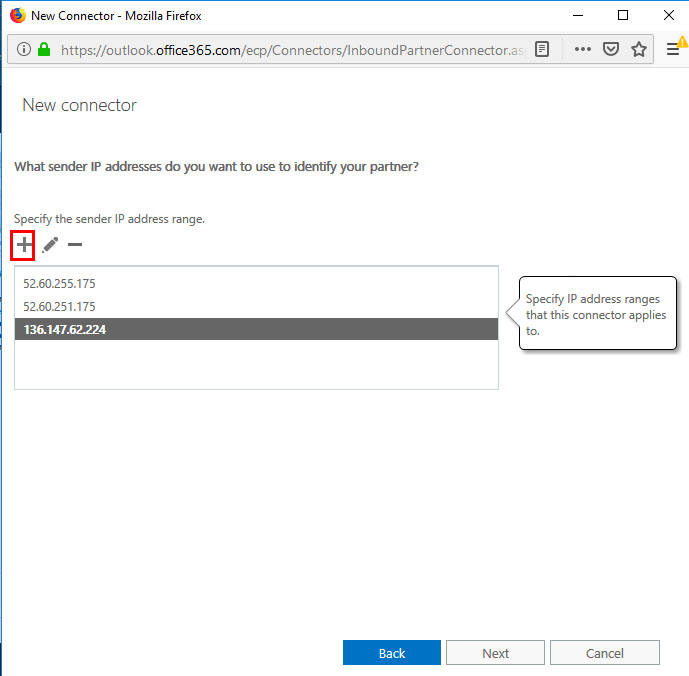
On the New connector screen, click the + sign to add the required Salesforce IP addresses.
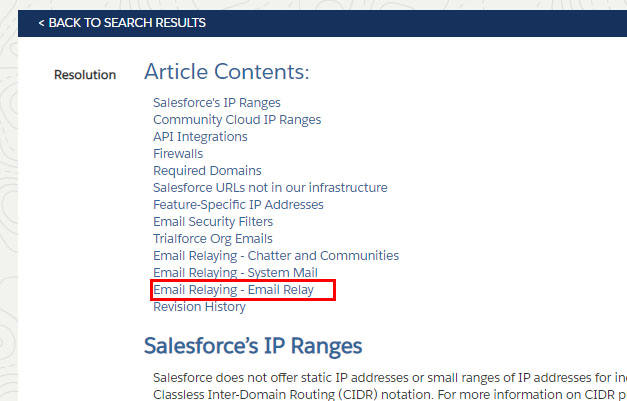
These need to be added individually, one by one. They can be found by going to https://help.salesforce.com/articleView?id=000003652&type=1. (This page can also be found in the Salesforce Knowledge Articles by searching for “What are the Salesforce IP Addresses & Domains to whitelist?”)
In Article Contents, click on Email Relaying – Email Relay.
The list will appear as below indicating the address to be used for email relay. Copy each one in entire list and add to Connector.
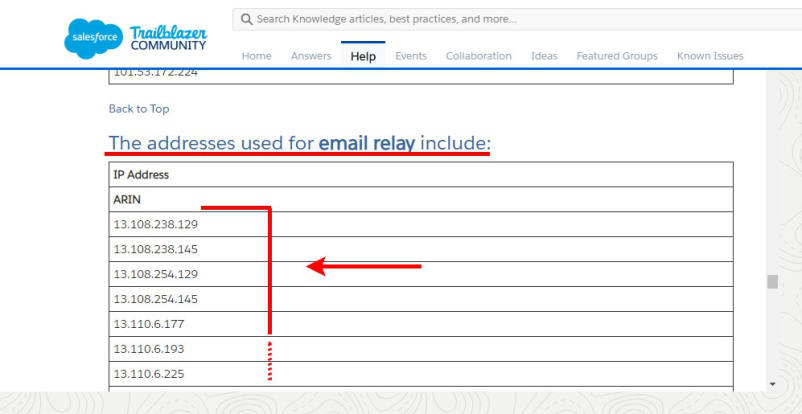
Continue to add these, one by one. When finished, click NEXT.
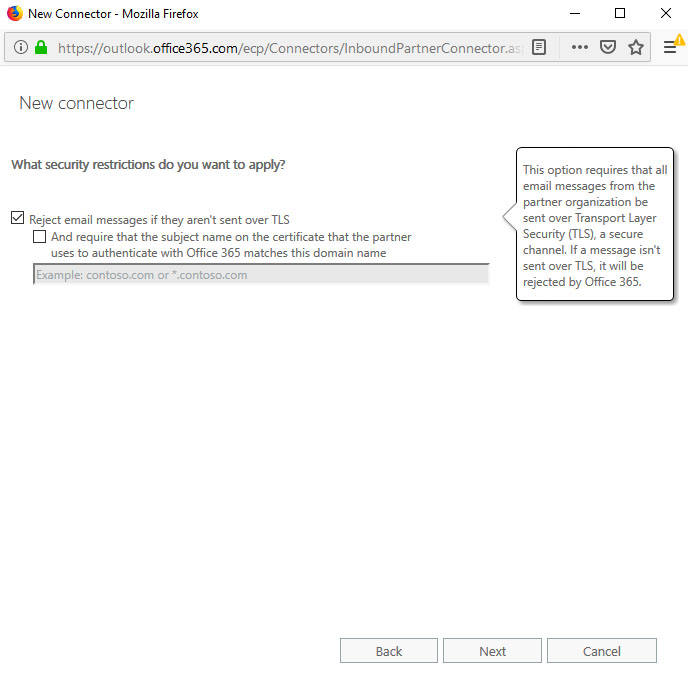
Leave the box checked so that TLS is used for security. Click NEXT.
Review the final settings for this Connector and then click SAVE.
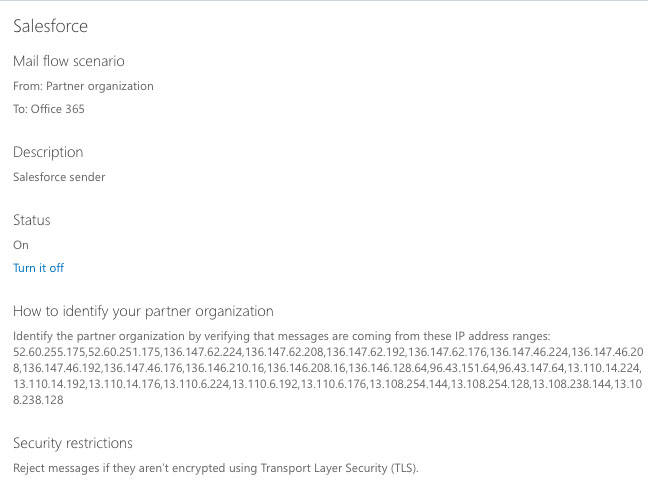
After Saving, you will return to the Exchange Admin Center and can see the new connector is listed.
Set up in Salesforce
Sign in to Salesforce and go to Setup.
In Quick Find at top of left sidebar, type in Email Relay and click on Email Relays option as it appears. (If you have not activated this, click Try It Now and proceed.) Once activated, click button for Create New Relay.

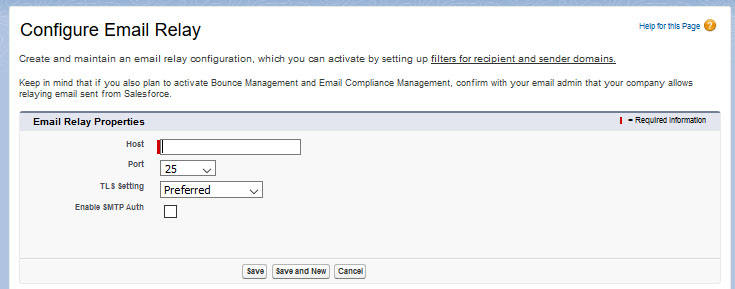
To Configure a new relay, enter as follows:
- Email Host should be the MX record of domain. This is usually in the format domain.mail.protection.outlook.com. So for a company with email domain acme.com, one would enter acme.mail.protection.outlook.com.
- Port should be 25
- TLS Setting should be Preferred. Click SAVE.
In Setup Quick Find type in Deliverability. Click on the option under Email > Deliverability.
- You may need to deactivate bounce management by unchecking the box.
- Under Email Security Compliance, uncheck the box next to “Enable compliance with standard email security mechanisms.” Office 365 servers will manage compliance.
Click SAVE at top to save changes.
Test Configuration
To test your configuration, in Quick Find at left click on Email > Test Deliverability.
Enter your email address and send a test message.
Open the test email in Outlook. You should not see the “via” next to the email address. Also, please note that emails you send via Salesforce will now be in your “Sent” folder in Outlook.
About Match My Email
If you would like to make your Salesforce deployment even better, take a look at how automated email integration can increase productivity and user satisfaction. Match My Email, the leading automated syncing app for Salesforce, fixes the flaws in other email syncing tools and fills in their functionality gaps.
Match My Email syncs to multiple email addresses for the same Contact and/or Lead [MULTIMATCH], eliminates duplicates emails in Salesforce [DEDUPE], is fully customizable so it can sync to custom records [CUSTOM MATCH], can sync by unique attributes like names, words or numbers in Opportunities [PRECISION MATCH] and creates email meta-data that can be used to track email activity by customer or user [TRACKING]. For a Live Demo of the app, use this scheduling tool.[/vc_column_text][/vc_column][vc_column width=”1/3″][vc_widget_sidebar sidebar_id=”sf-widget-area”][/vc_column][/vc_row]


